Local Rank Tracker
Adding & Setting Up Local Rank Tracker
1. Adding Local Rank Tracker to Your Account
To get started using the DAXRM Local Rank Tracker, you must first activate it within an Account. First click the Accounts icon in the sidebar. Select the appropriate Account from the list and click the Local Rank Tracker tab at the top.
Click on the + icon beneath Add Local Rank Tracking.
Search for the Google Business Profile (GBP) by adding a business name and clicking search. The GBP link will appear. Click on your Google Business Profile. This will take you to the Local Ranker Tracker dashboard.
2. Choosing Your Keywords
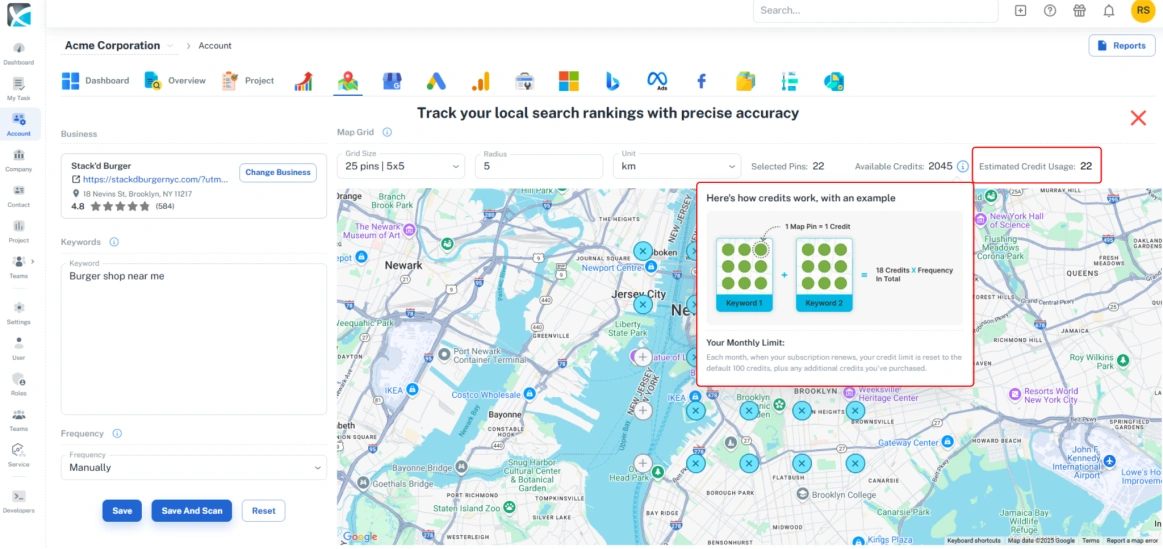
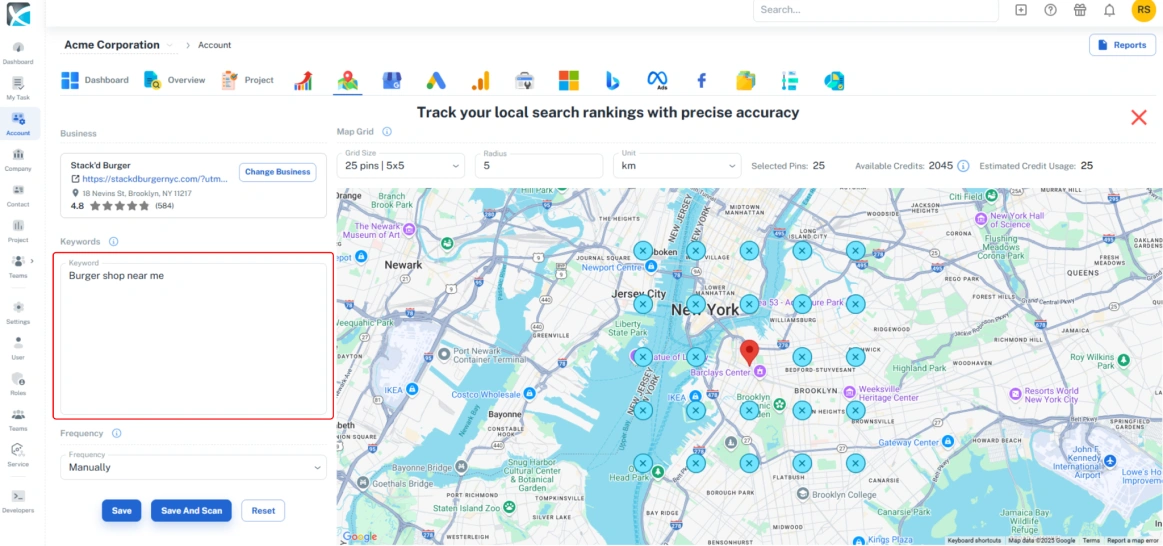
From the dashboard you can choose your keywords, set your local search grid, and the search frequency. Start by typing in your preferred keyword terms in the Keywords box.
 3. Select Grid Size & Search Radius
Next, set the grid size and search radius. This will determine the area that you will be searching within.
Select the number of grid pins from the drop down and adjust the radius. The pins will appear on the map indicating precisely where the local searches for each keyword will take place.

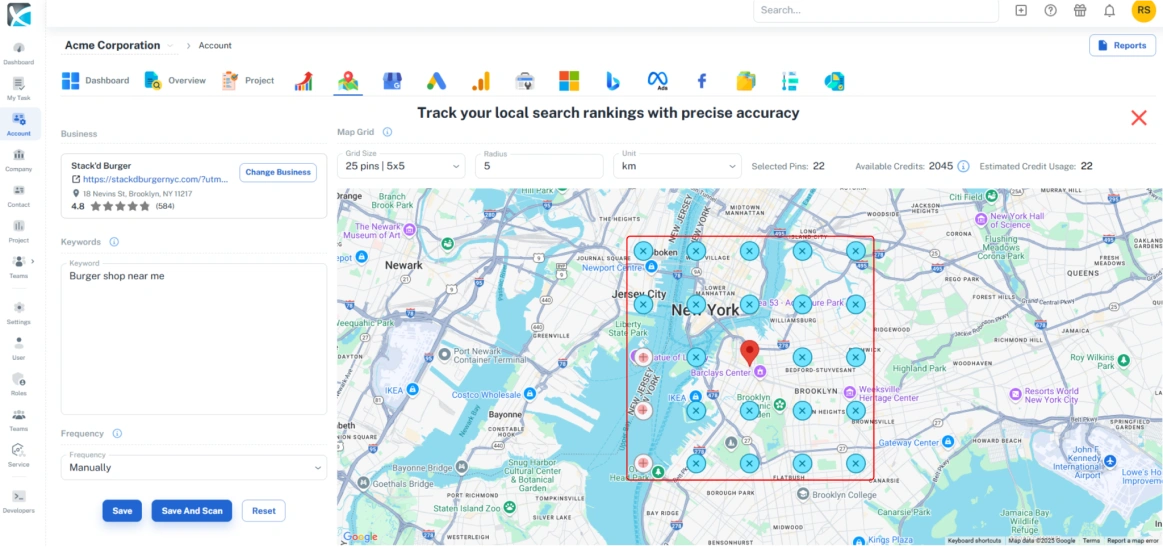
4. Customize Your Search Grid
Once you’ve selected the grid size and radius you can customize the grid to remove any pins in areas you don't want to search. To remove a pin, simply click on it.
5. Set Your Search Frequency & Scan
You can also set the frequency with which you want to carry out local searches. The frequency is set to “manual” by default. You can schedule automatic searches by selecting from the drop down. 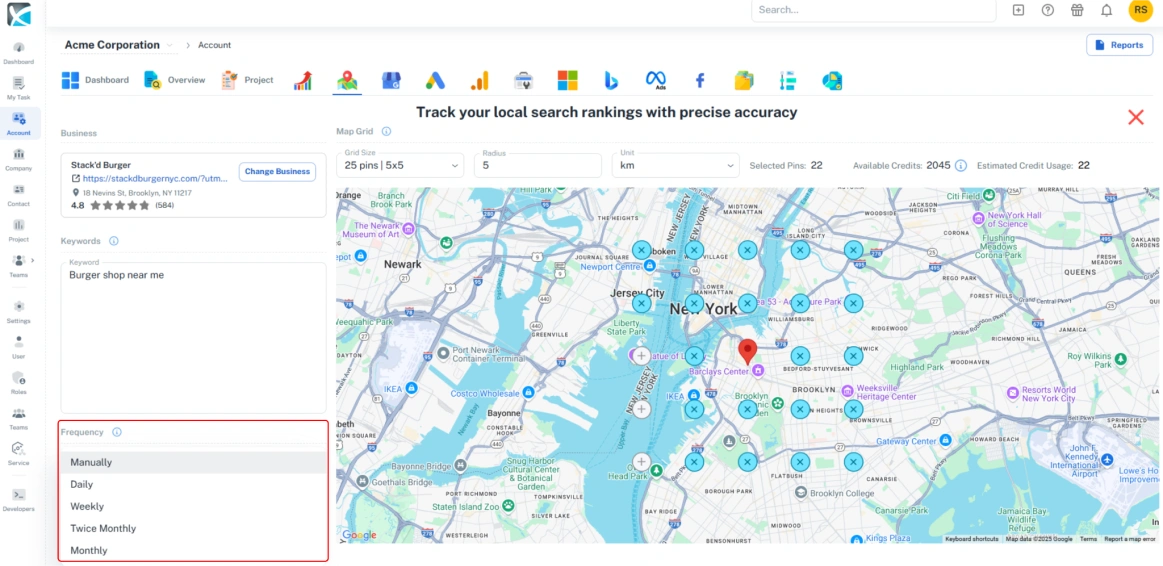
Once you’ve configured your local search parameters, you can save or save and scan to carry out the search.
Managing Frequency Settings
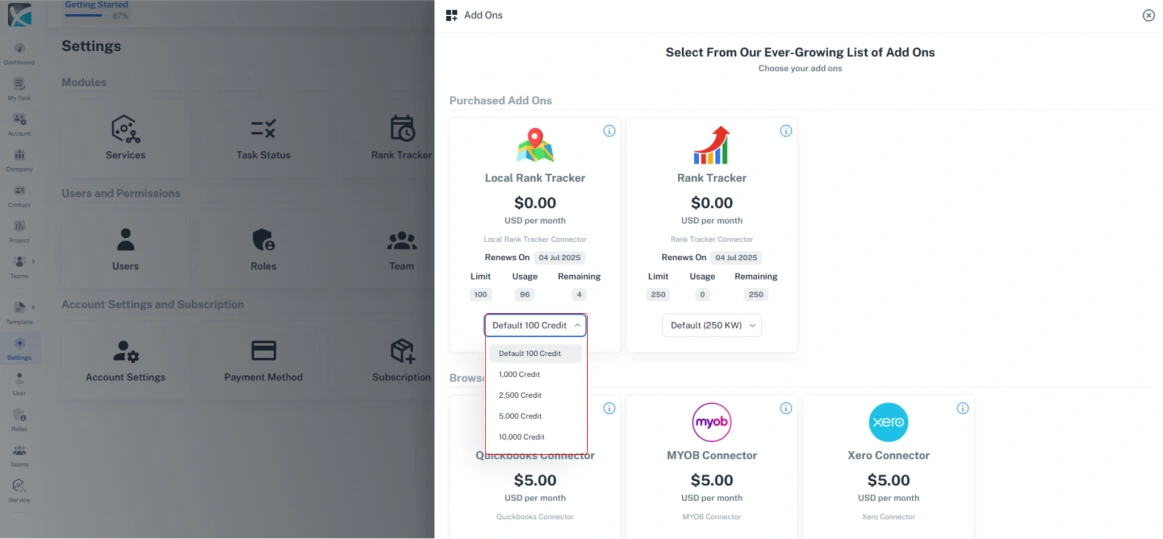
The frequency settings will determine exactly when your automated local searches will take place. To manage your search frequency settings go to Settings in the side bar and click on the Local Rank Tracker icon.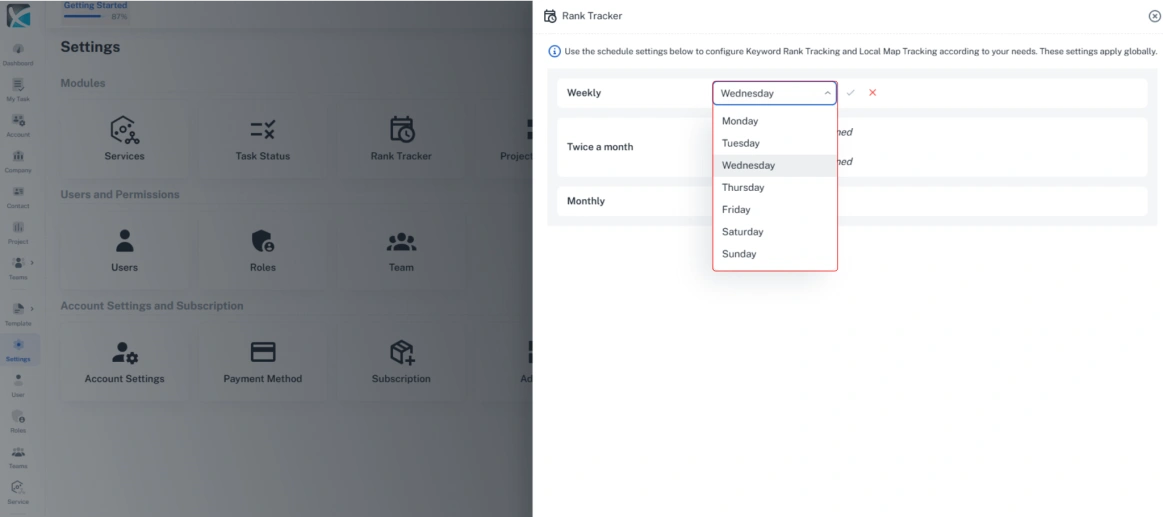
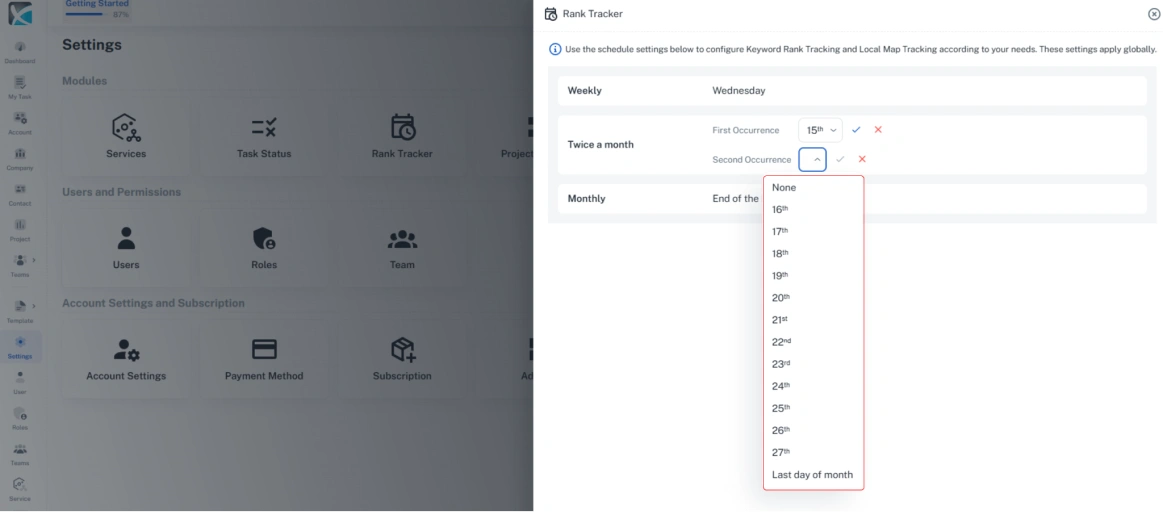 And for monthly searches, select the day of the day of the month from the drop-down.