Integrations
How to Add Rank Tracker to a DAXRM Account
1. To get started using the DAXRM Rank Tracker, you must first enable it to an Account. First click the Accounts icon in the sidebar. Select the appropriate Account from the list and click the Rank Tracker tab at the top.
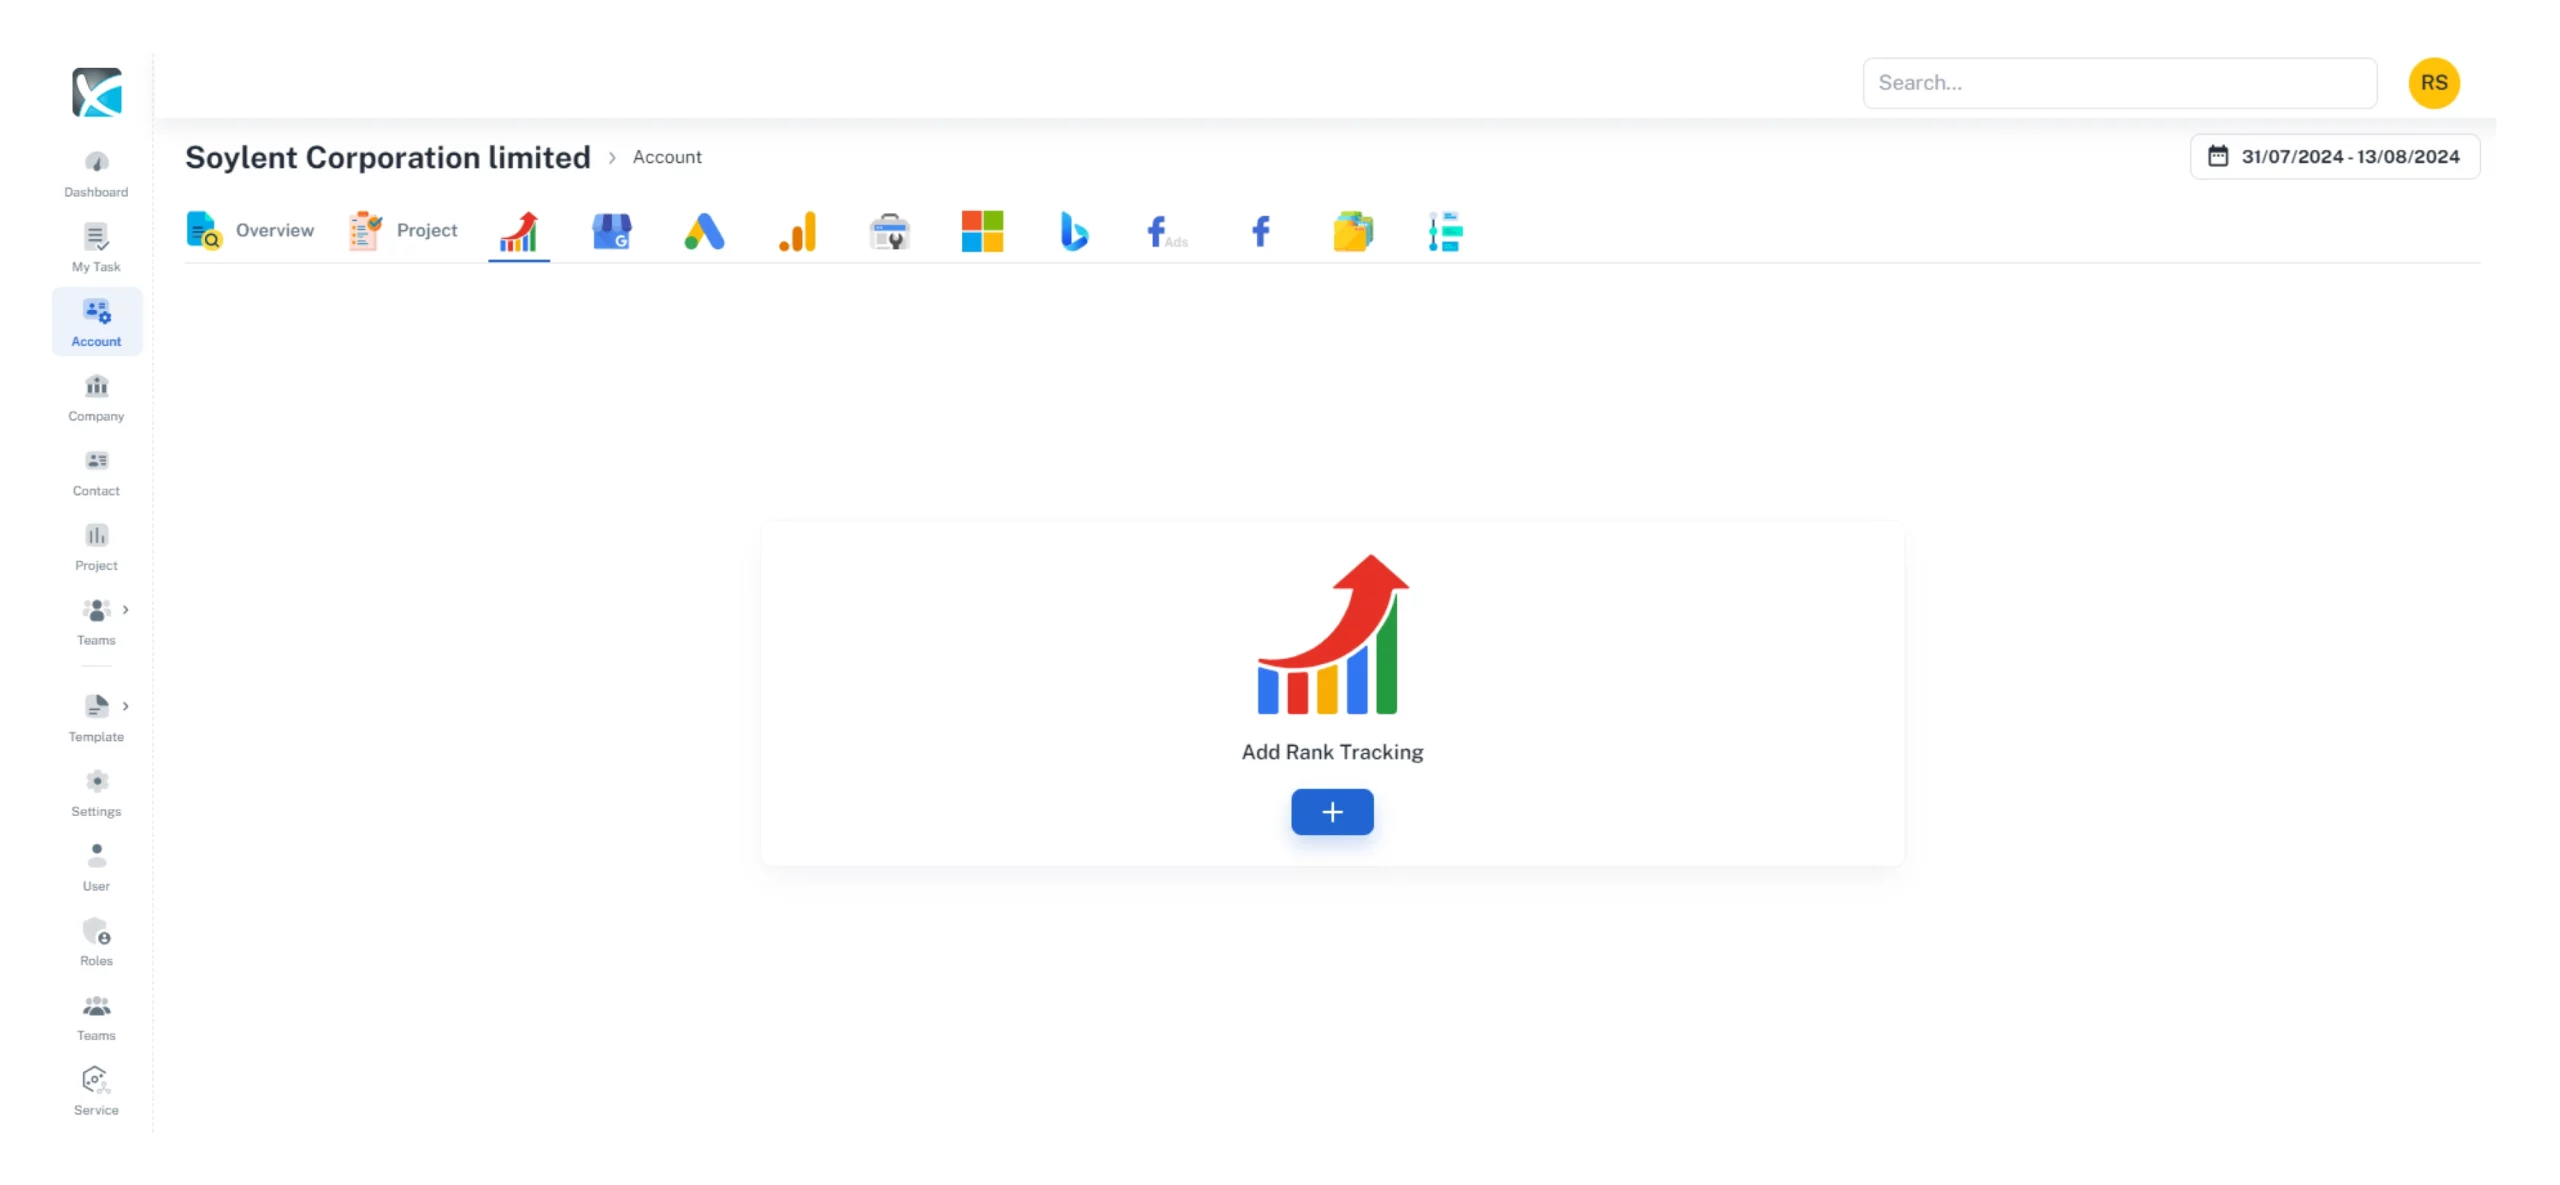
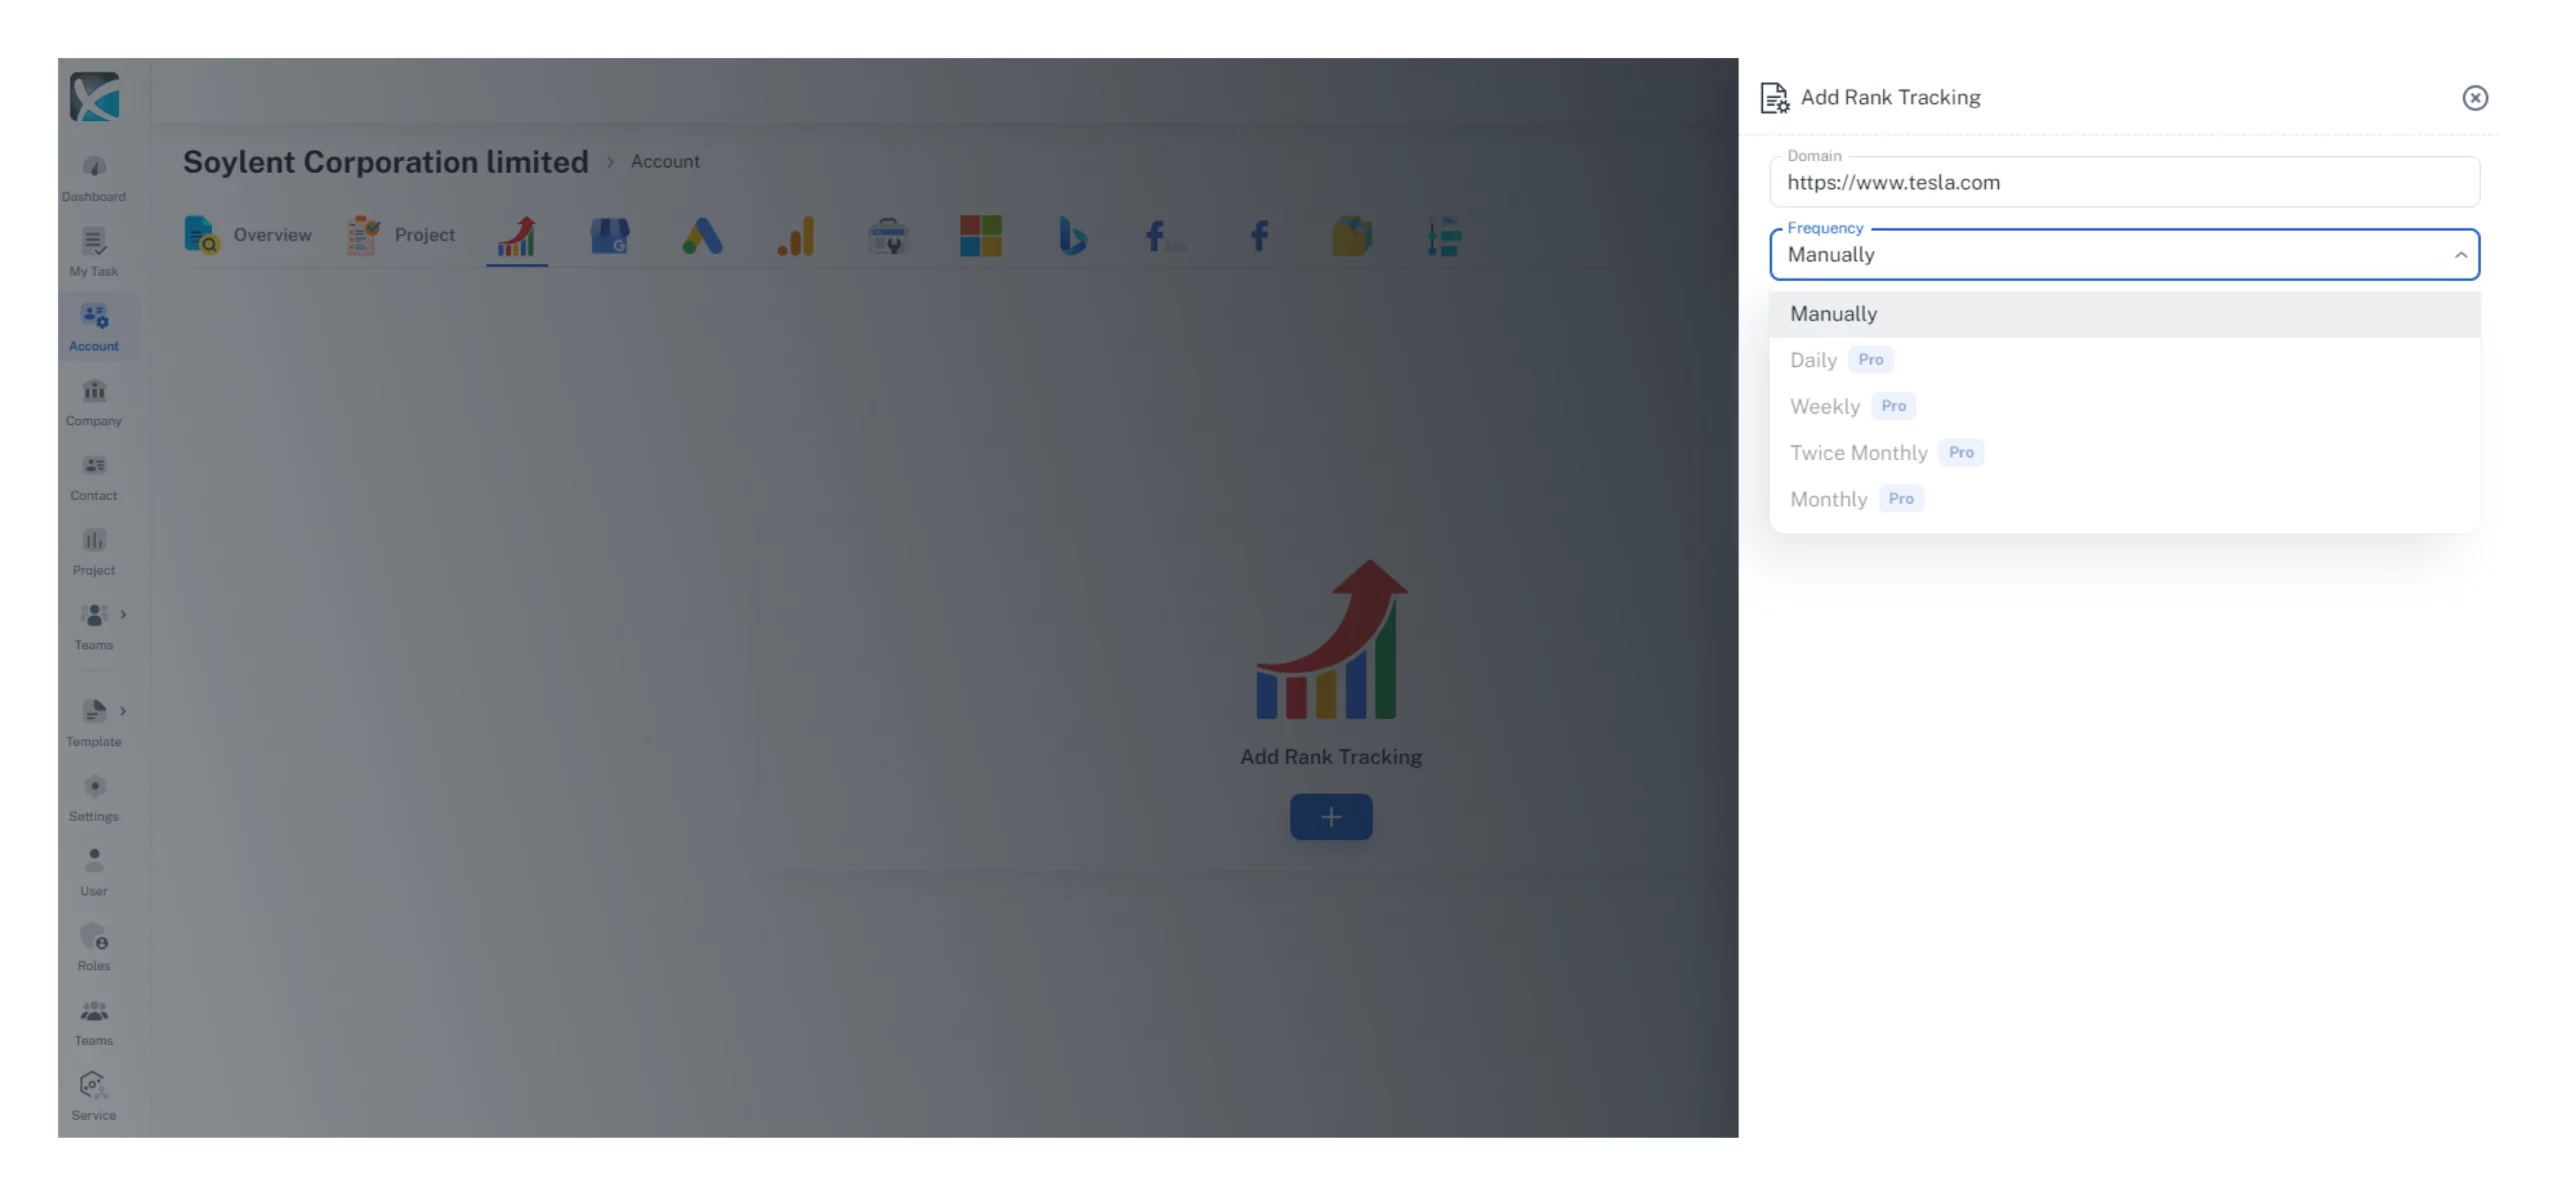
2. Click on the + icon beneath Add Rank Tracking. Fill in the domain you want to track and the frequency you want to perform Rank Tracking. You will need to buy add-on to perform (daily, weekly, twice monthly, monthly) to automatically check rankings.
How to Add Rank Tracking Keywords
1. Once you’ve enabled the Rank Tracker, you will need to start adding your keywords. Firstly, click the + icon on Rank Tracker Dashboard.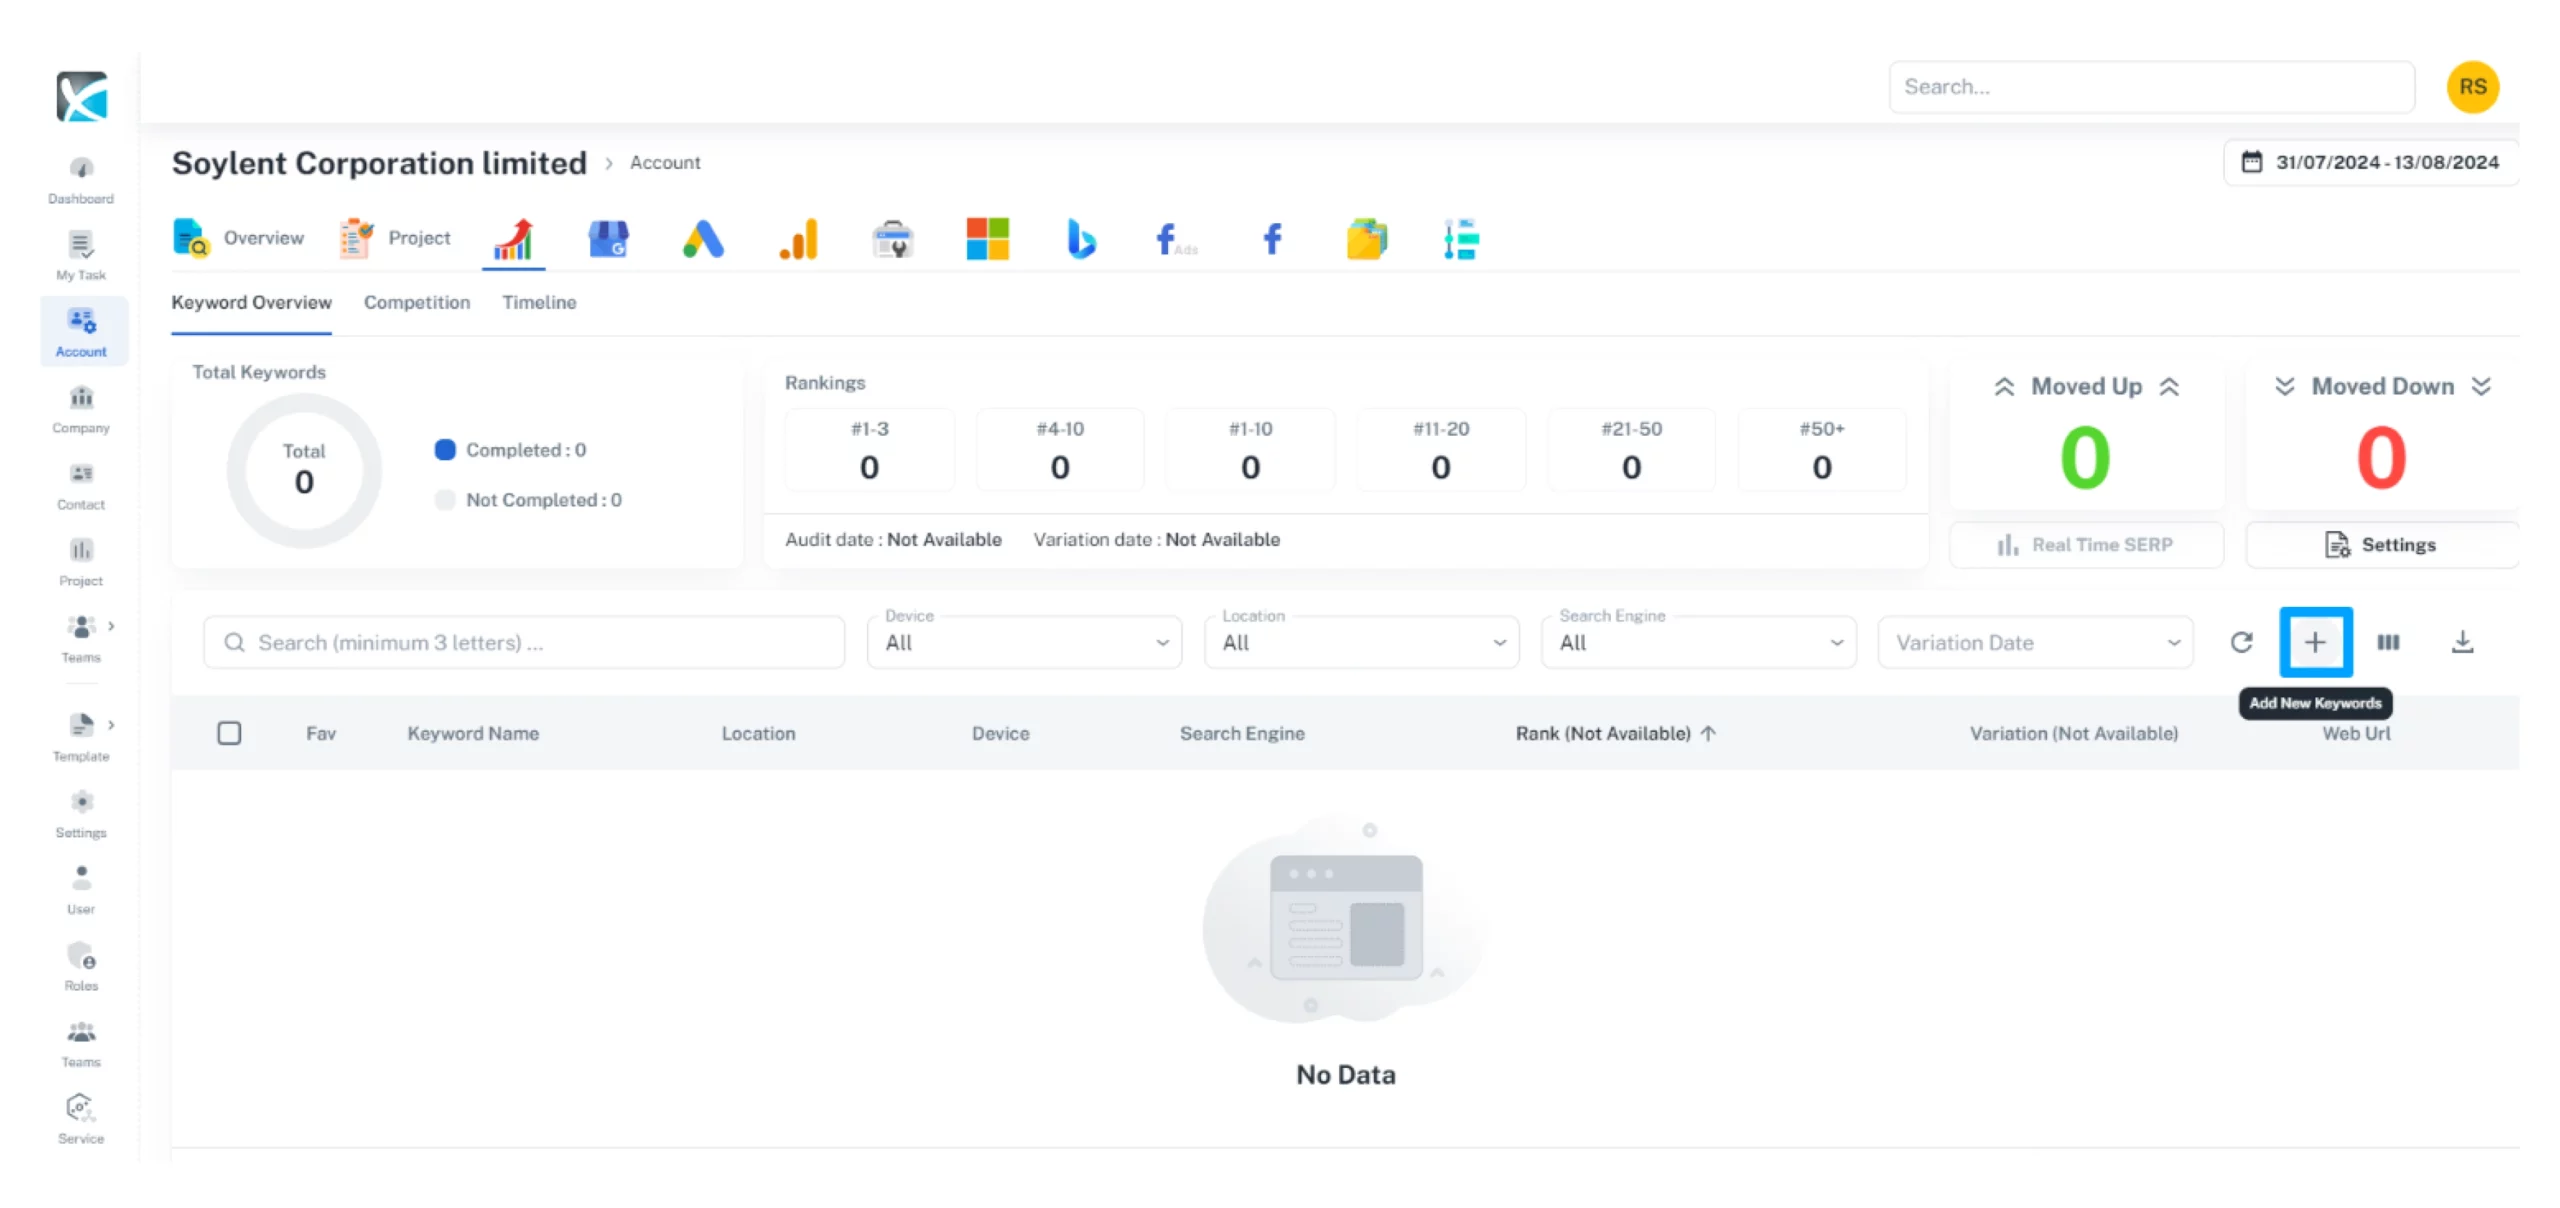
2. Provide the location name along with the domain name or a page URL, then click the search icon. This will provide you with a list of keyword suggestions. You can select from this list or input your own keywords.
Once you have selected your keywords, select the devices and the search engine, as well as the locations for which you want to check keyword rankings. 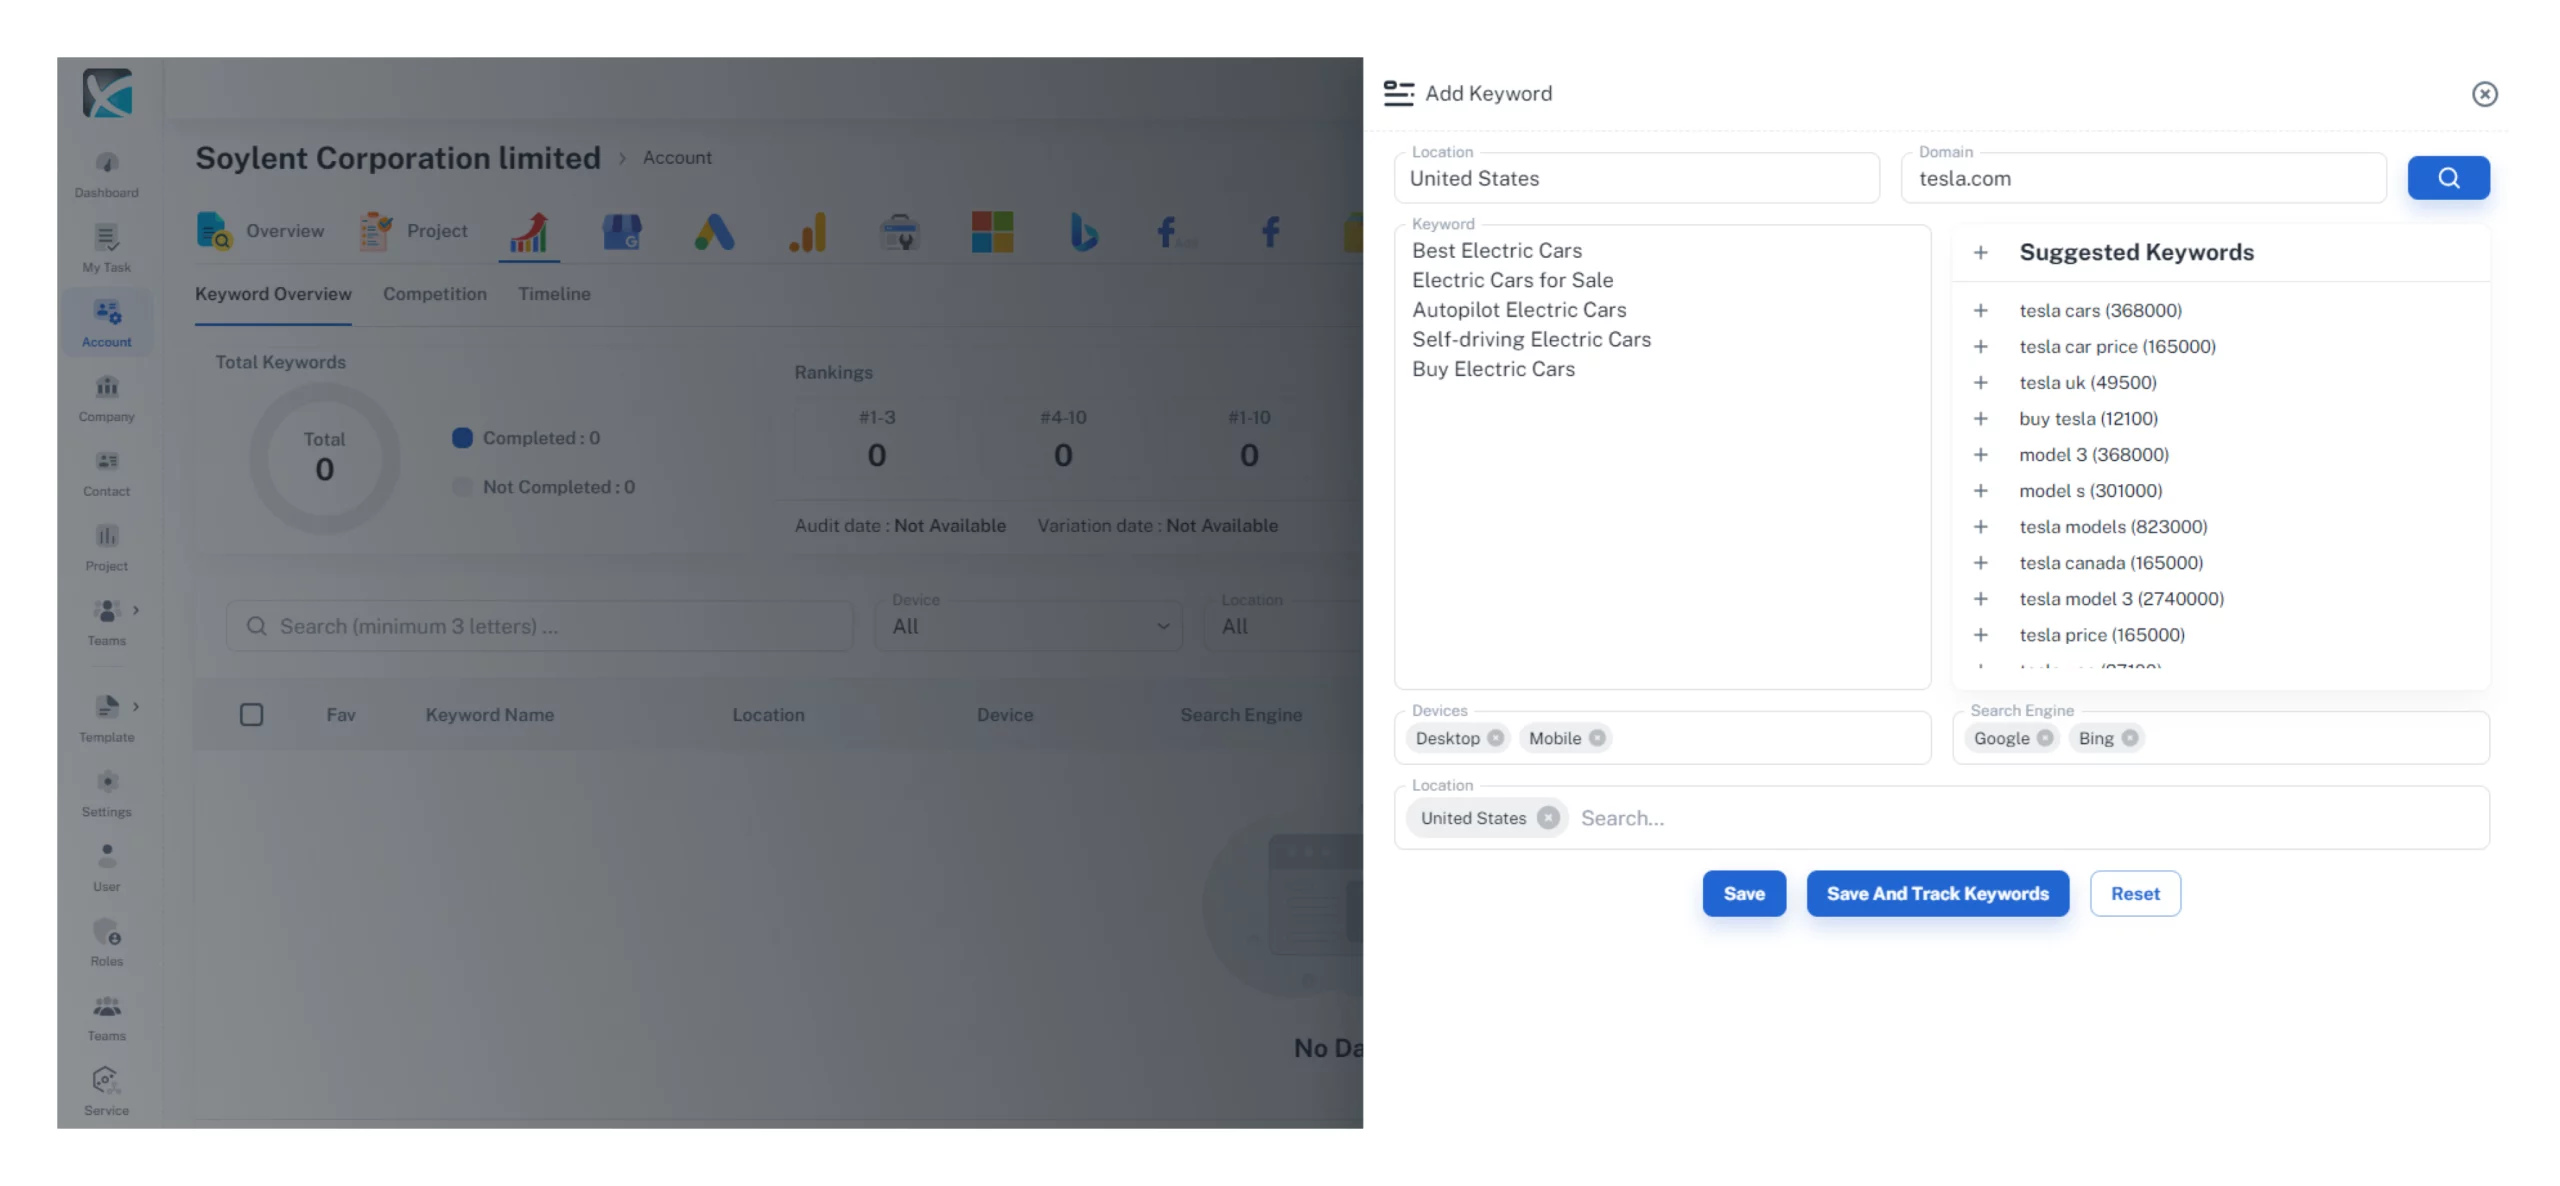
3. Click “Save” or “Save and Track Keywords” to perform a real-time ranking check for your selected keywords.
4. With your keywords inputted, simply click the Real Time SERP button and DAXRM will check the rankings for your keywords based on the parameters you have provided. 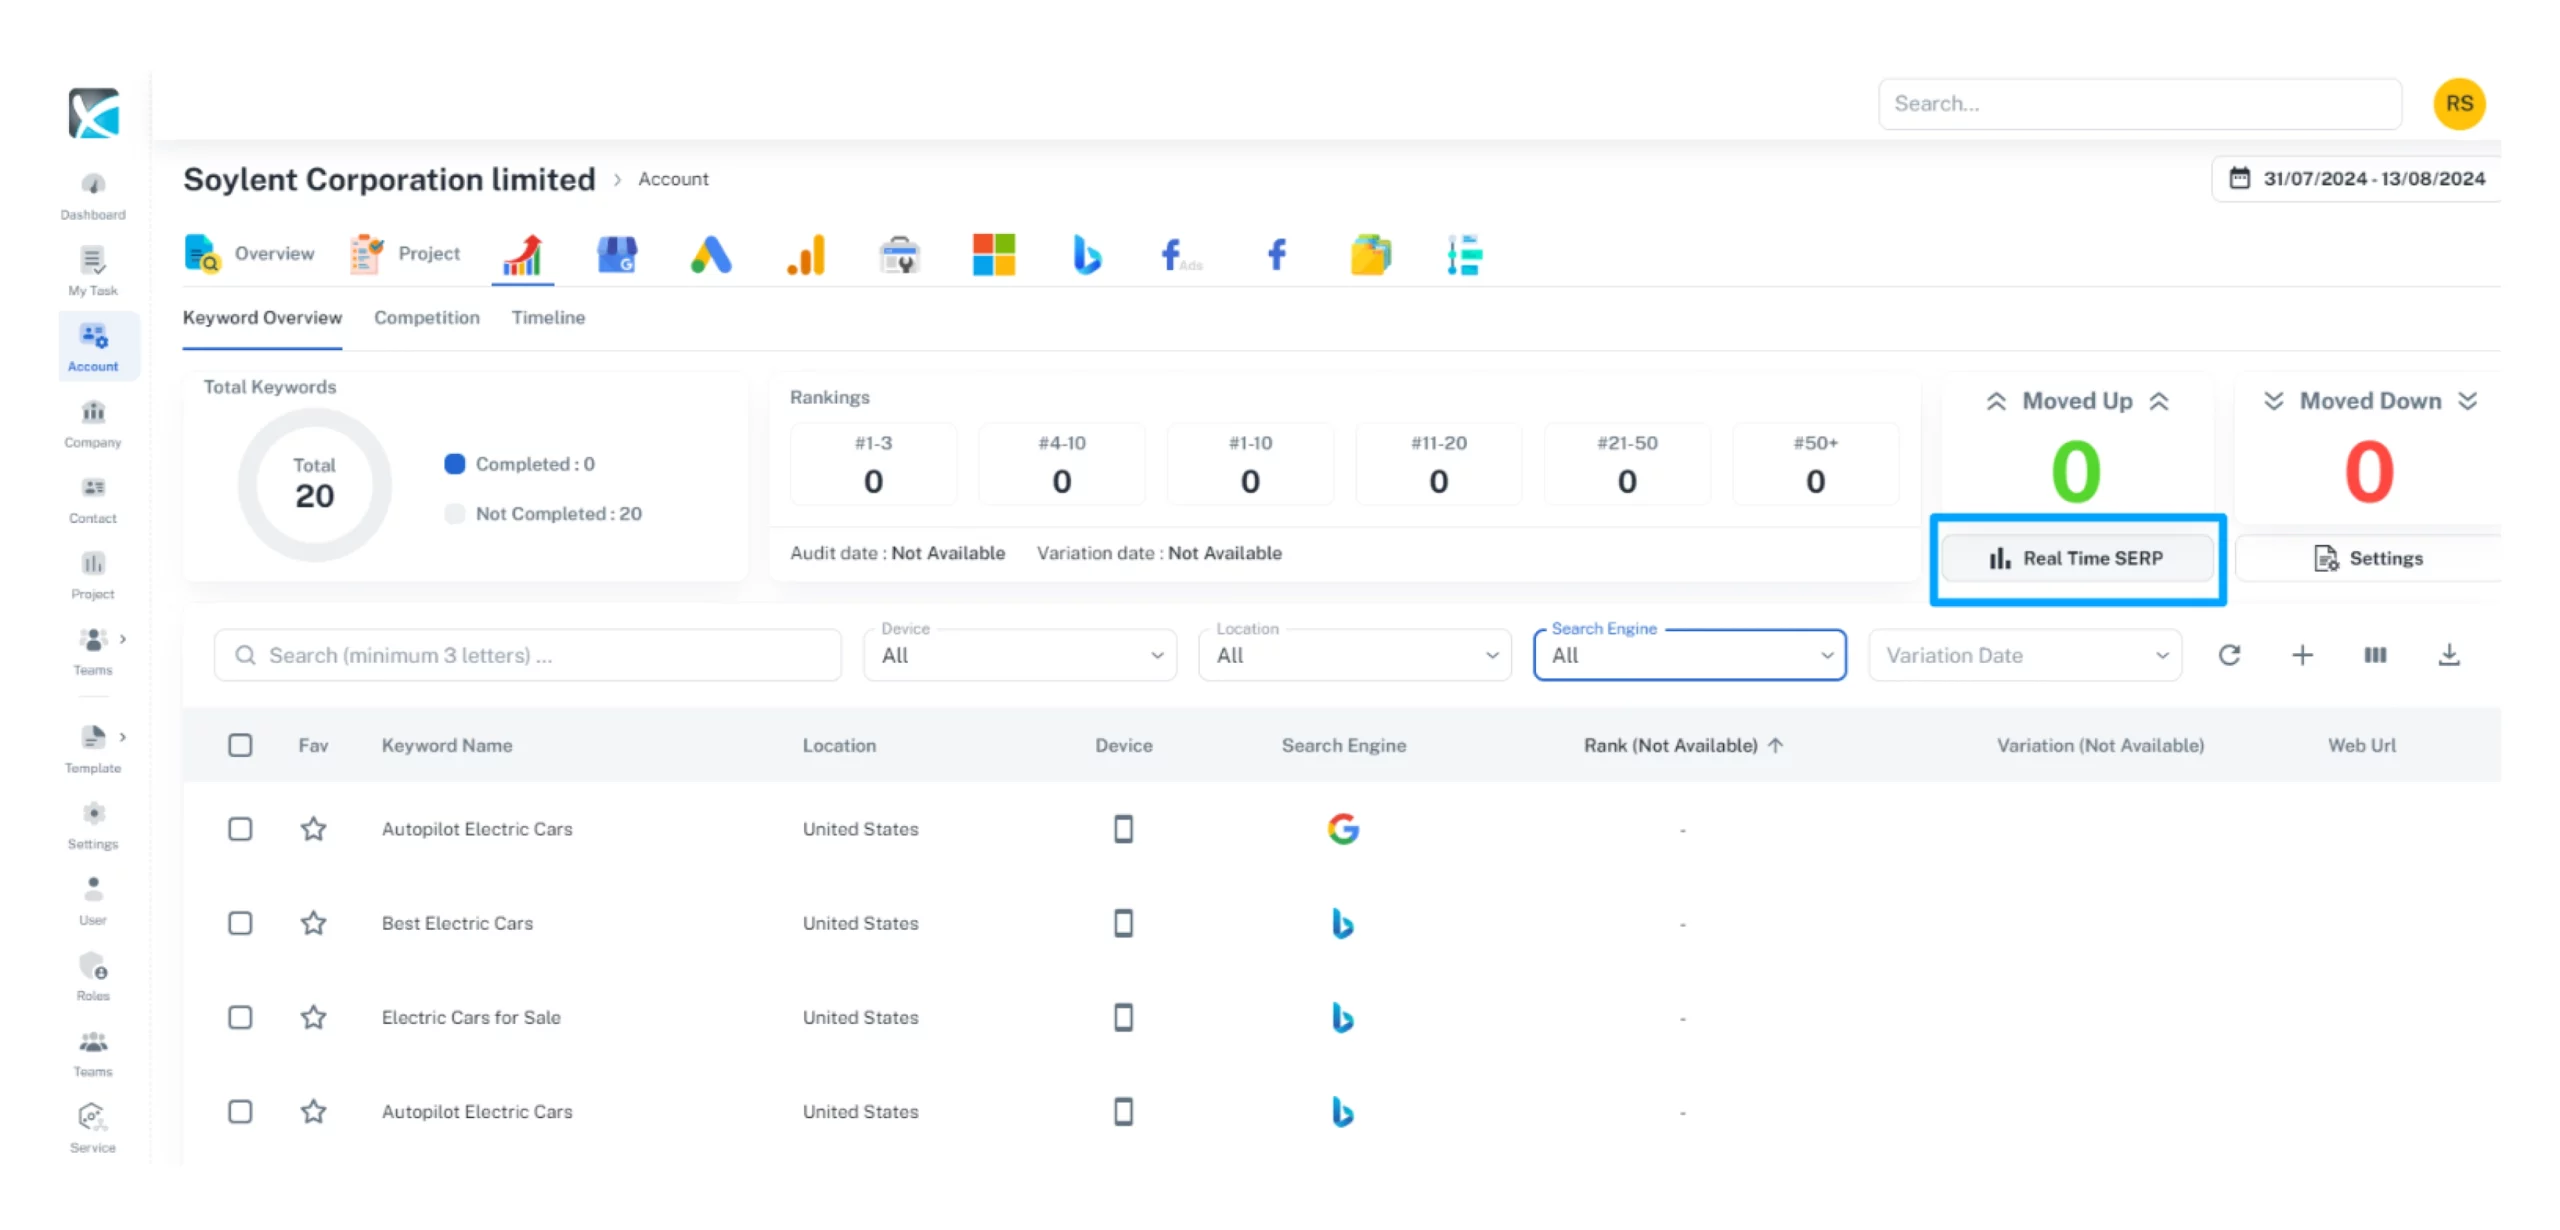
How to add competitors
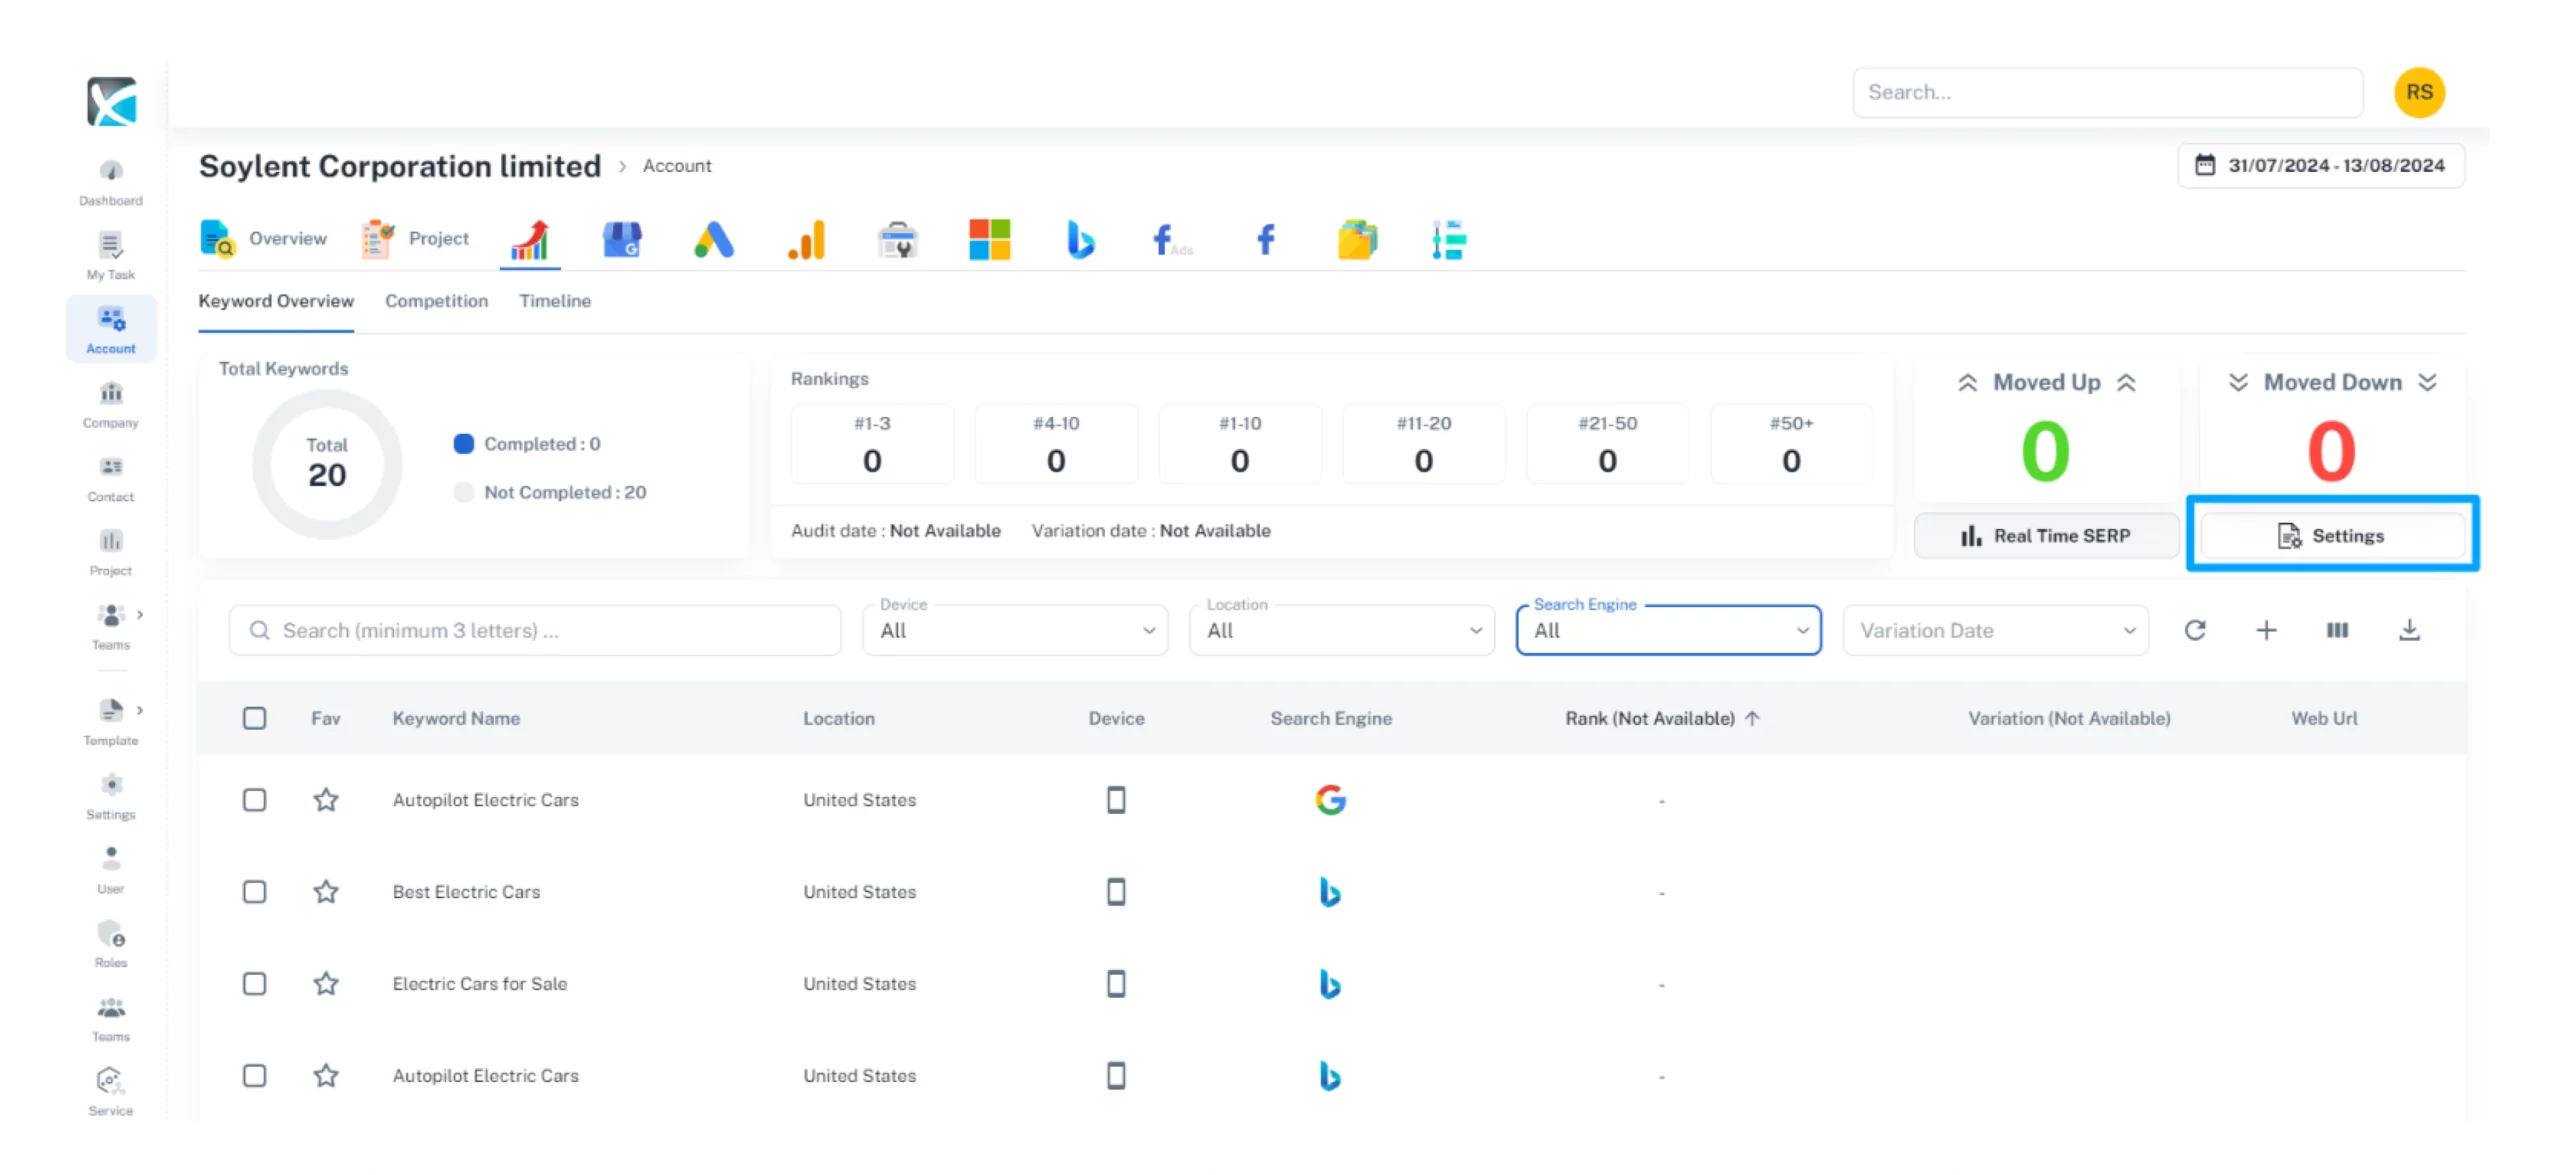
1. Adding competitors to Rank Tracker enables you to compare the chosen keywords for your domain against your competitors’ rankings. To add competitors, click the Settings icon on the right hand of the screen.
2. Fill in the competitor’s business name and domain. You can add up to three competitors.
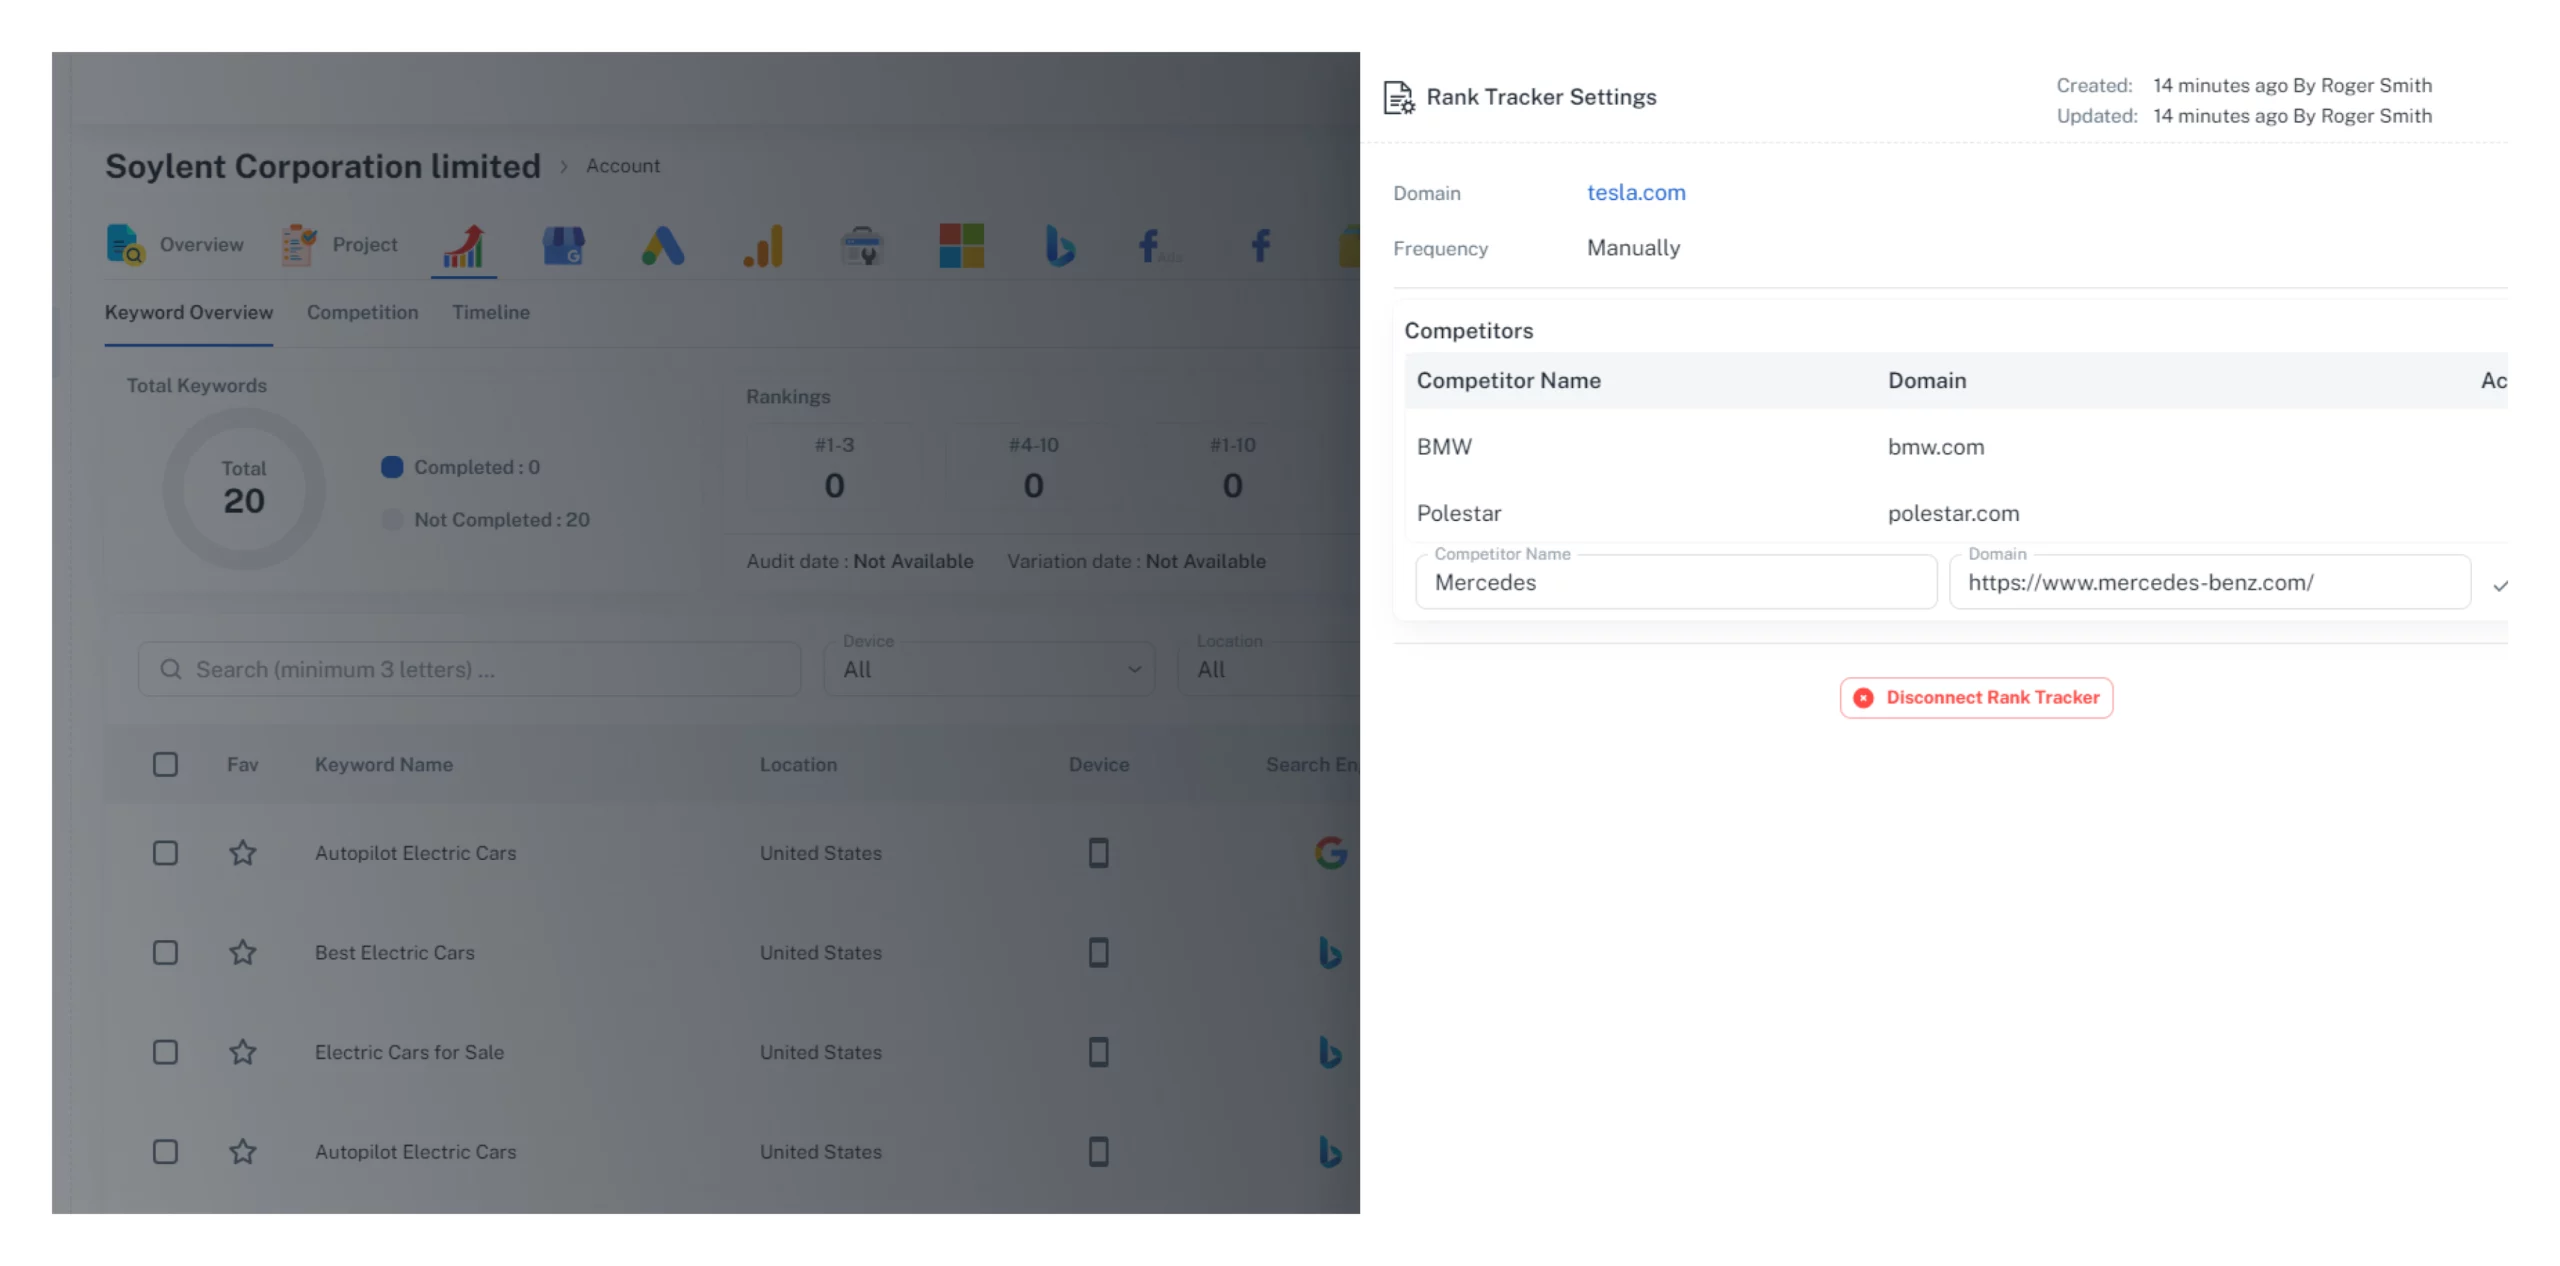
3. Once you’ve inputted your competitors, you can click on the competition tab to compare how your keywords are ranking against your competitors.
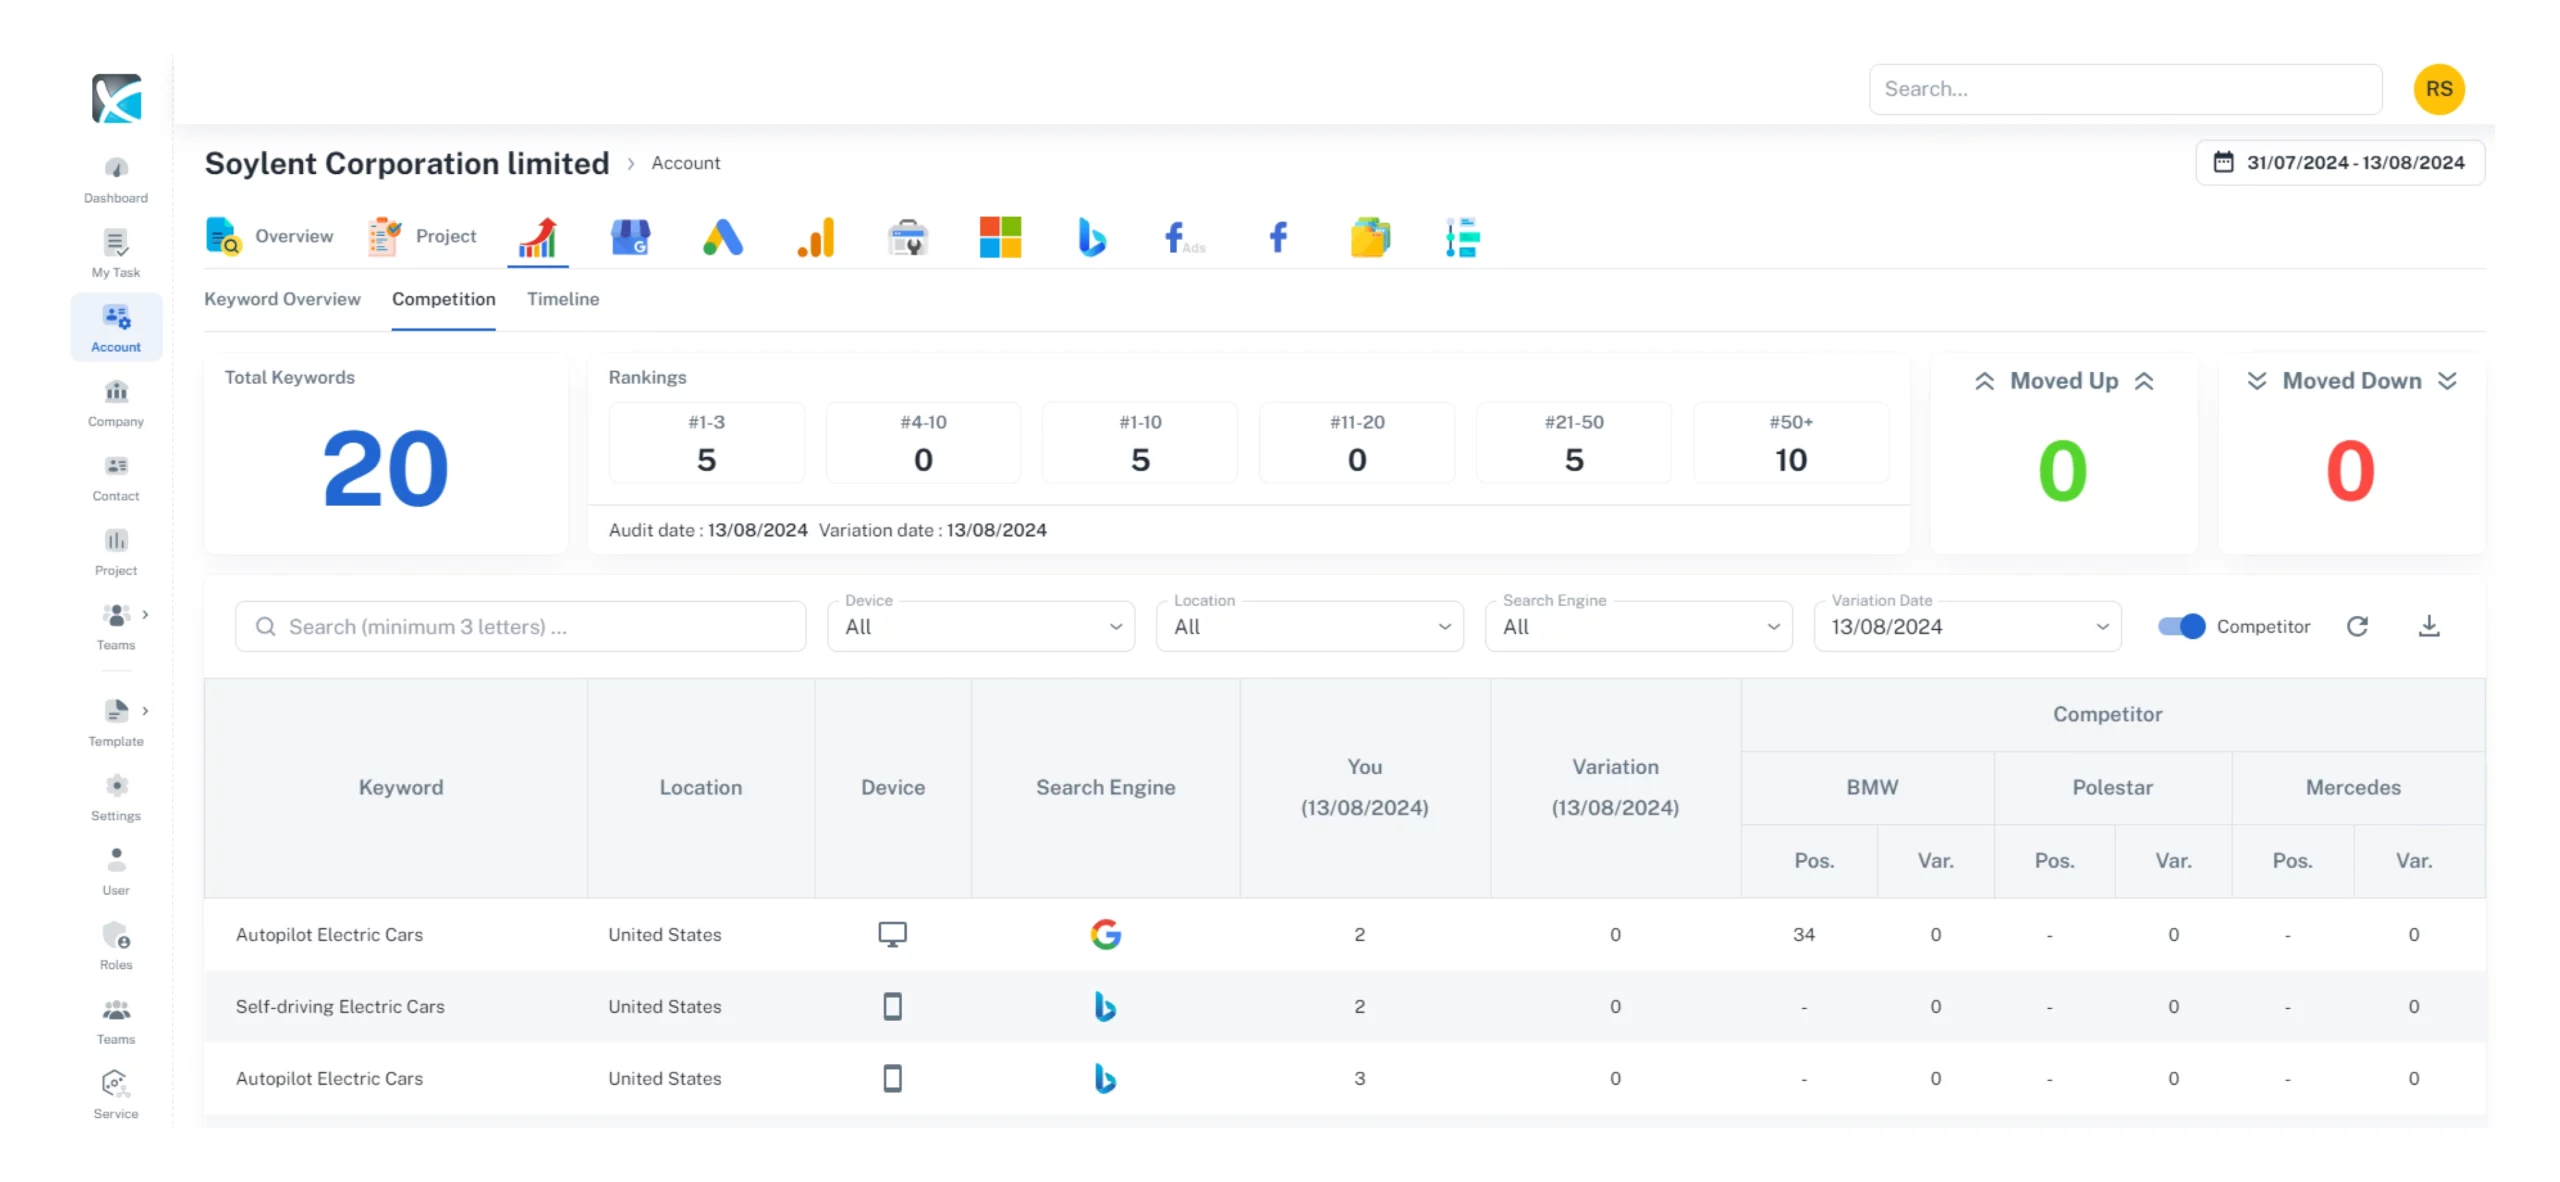
4. To download the competitor analysis report, simply click the download icon on the right-hand side of the screen.

Rank Tracking Analysis
1. With all your keywords and competitors inputted, you can now use DAXRM to explore your keyword rankings. Click on the Keyword Name in the list. This will provide you with a SERP analysis for that keyword, showing you the current rank together with the ranking volatility over the selected time period.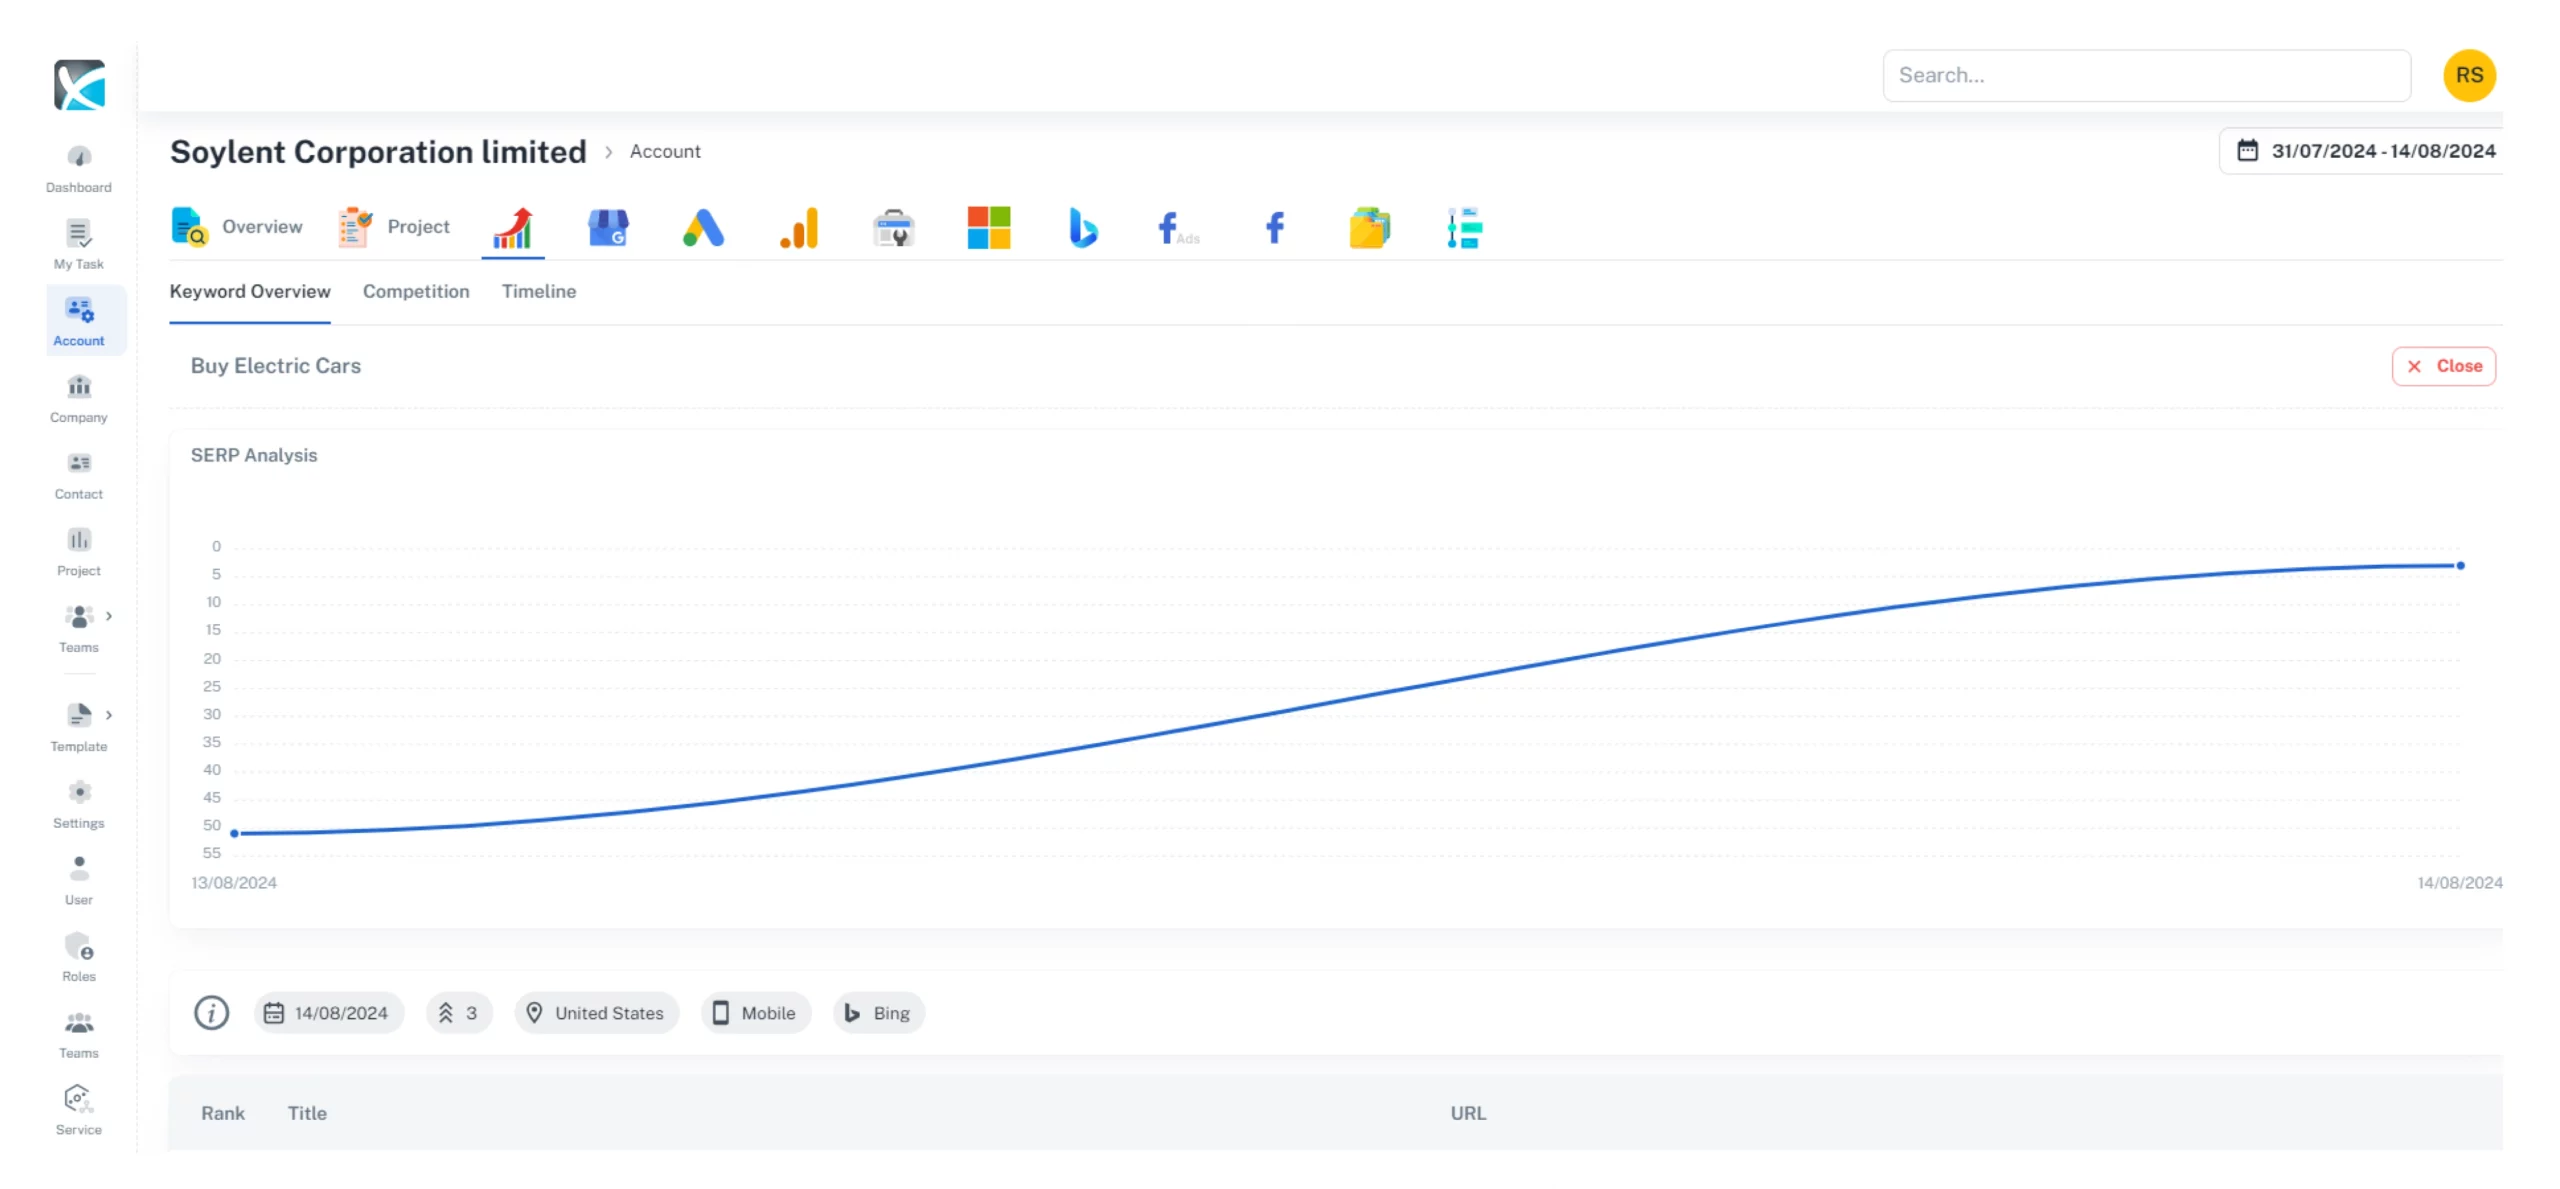
You can change the time period by clicking on the date range in the top right corner. Select your preferred date range, or input a custom date range, and click apply to view the ranking volatility across this period.
2. Below the SERP analysis graph, you will find a list of the top 10 ranking positions for the chosen keyword with your client’s position highlighted (if it appears in the top 10)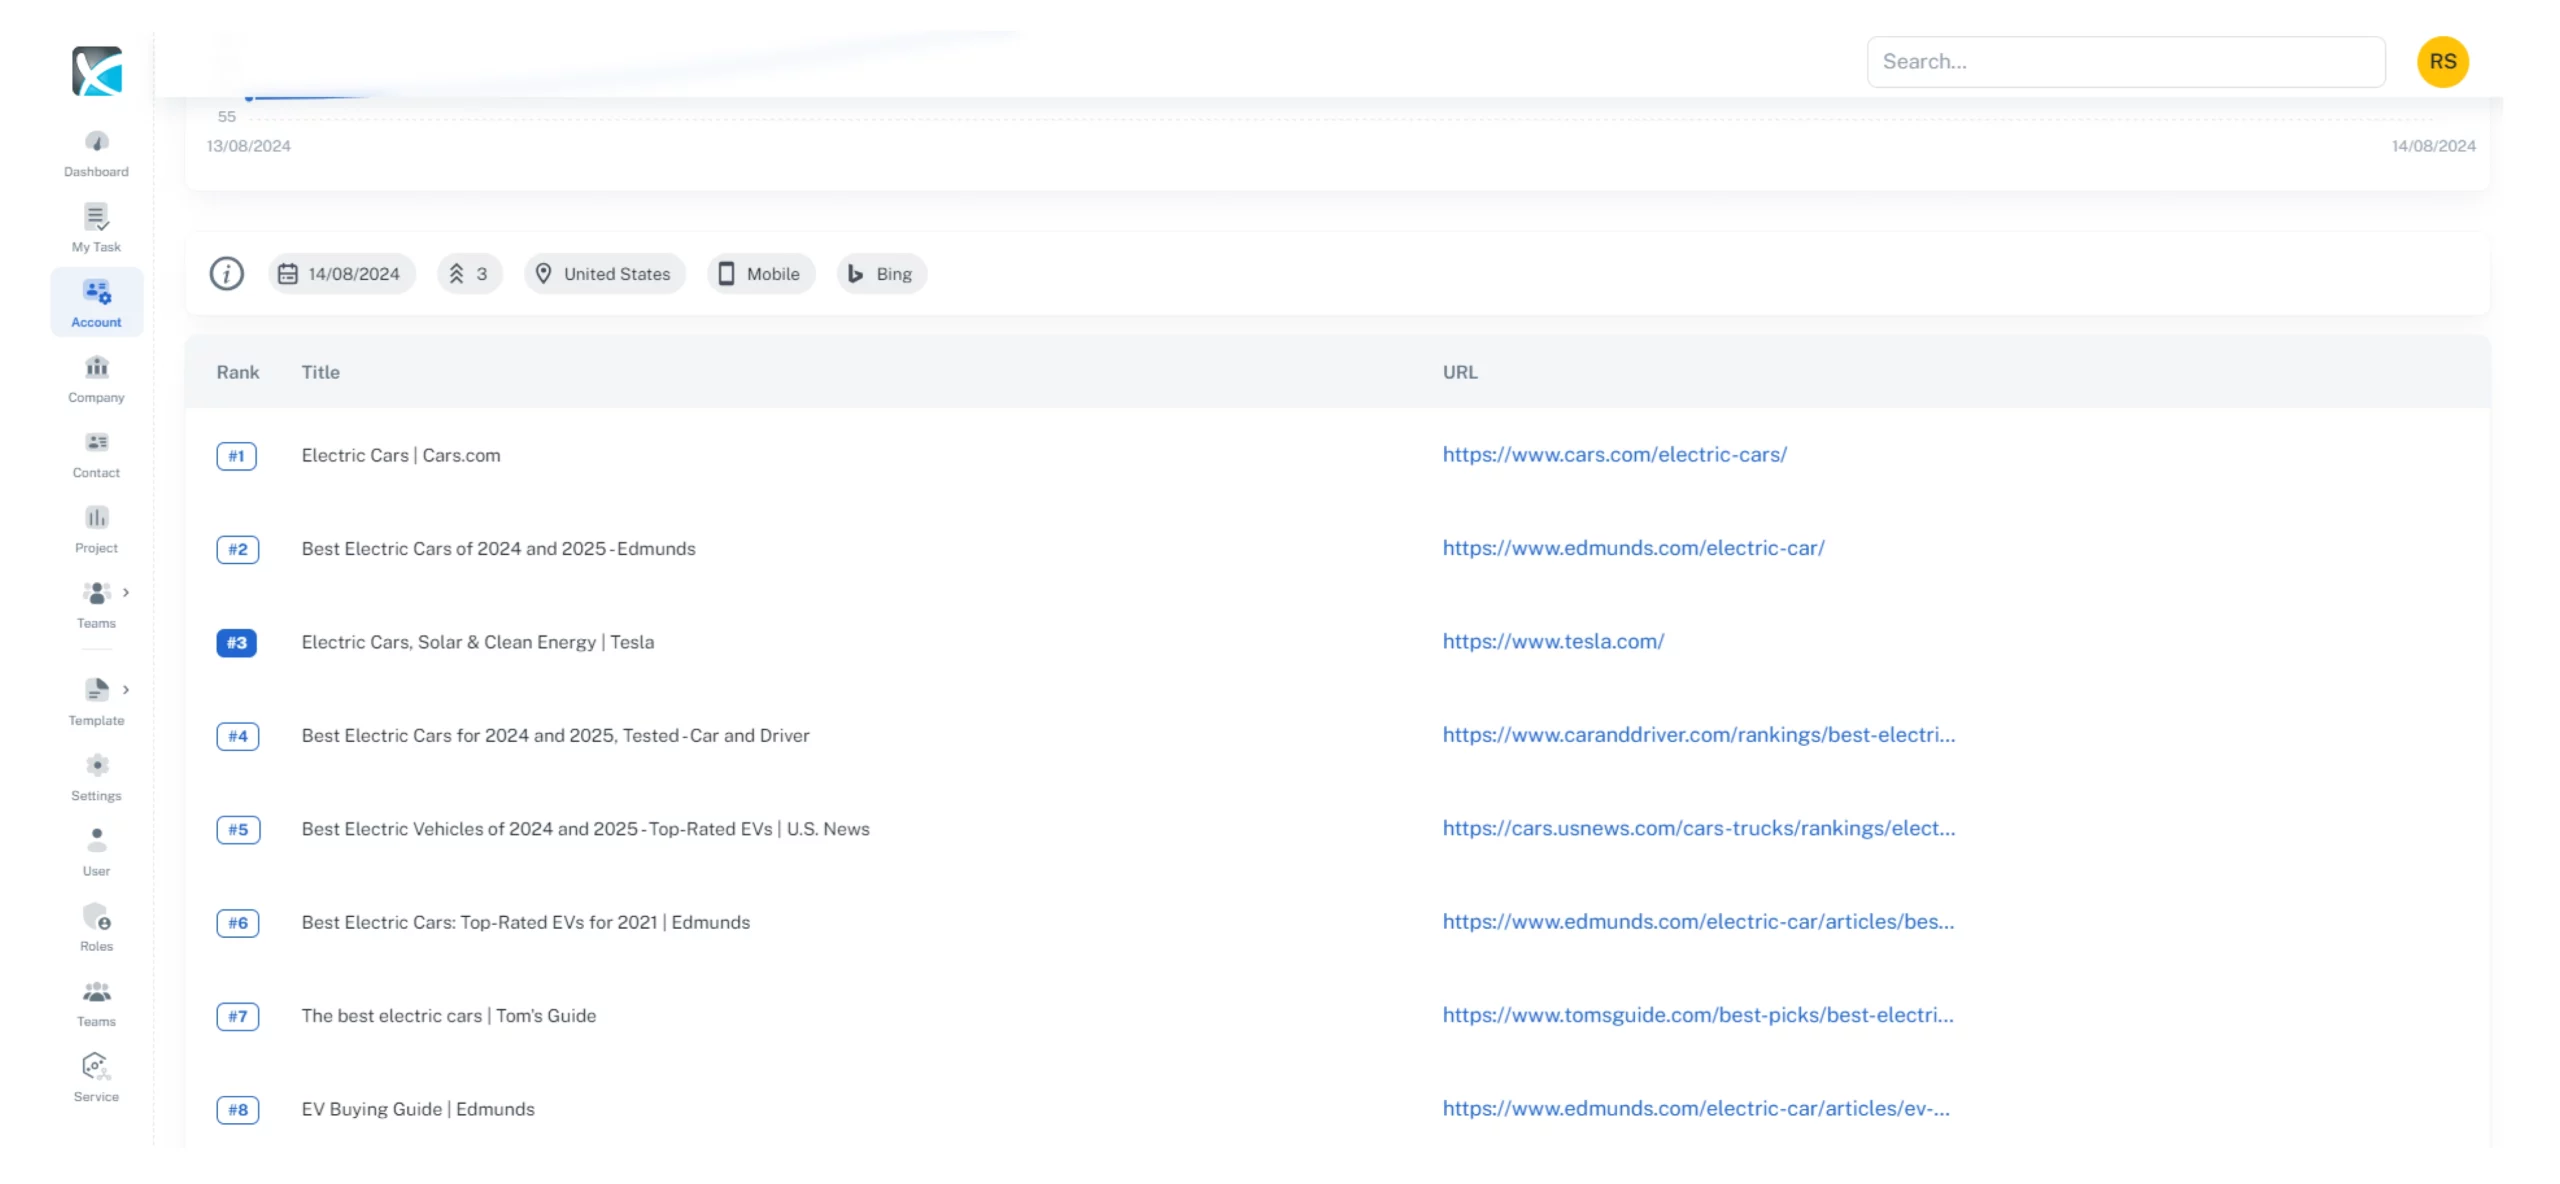
3. You can also filter keywords by device, location, search engine, and variation date, or search for keywords using the search box.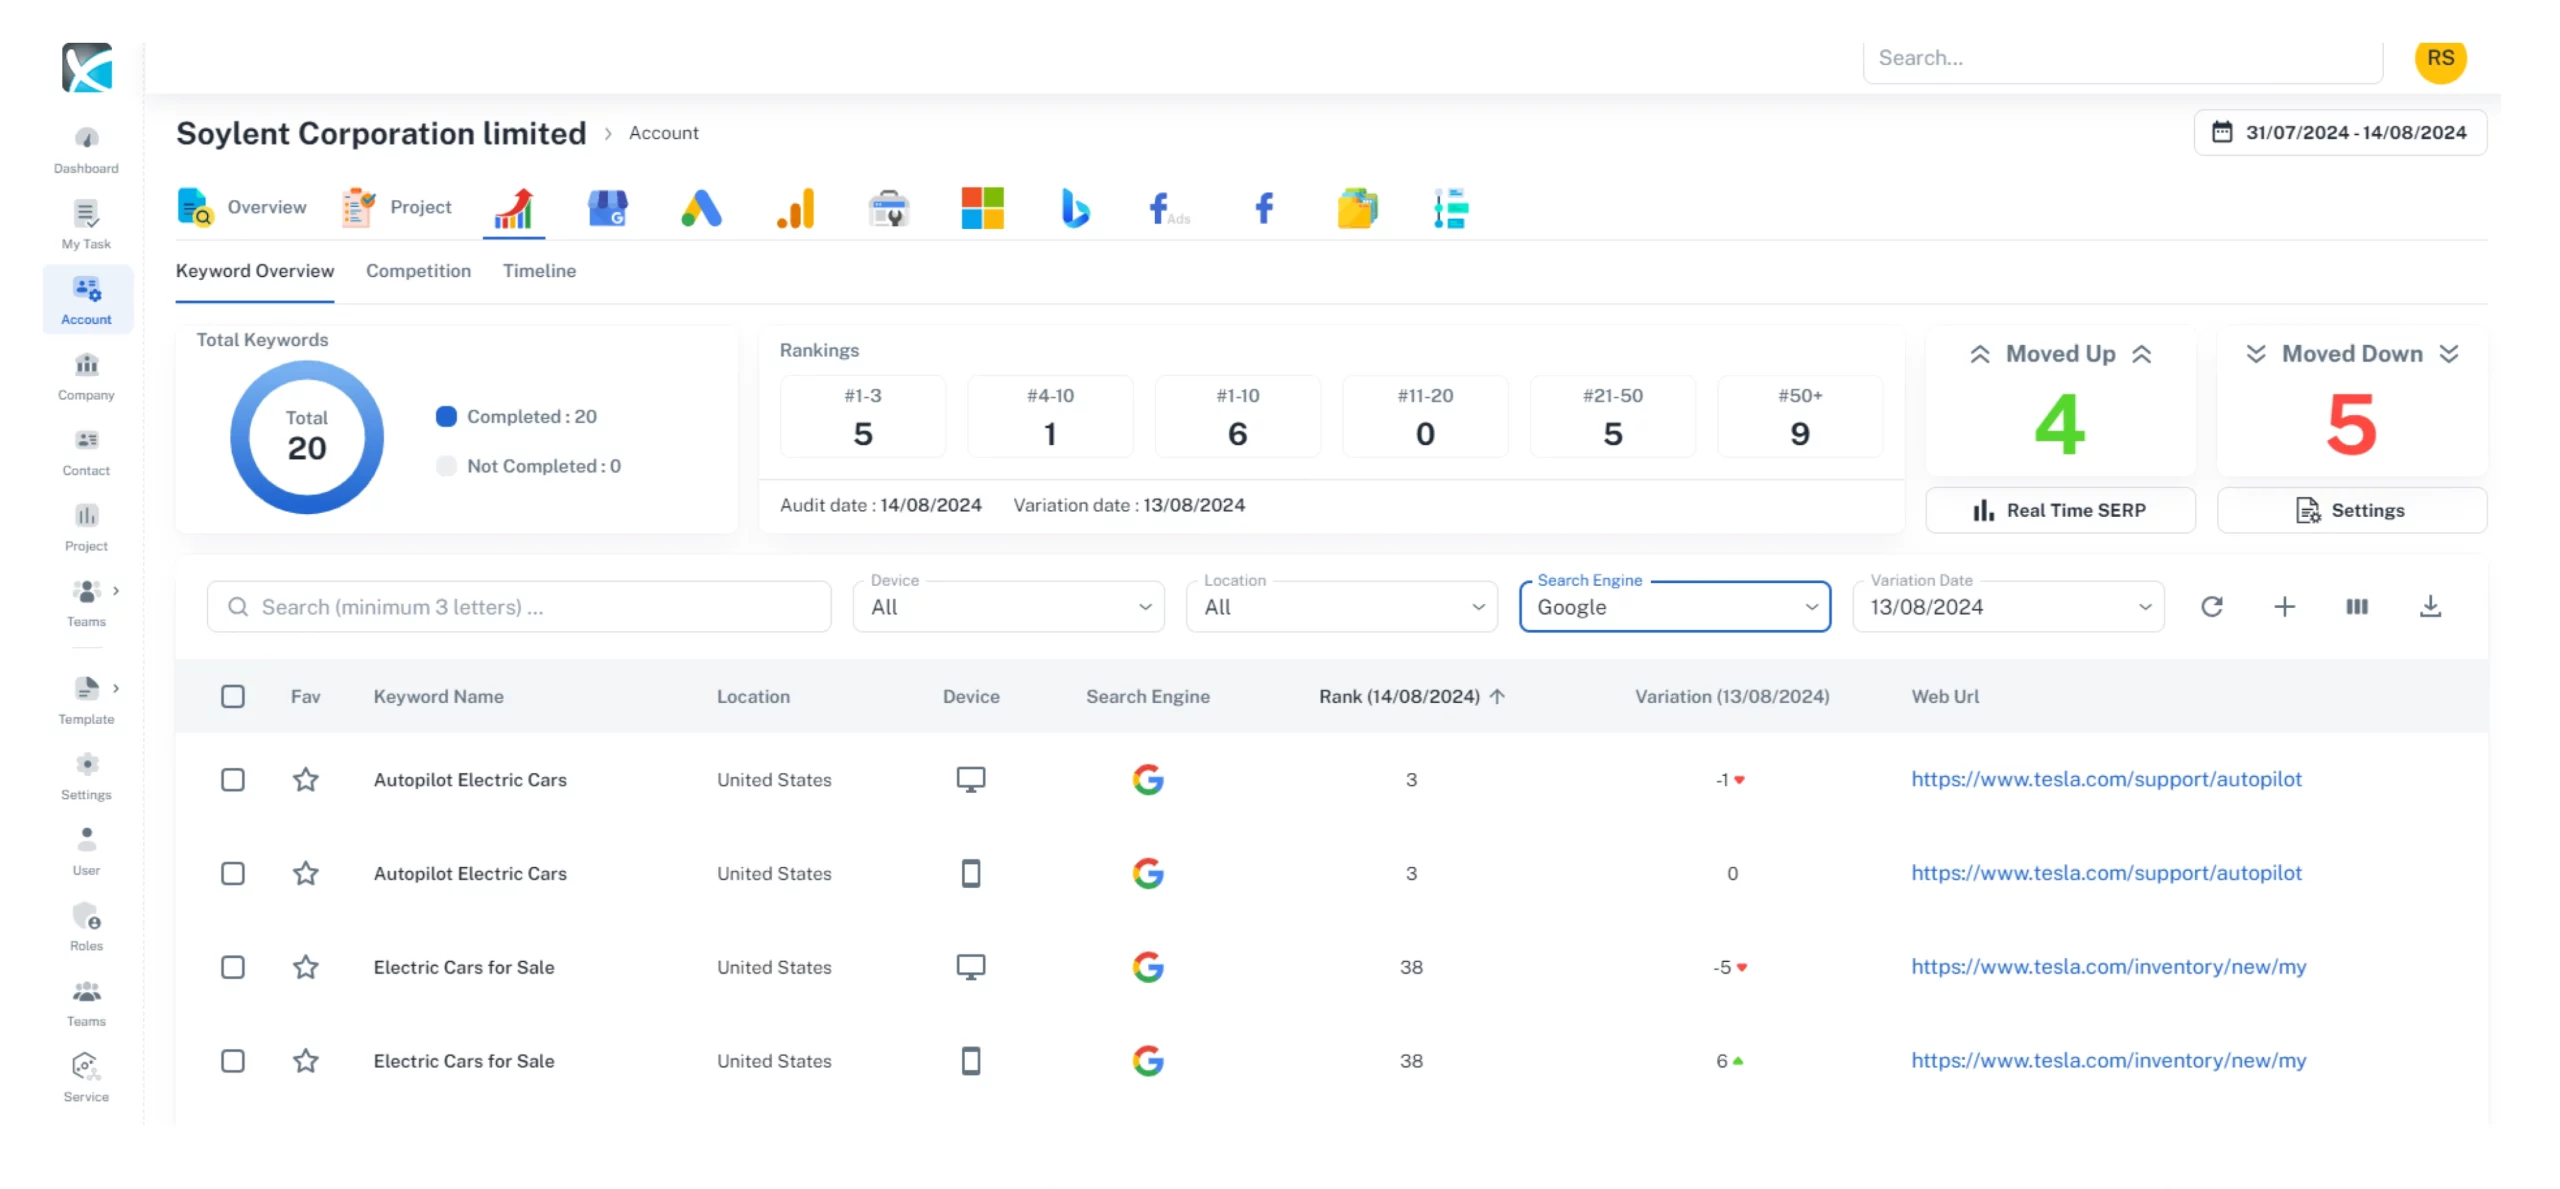
4. To download the keyword report, simply click the download icon on the right-hand side of the screen.
5. Finally, if you need to delete a keyword, simply tick the box to the left of the keyword, then click the red delete icon. CAUTION: Deleting the keyword will remove all previous SERP analysis data associated with that keyword.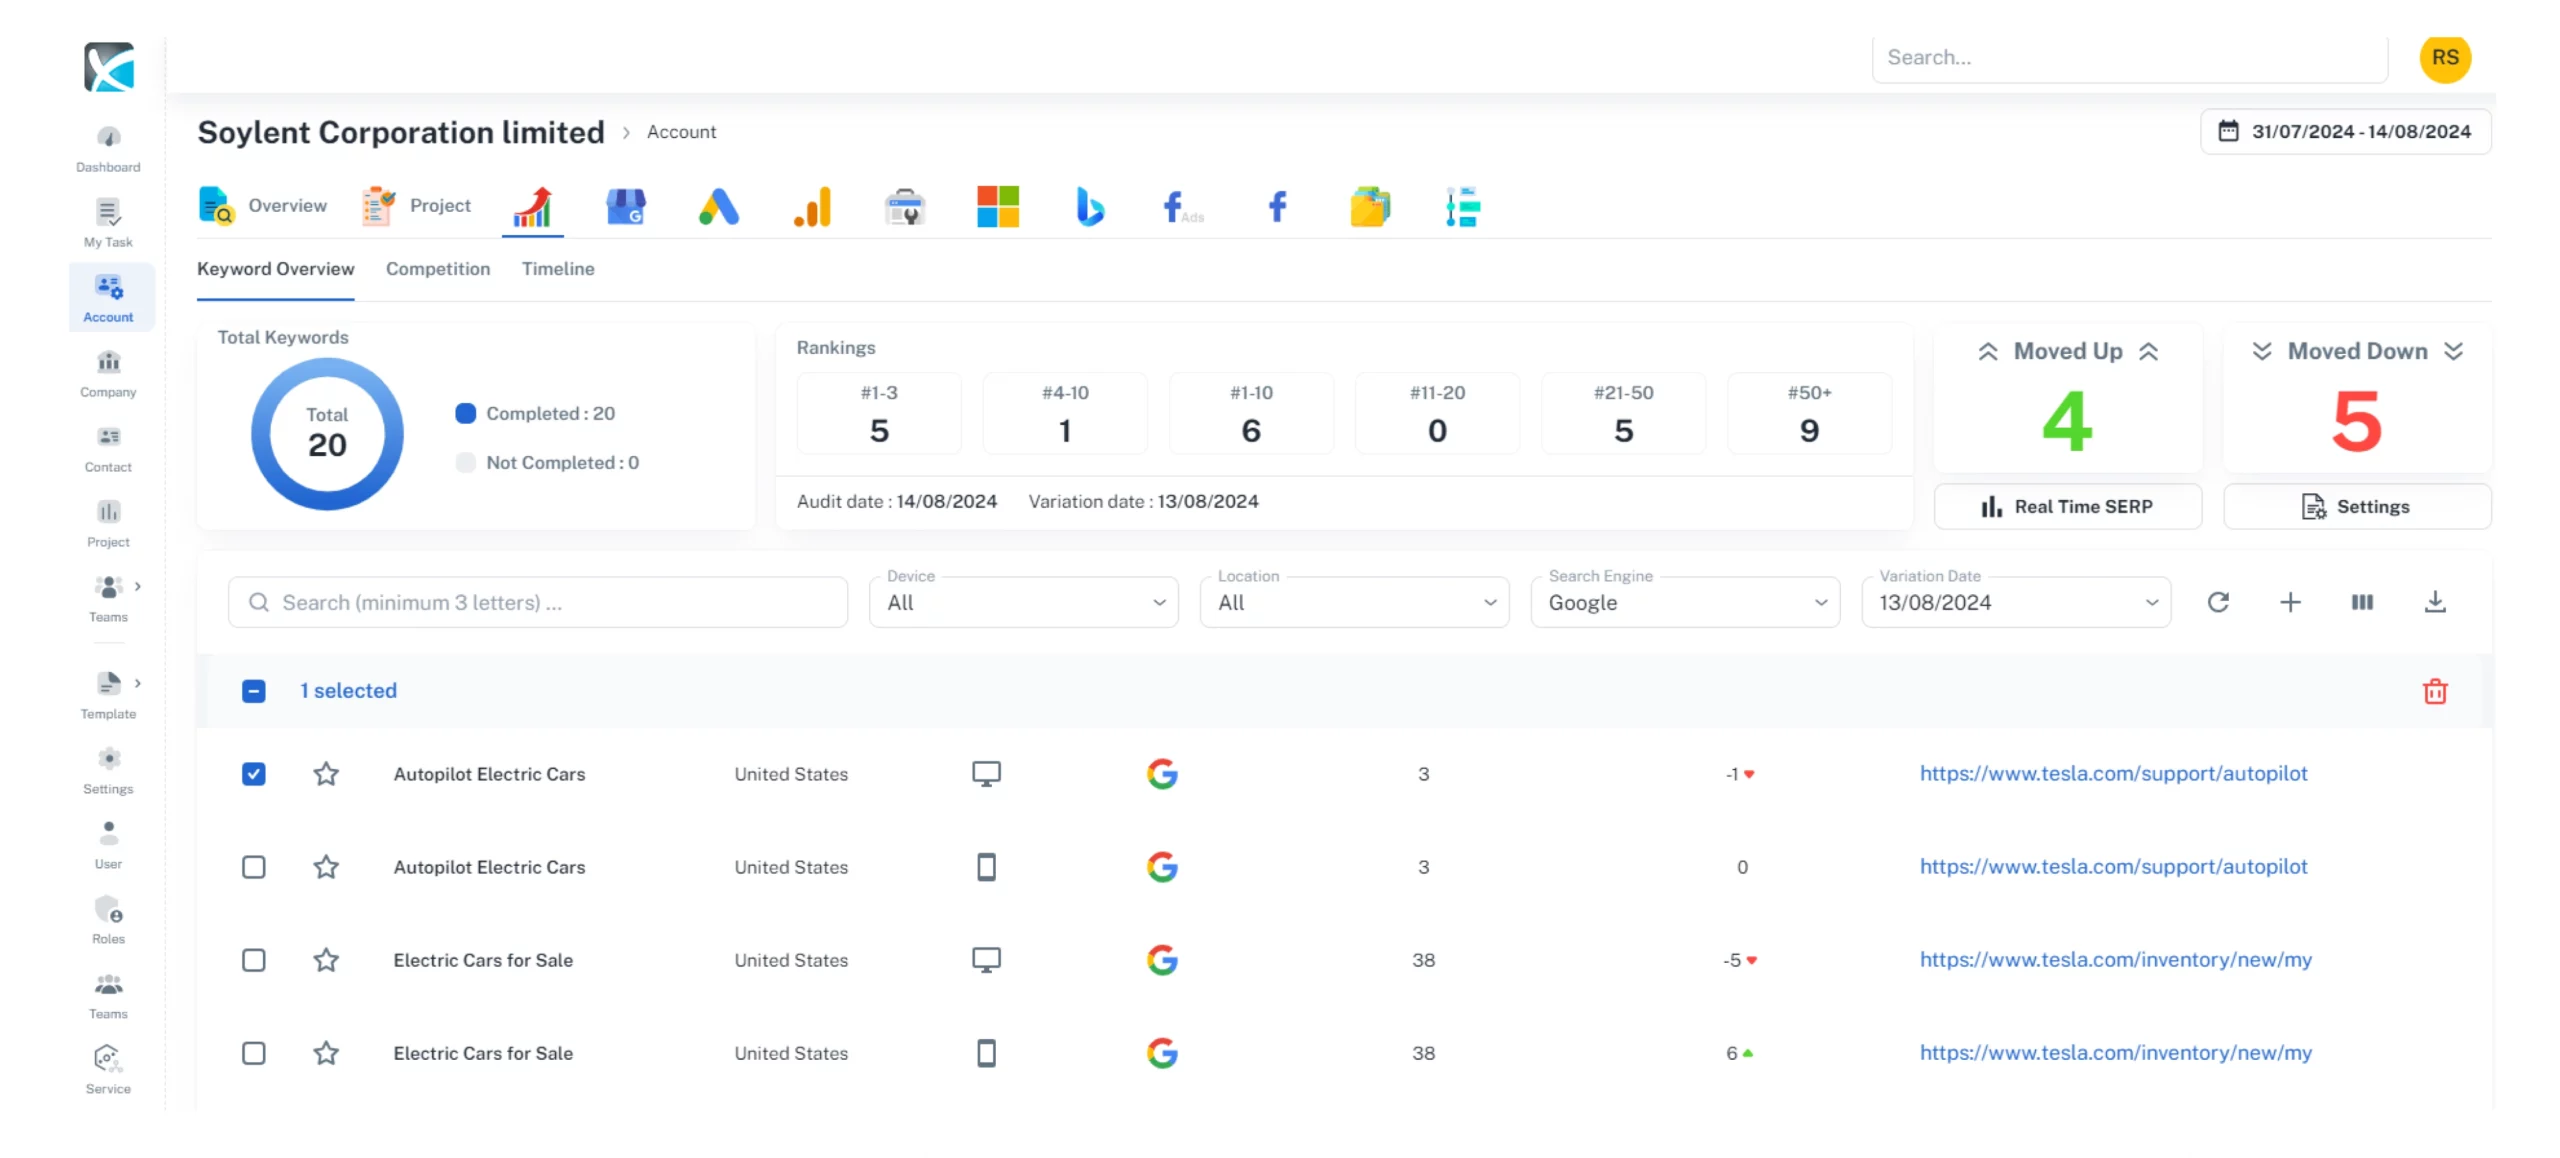
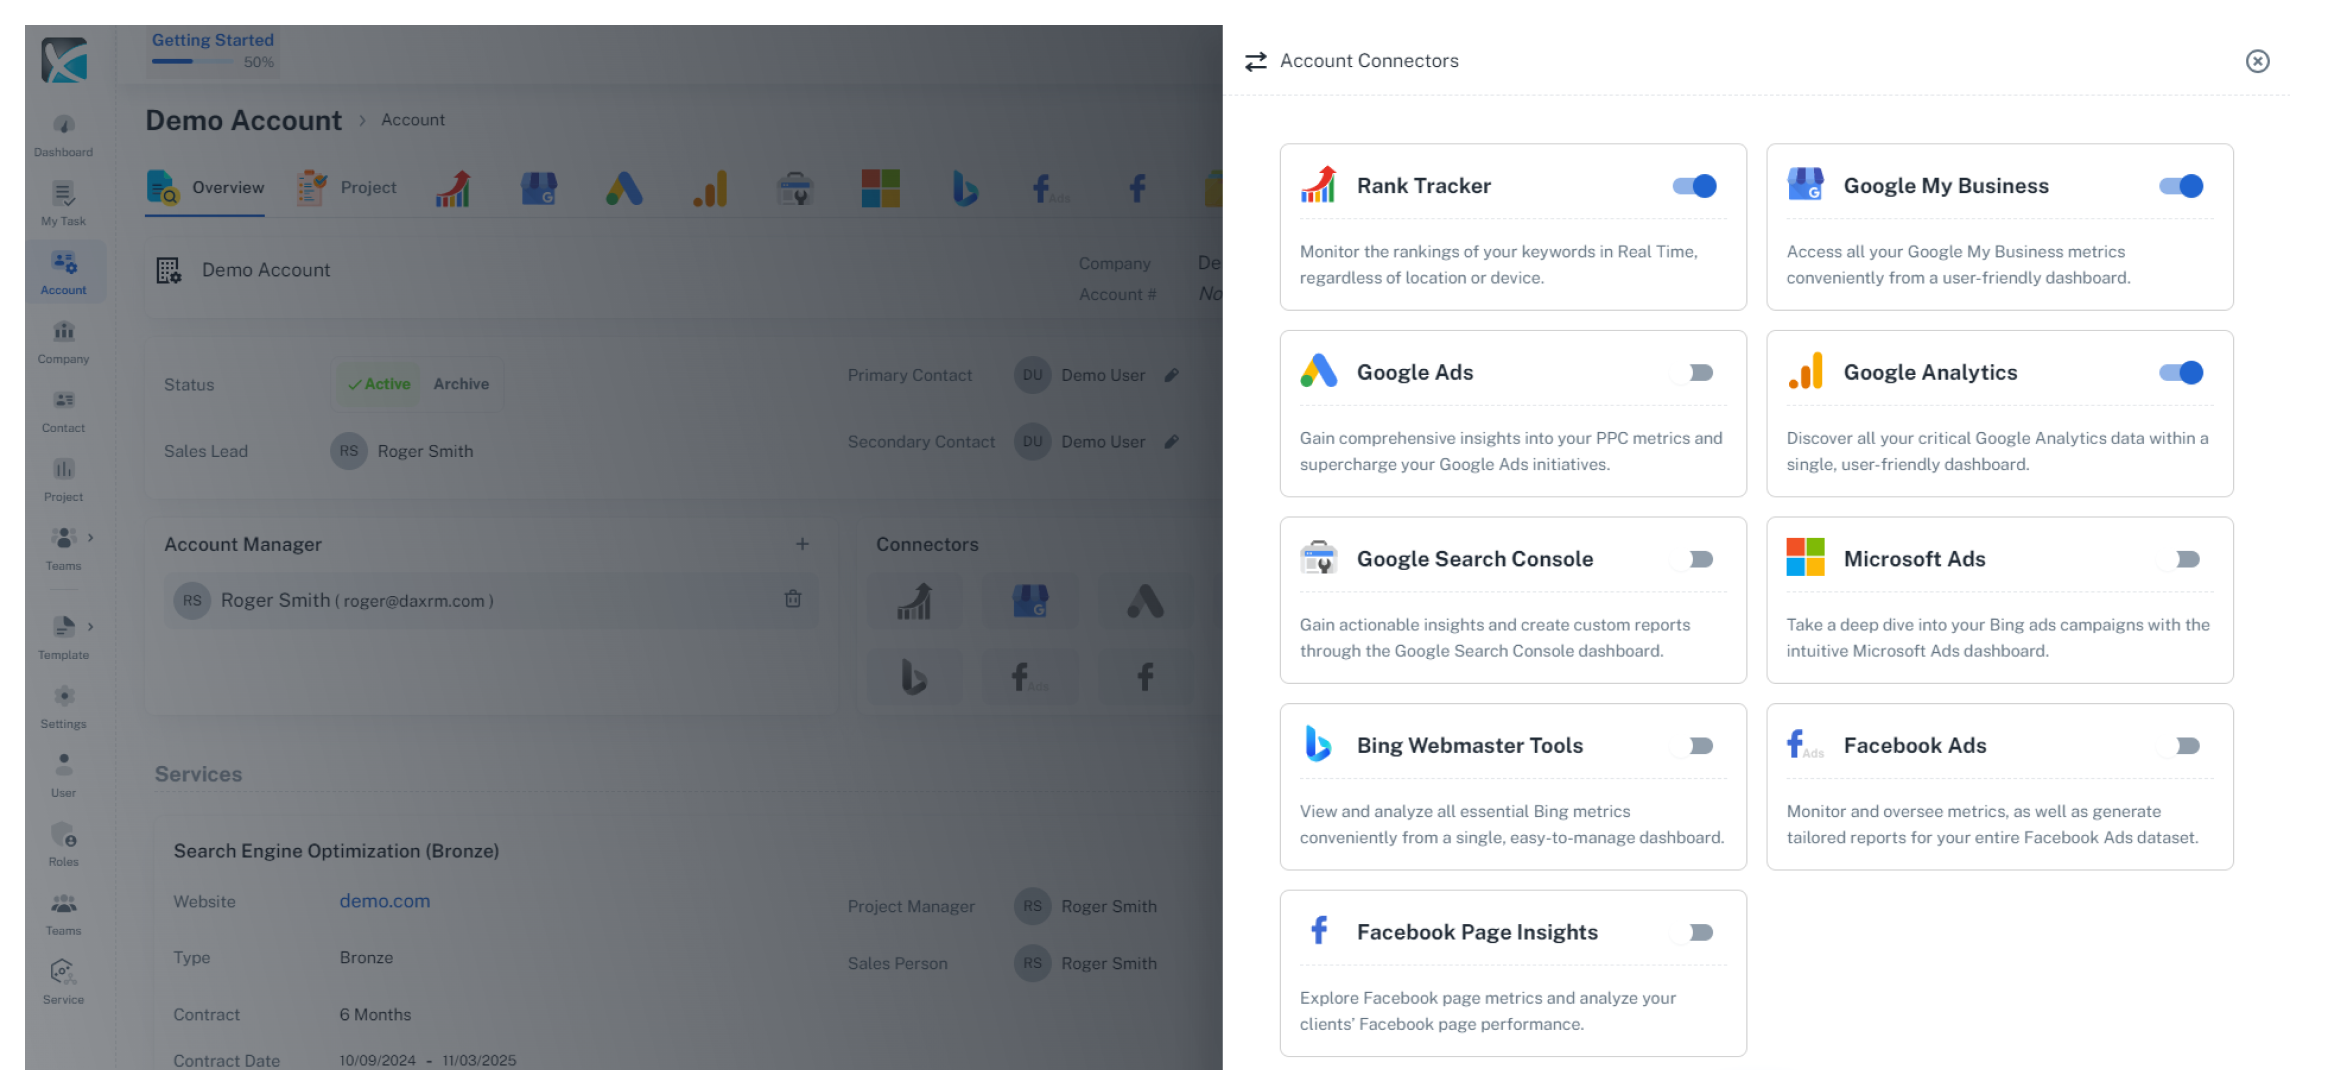
How to Add Connectors to your DAXRM Account
Follow this process to connect these connectors:
- Looker Studio
- Google Ads
- Google Analytics
- Google My Business
- Google Search Console
- Microsoft Ads
Connecting Bing Webmaster Tools and Facebook integrations involves a few additional steps, which are outlined at the bottom of this page.
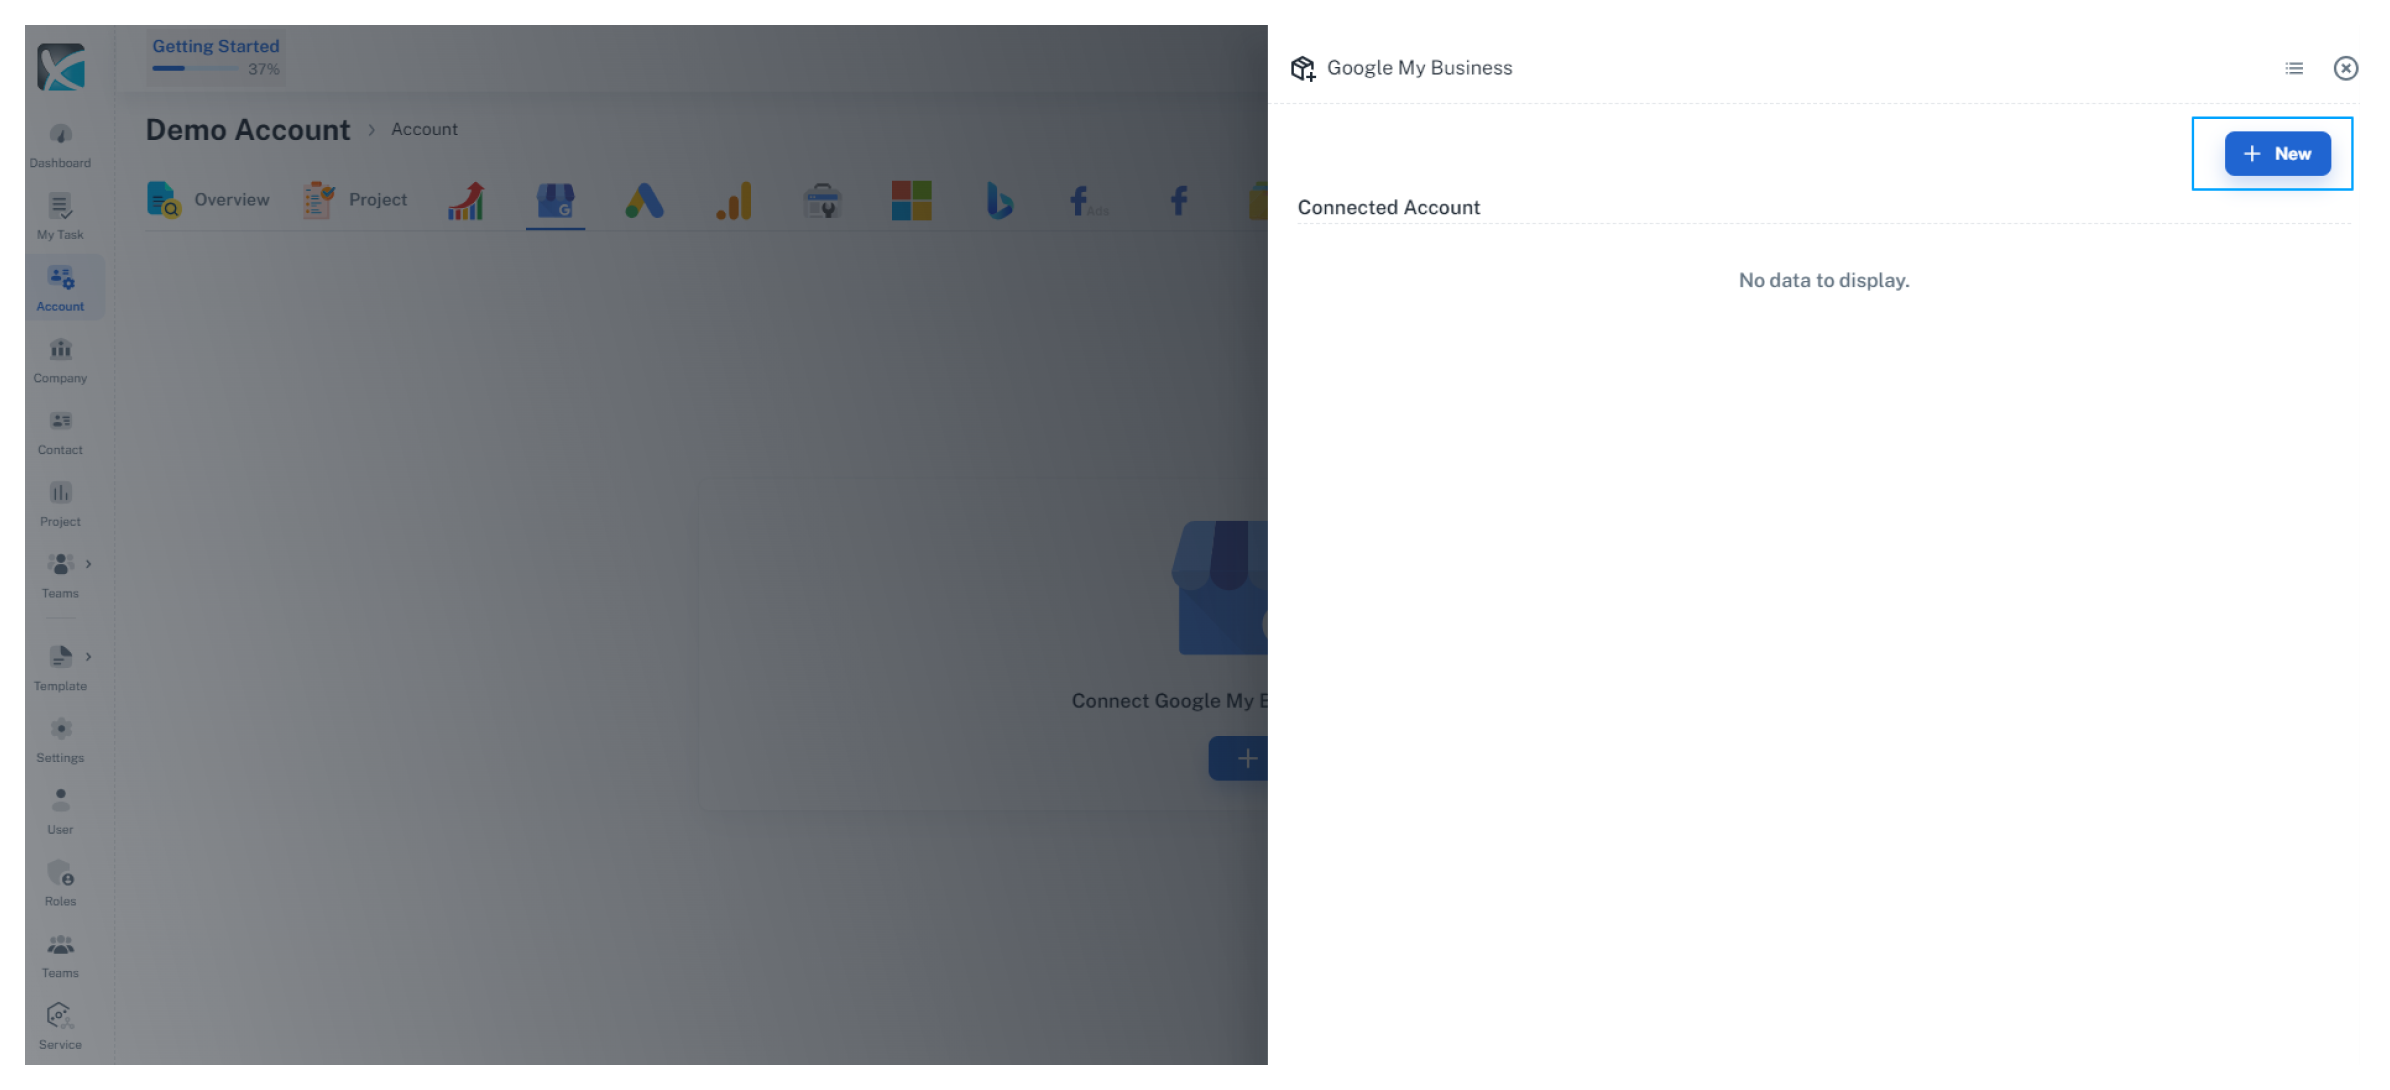
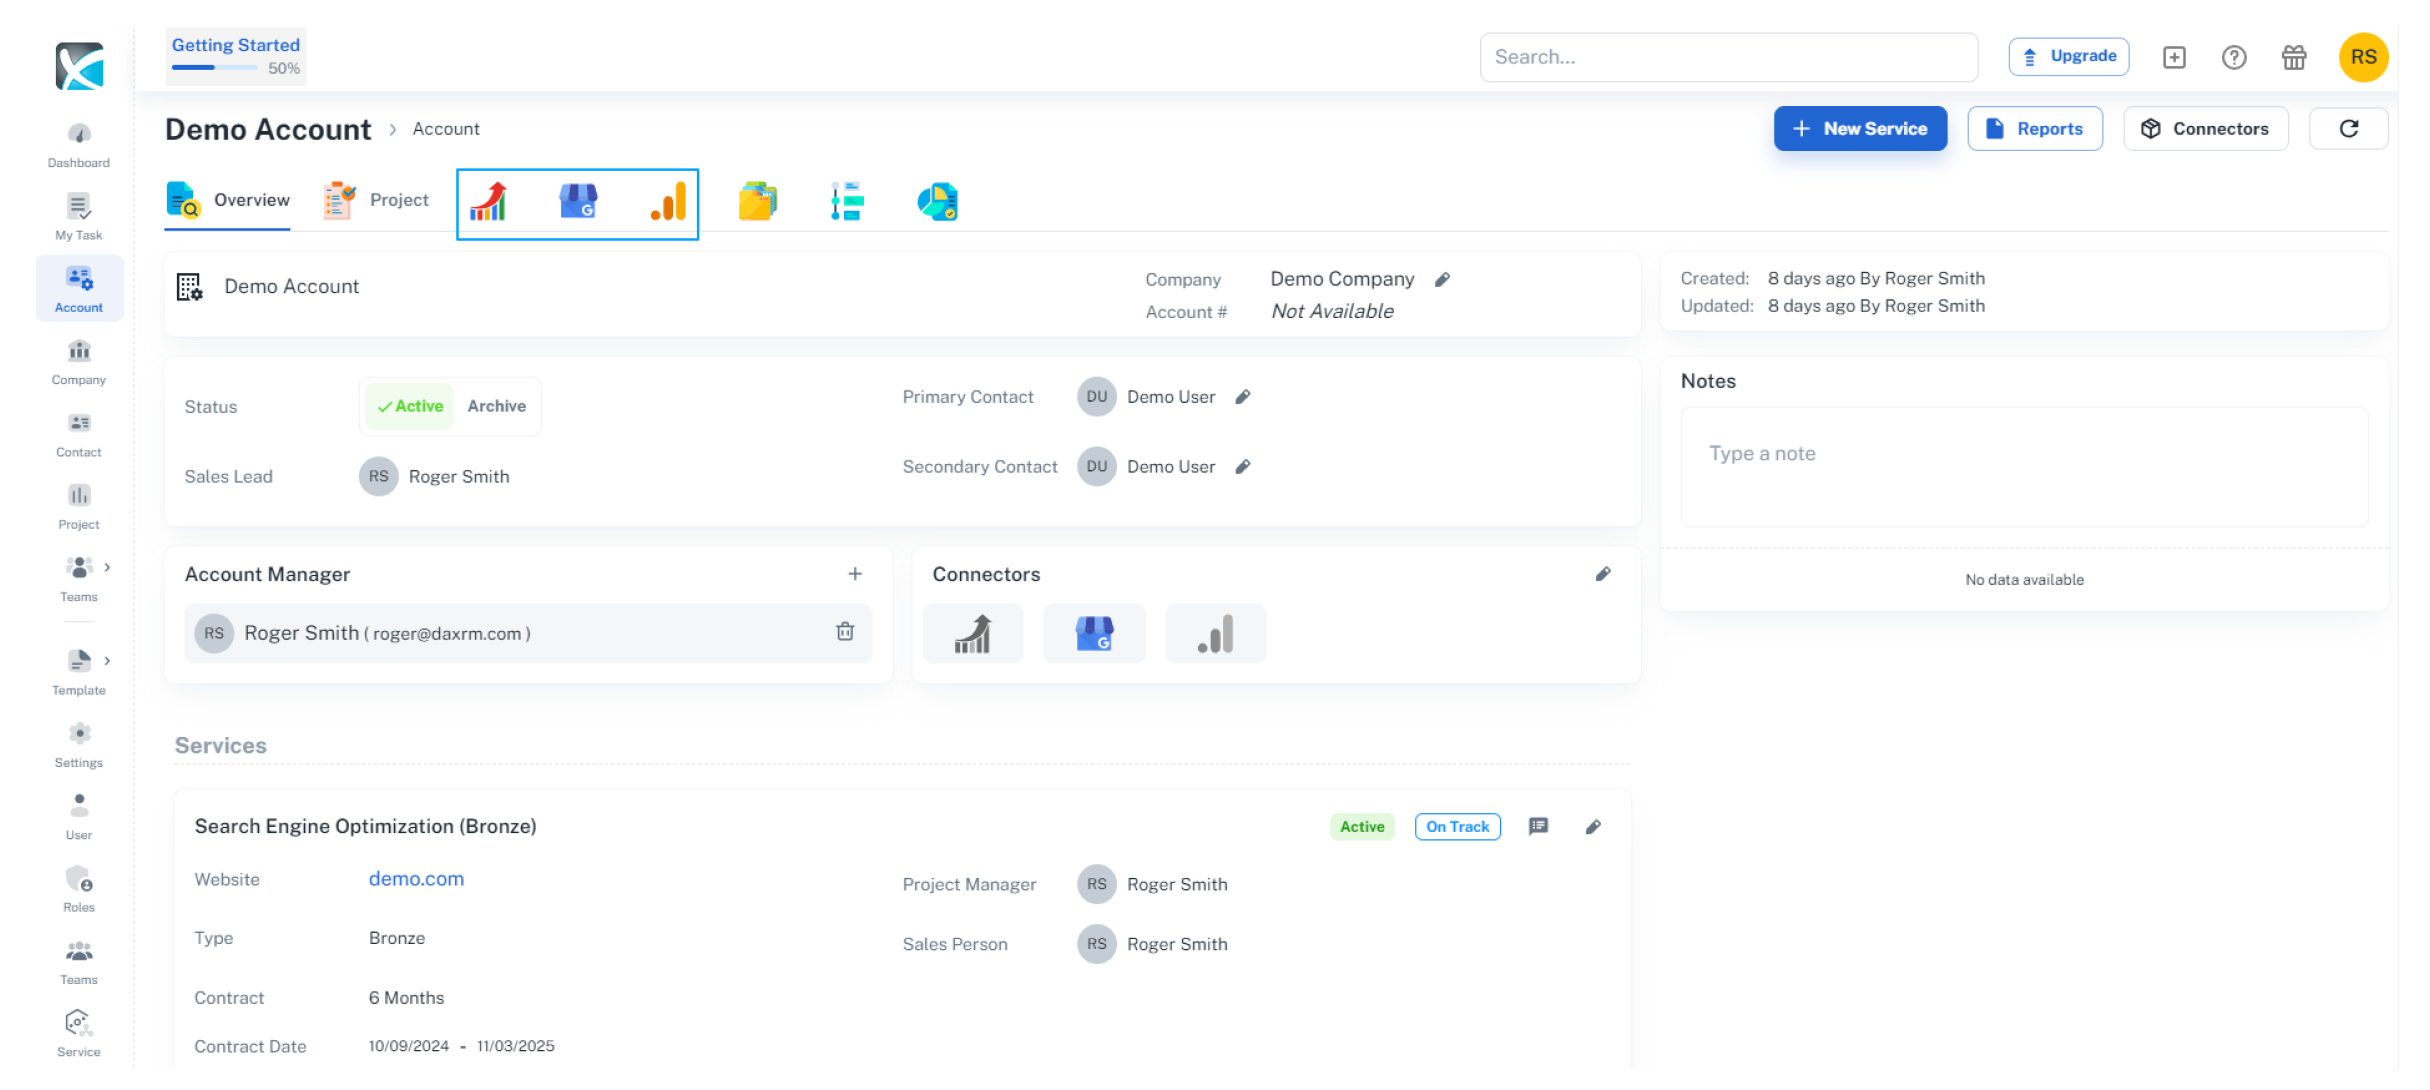
1. To get started, click the Accounts icon in the sidebar and select the appropriate Account from the list. Click the icon for the connector you wish to connect.
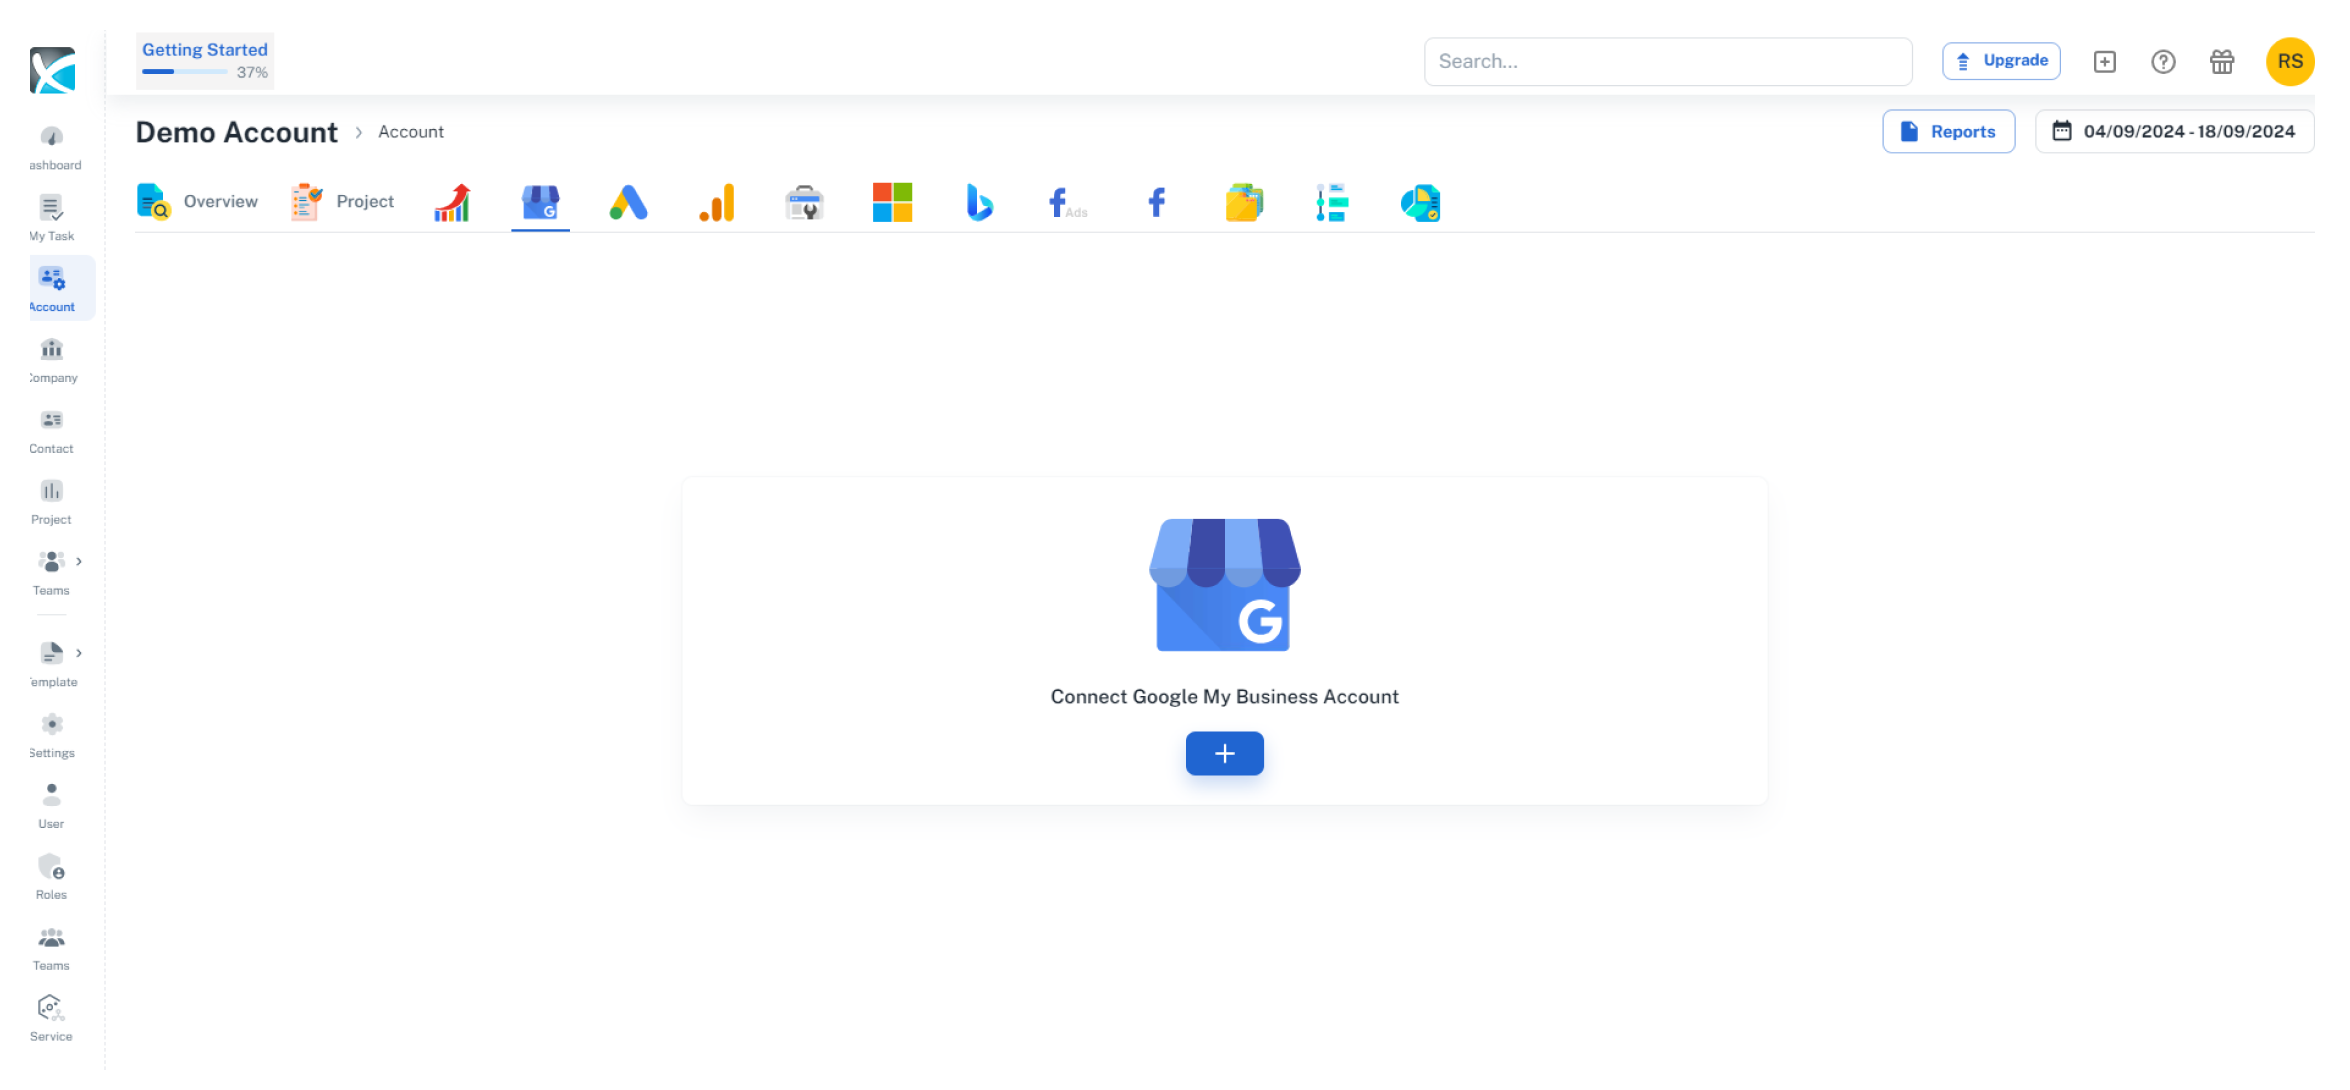
3. Click the + New icon on the right hand side to connect your GMB account.
4. Click continue to allow Google to share information with DAXRM.
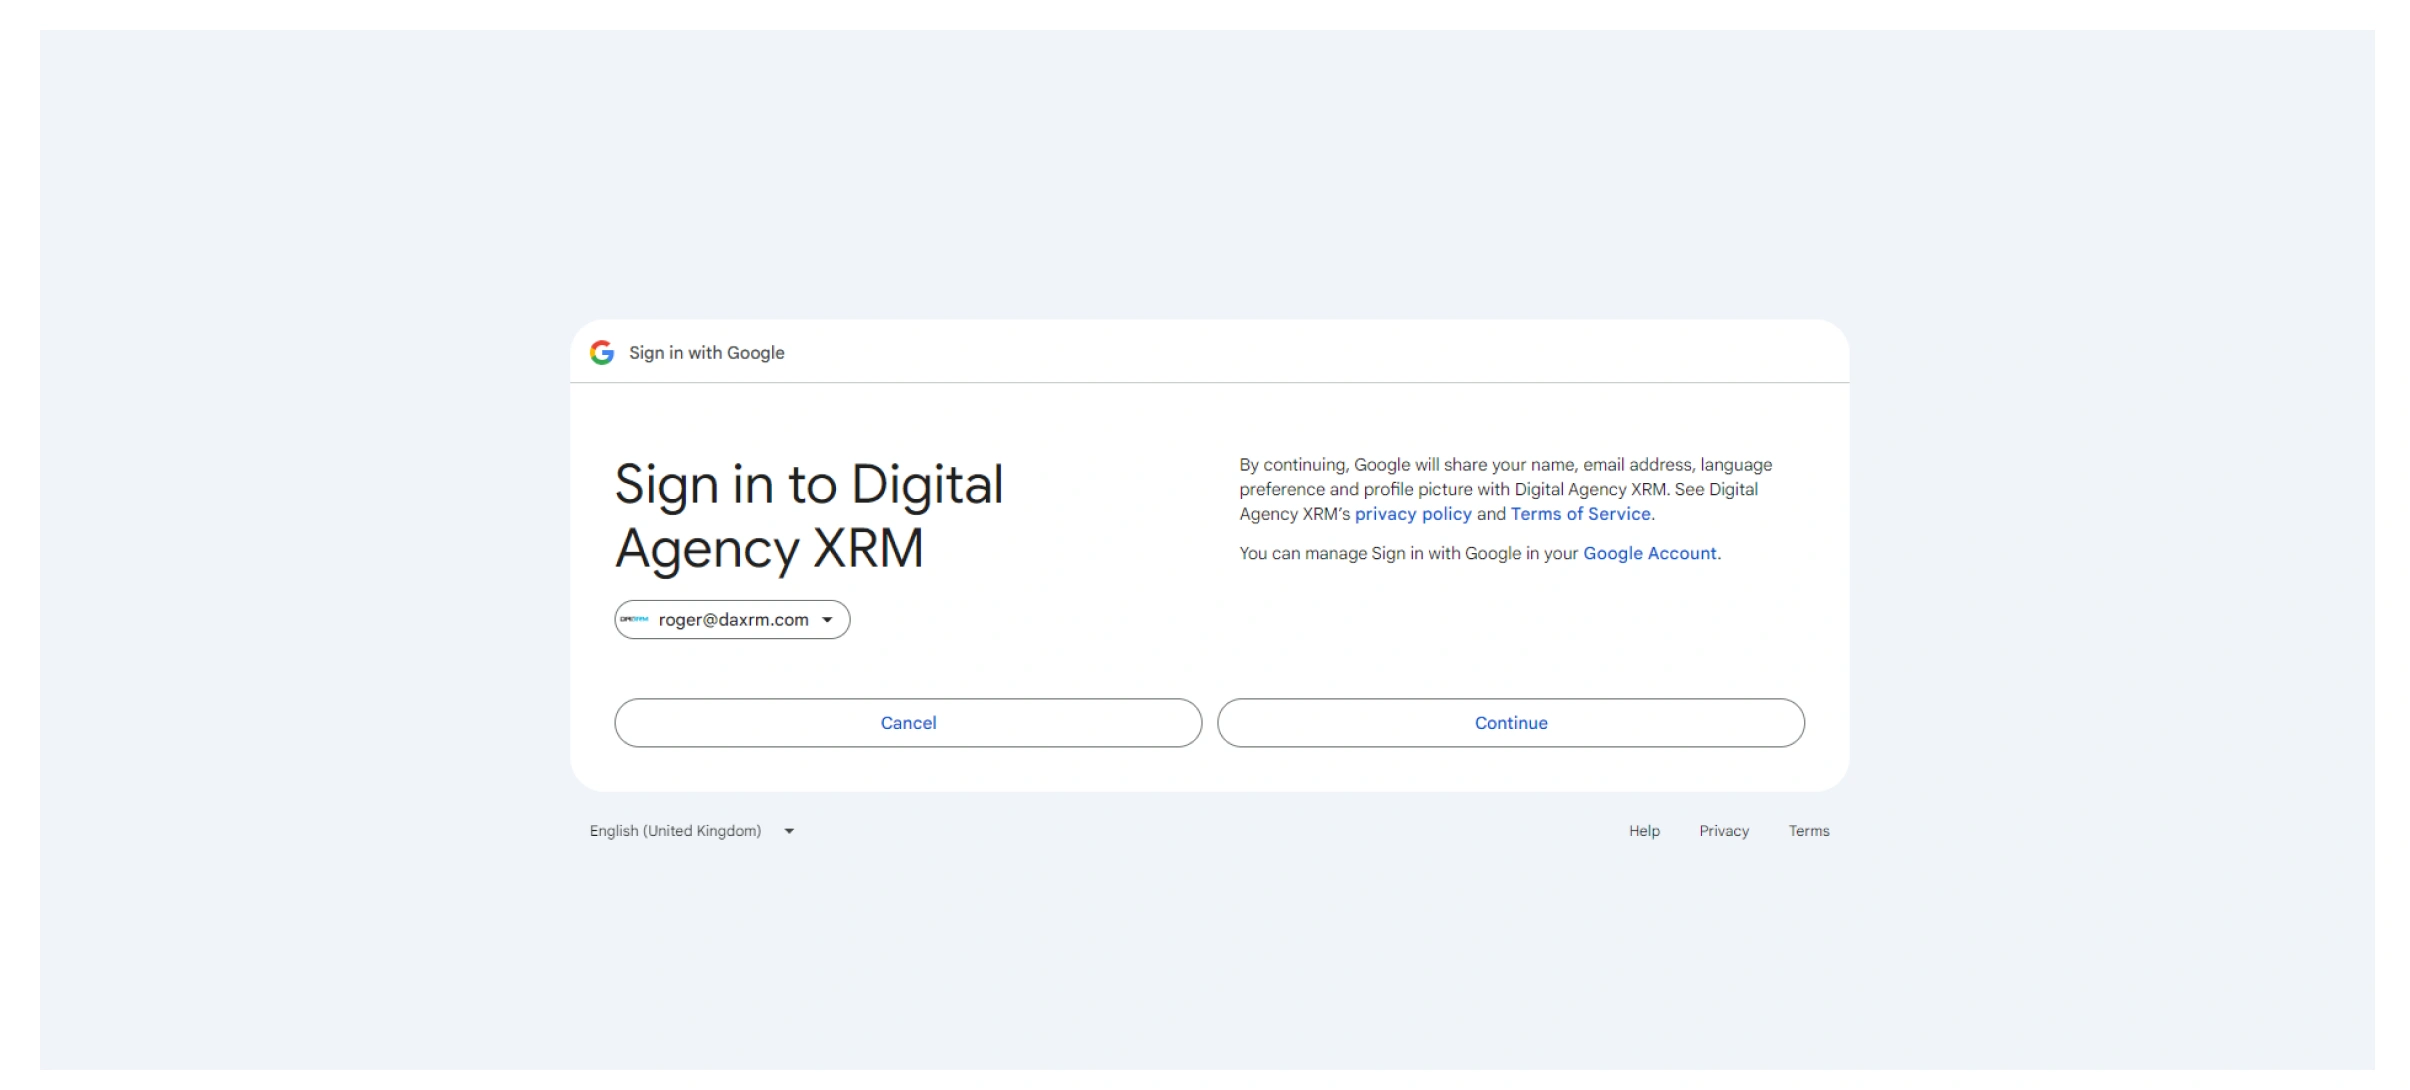
5. Click continue to allow DAXRM to access your Google Account.

6. Once you’ve activated the connector, simply select it and select the parent account
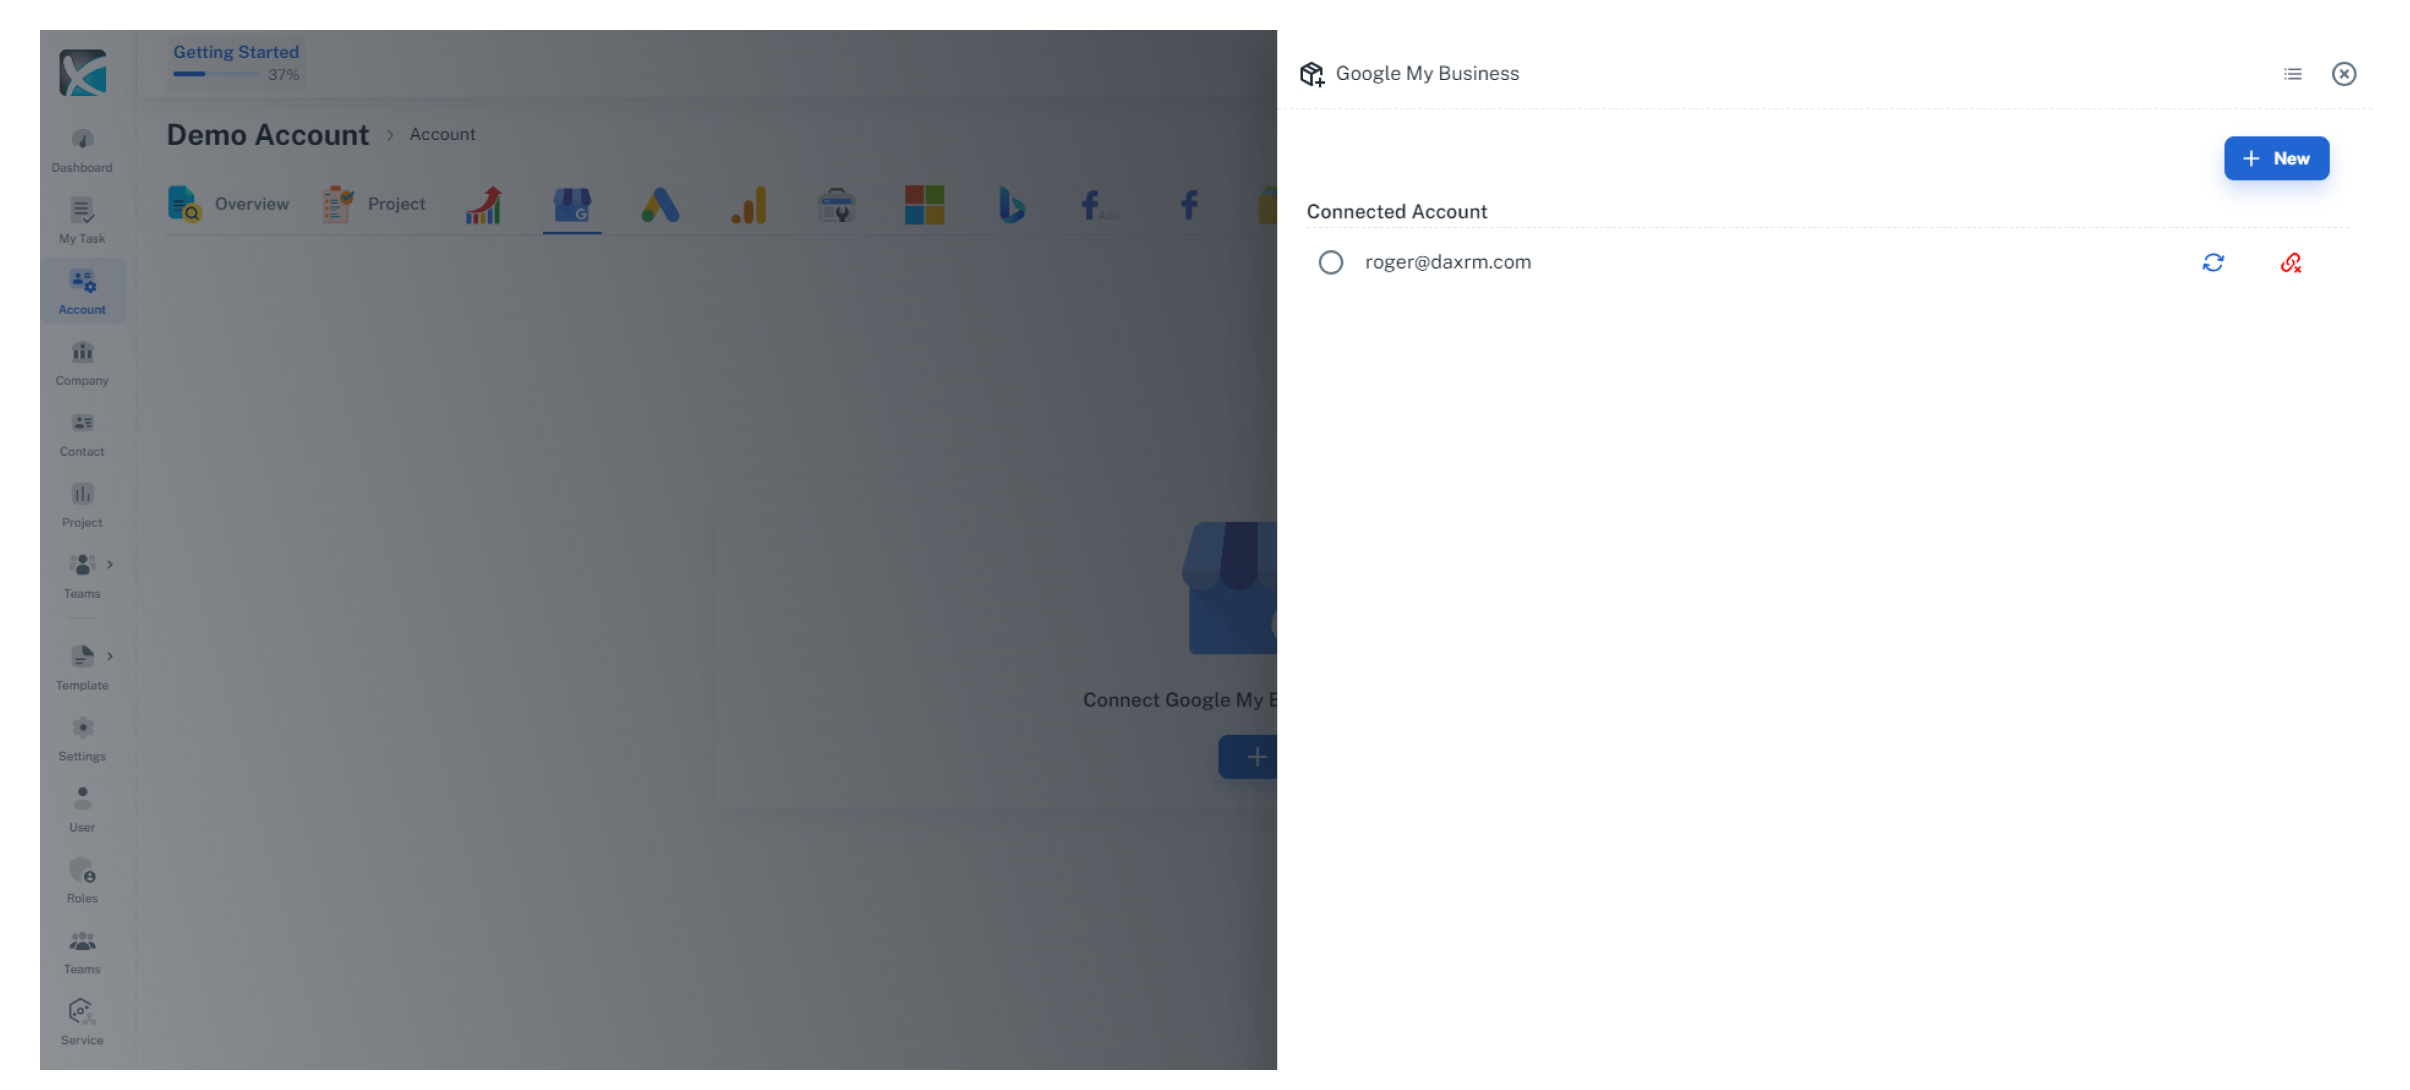
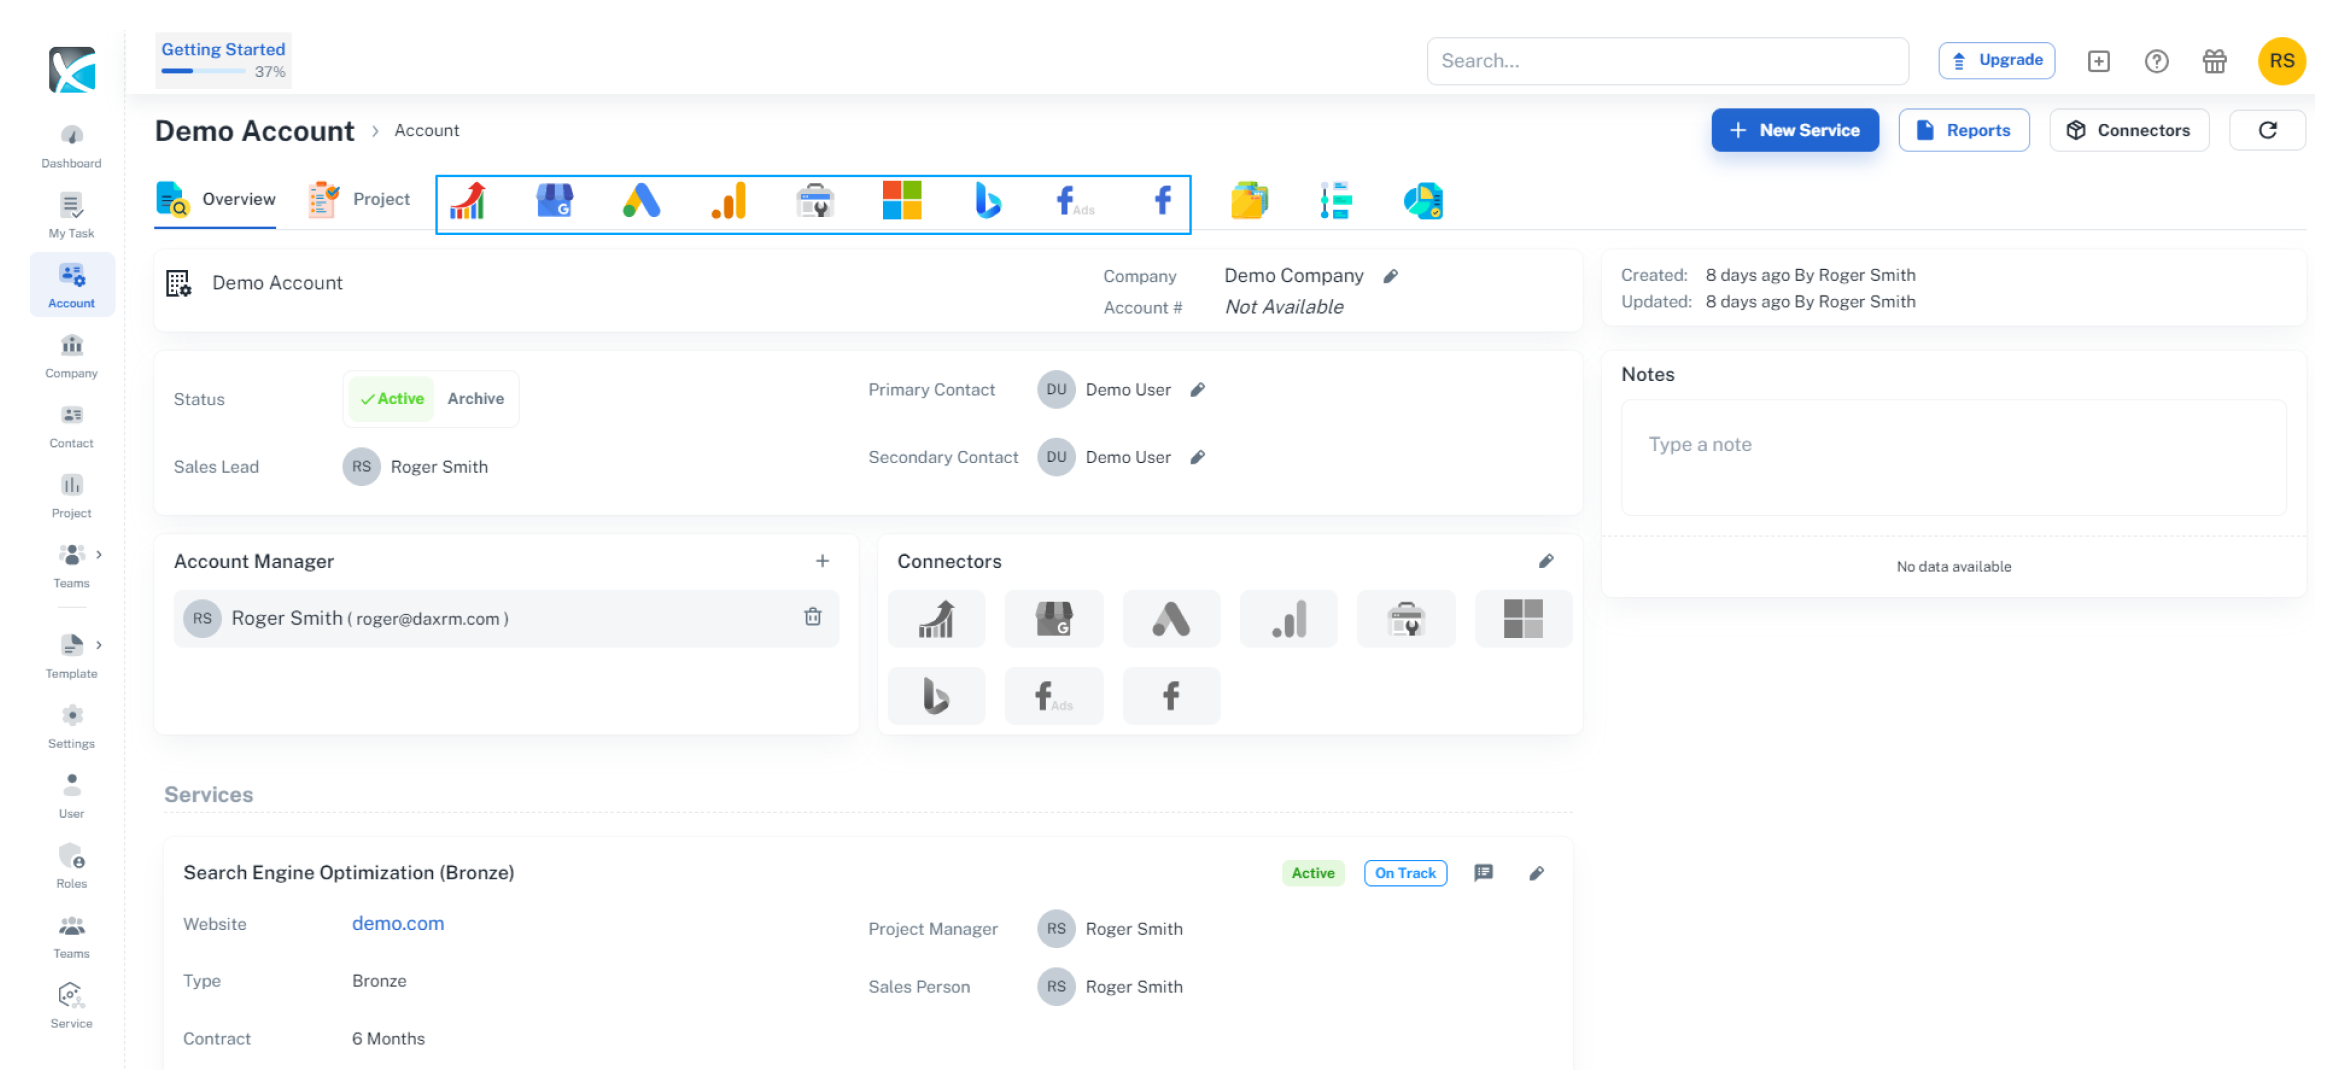
7. The Connectors bow on the Account overview screen will show the connectors that have been activated. Connector icons in color have been connected, while those in gray scale are not yet active.
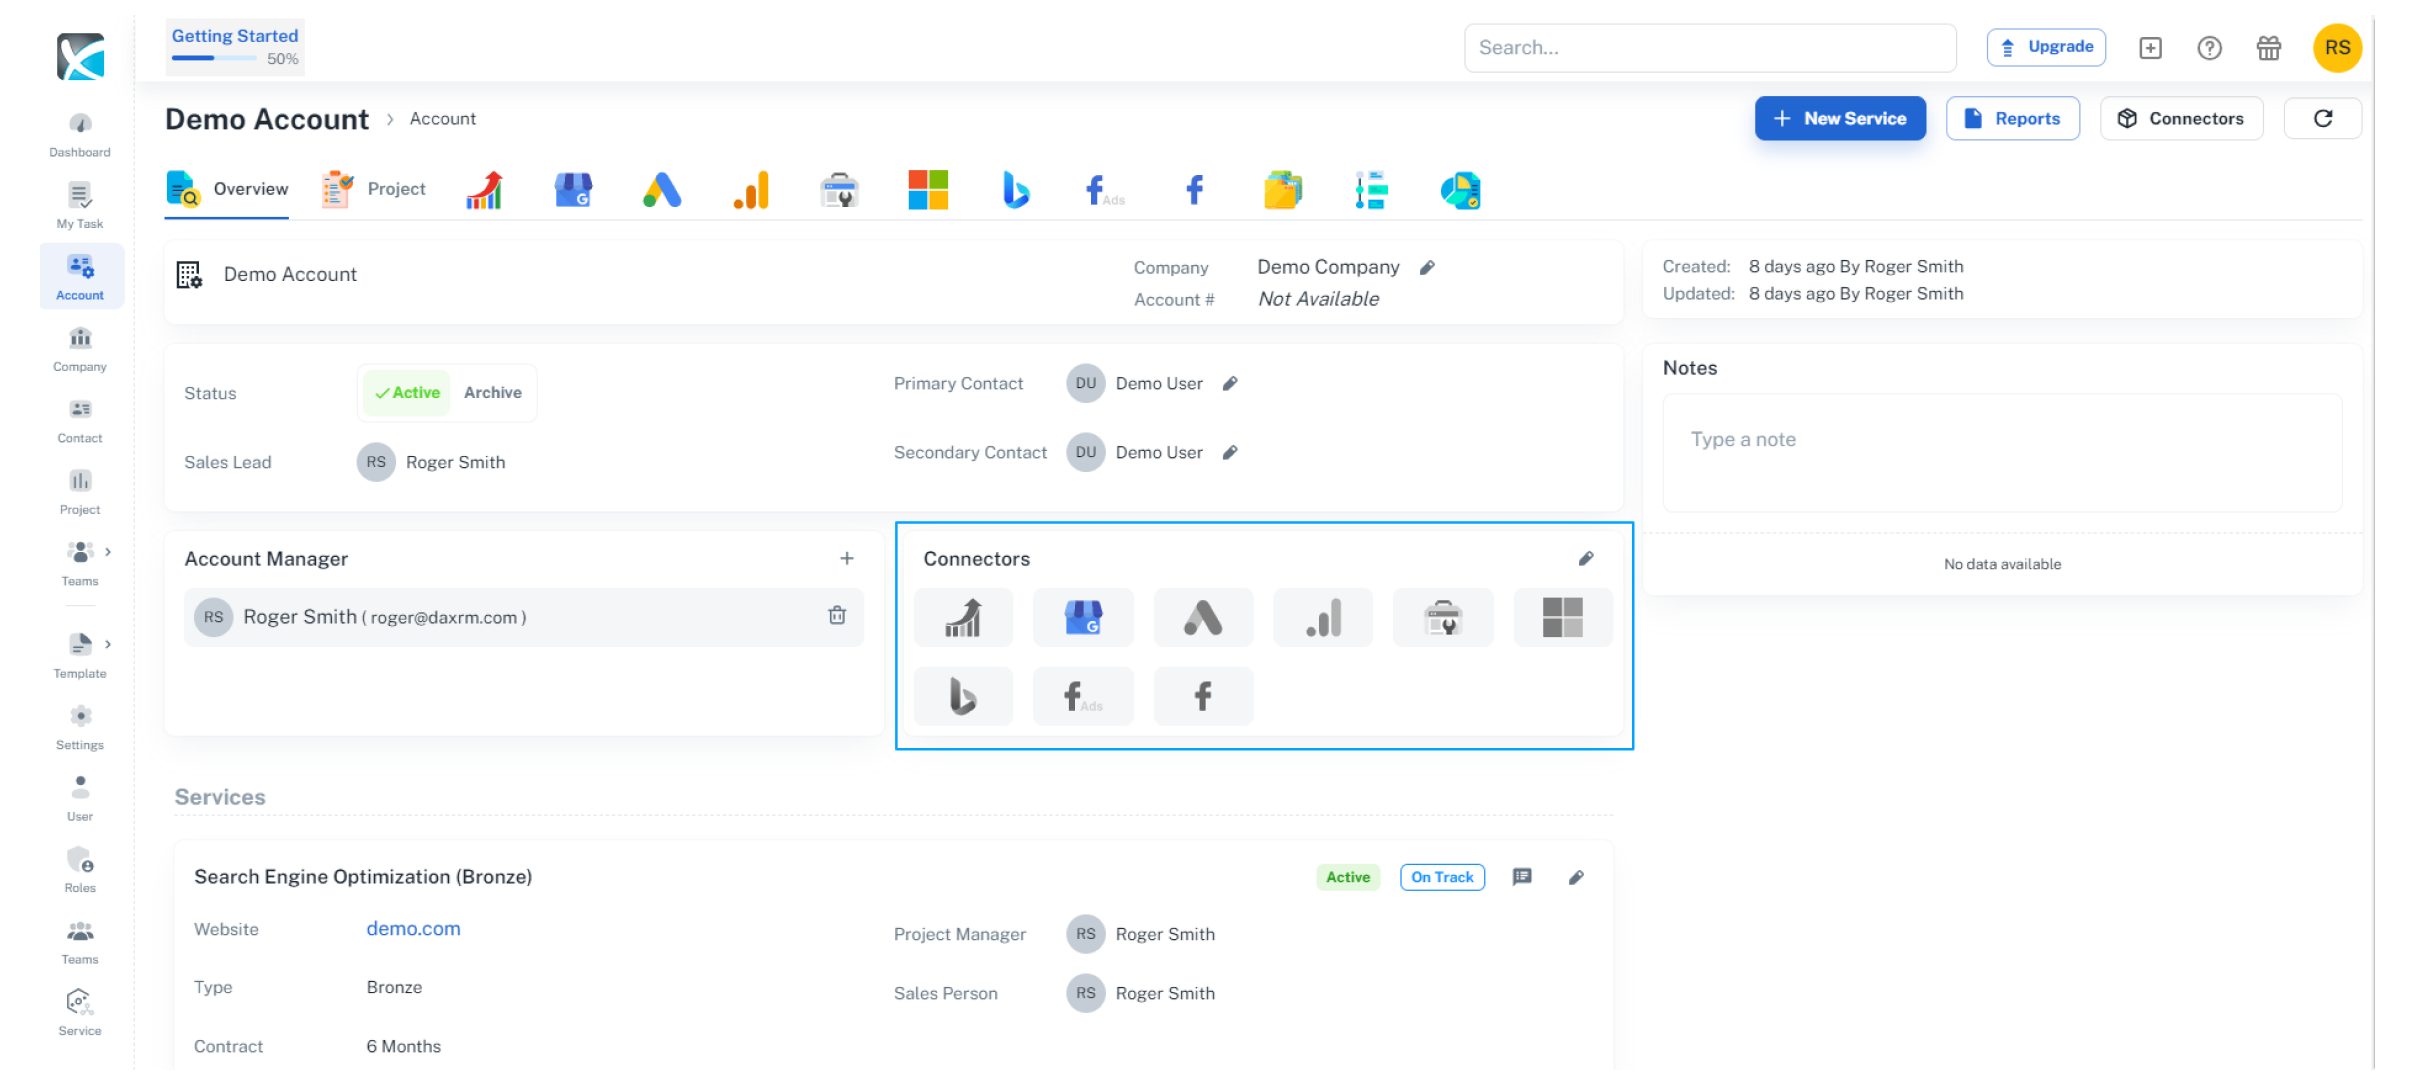
8. Connectors can be activated or deactivated at any time. Simply click the pencil icon at the top right of the Connectors box, then click the toggle switch beside the connector you wish to activate/deactivate and hit save at the bottom.
9. Only icons for active connectors will appear in the account toolbar at the top of the Account screen. If you deactivate a connector, it will be removed from the account toolbar.
Bing Webmaster Tools
1. To connect Bing Webmaster Tools, click on the Bing icon at the top of the account overview screen.

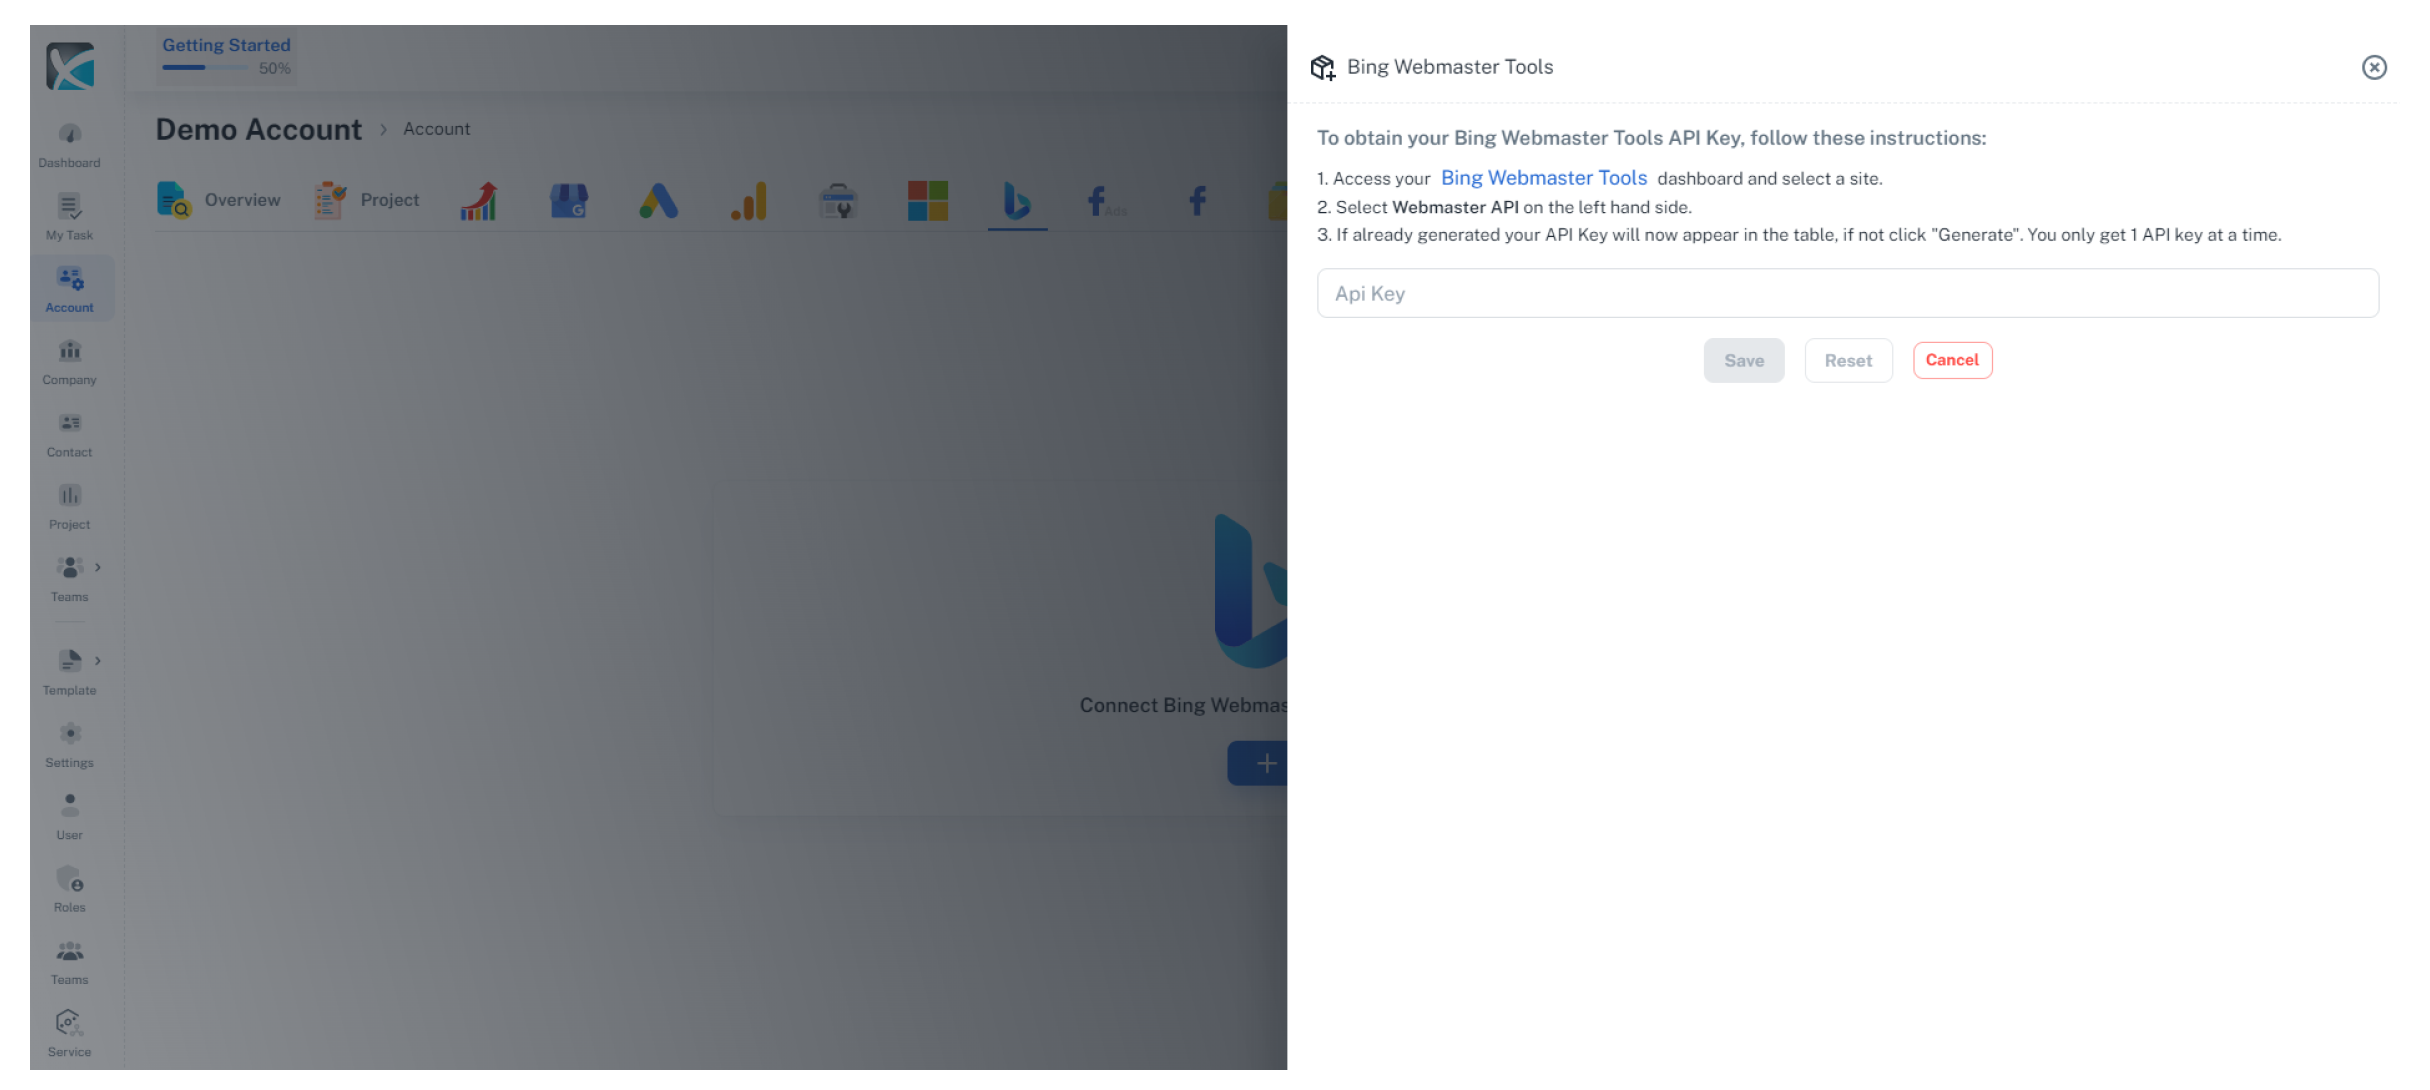
3. Once you have inputted your API key, the remaining steps are the same as those for the other connectors outlined above.
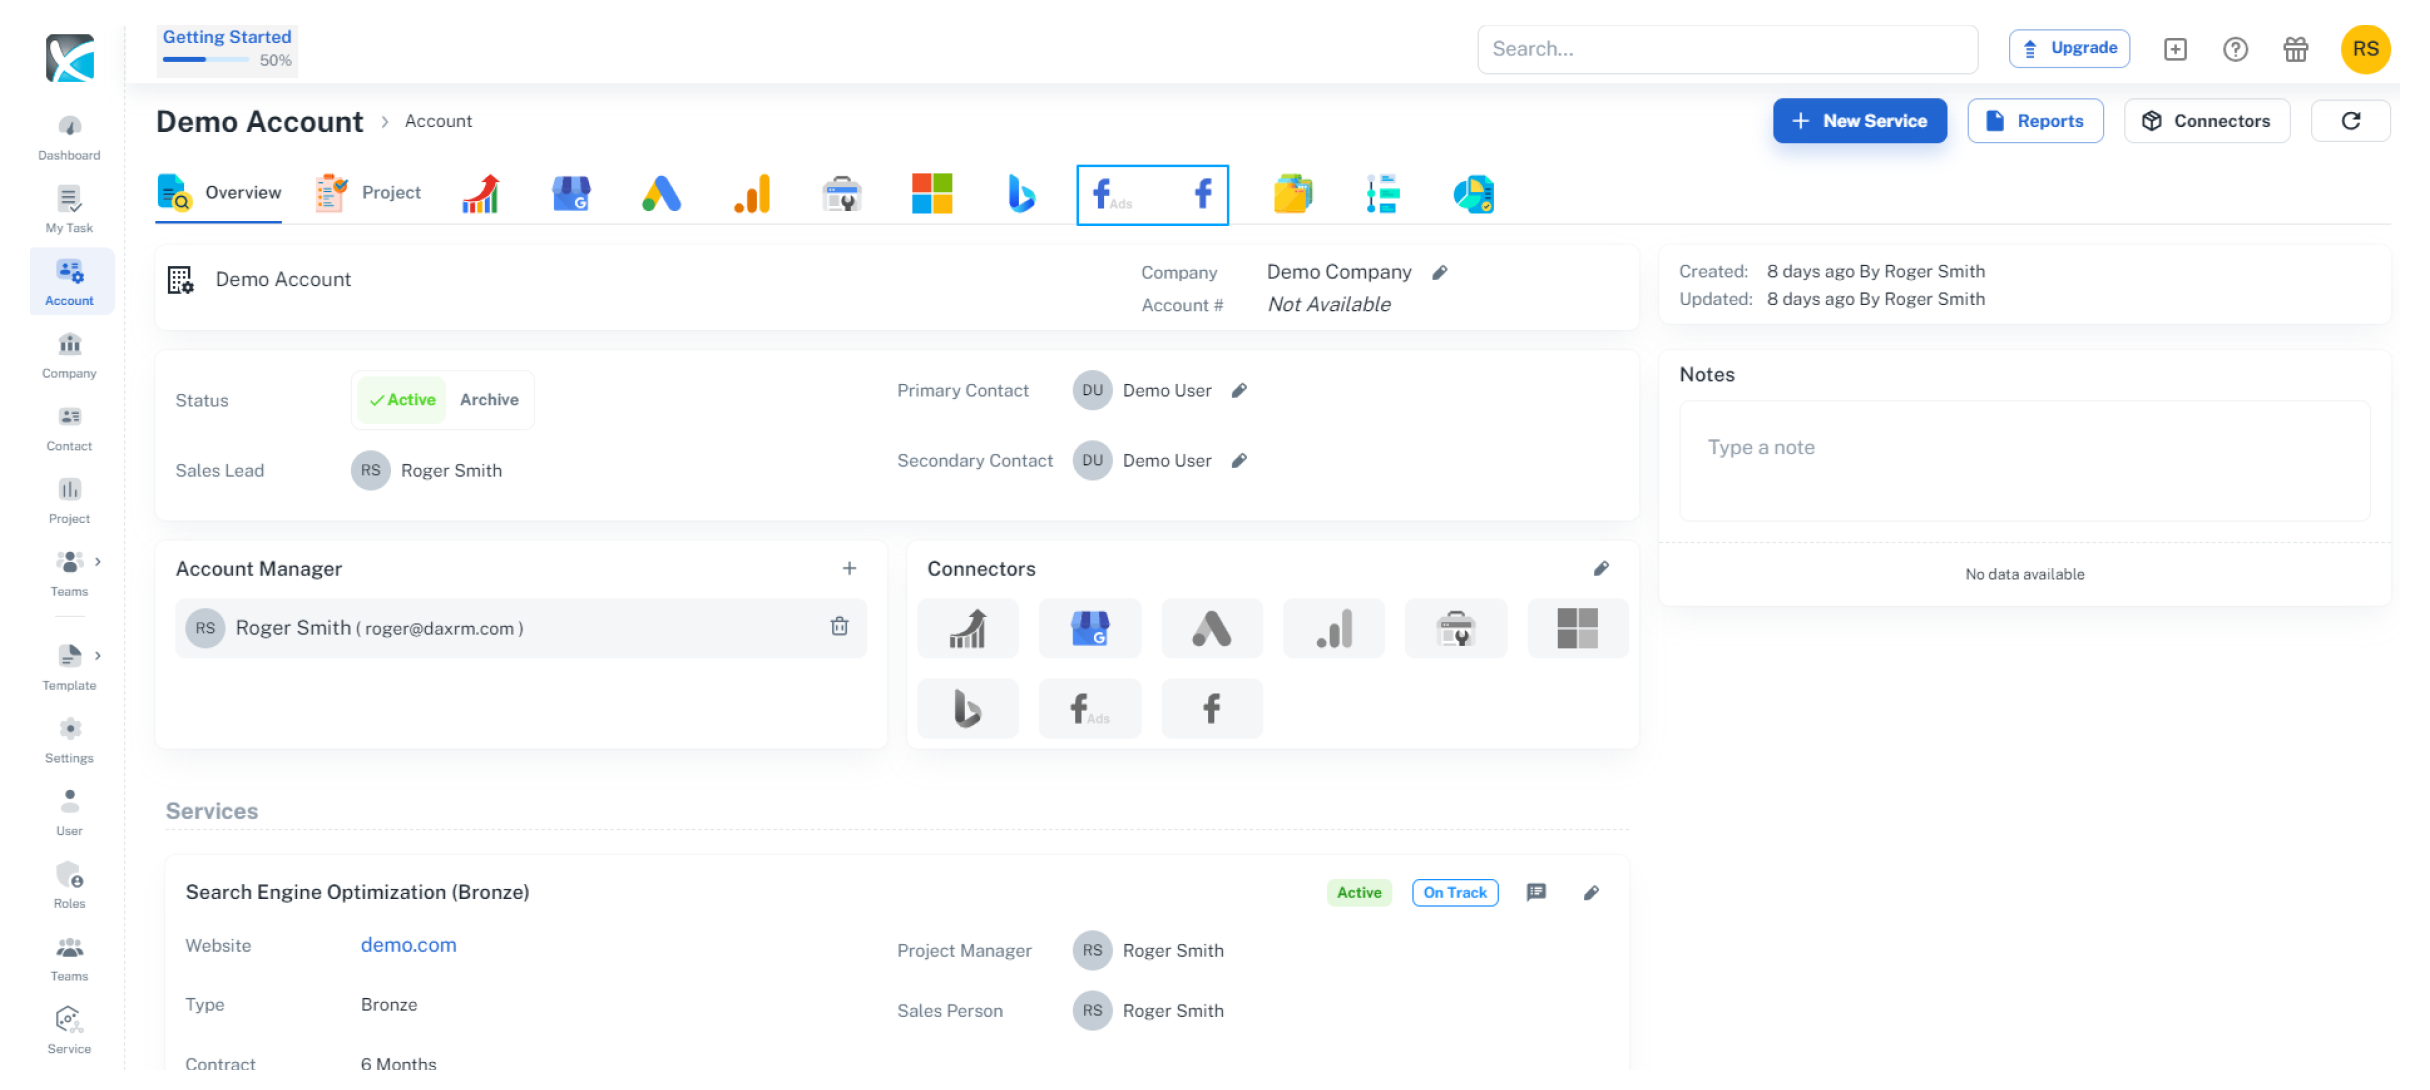
Facebook Ads & Page Insights
1. To connect Facebook Ads or Facebook Page Insights, click on the icon at the top of the account overview screen.
Adding & Setting Up Local Rank Tracker
1. Adding Local Rank Tracker to Your Account
To get started using the DAXRM Local Rank Tracker, you must first activate it within an Account. First click the Accounts icon in the sidebar. Select the appropriate Account from the list and click the Local Rank Tracker tab at the top.
Click on the + icon beneath Add Local Rank Tracking.
Search for the Google Business Profile (GBP) by adding a business name and clicking search. The GBP link will appear. Click on your Google Business Profile. This will take you to the Local Ranker Tracker dashboard.
2. Choosing Your Keywords
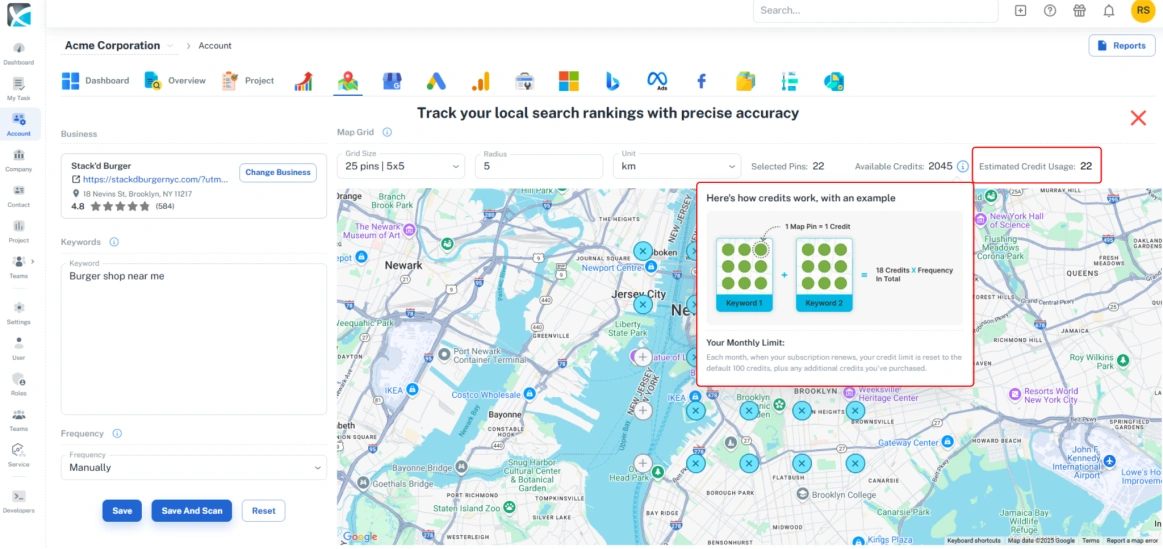
From the dashboard you can choose your keywords, set your local search grid, and the search frequency. Start by typing in your preferred keyword terms in the Keywords box.
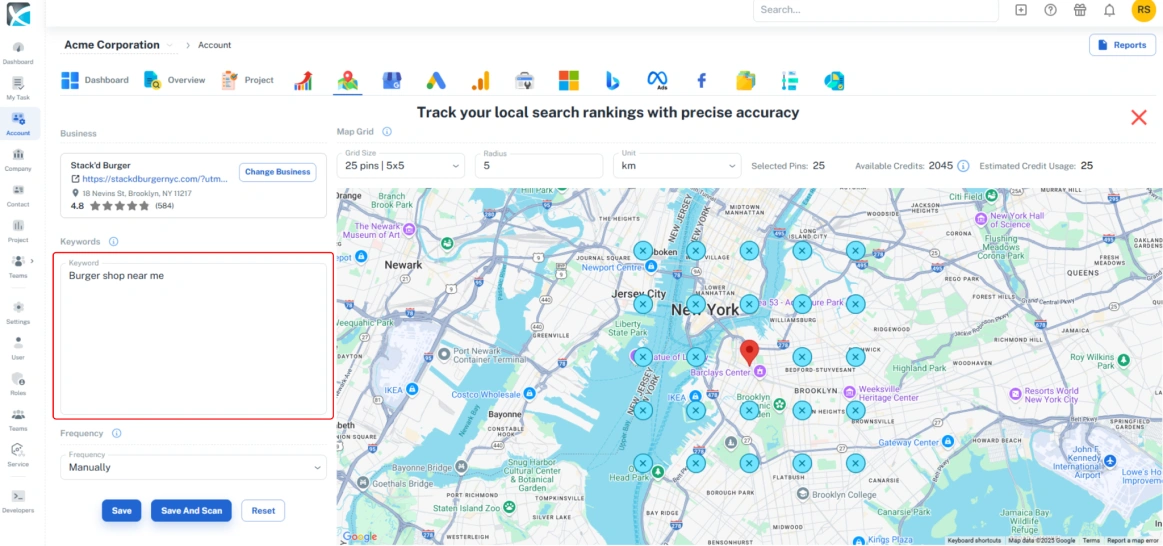 3. Select Grid Size & Search Radius
Next, set the grid size and search radius. This will determine the area that you will be searching within.
Select the number of grid pins from the drop down and adjust the radius. The pins will appear on the map indicating precisely where the local searches for each keyword will take place.

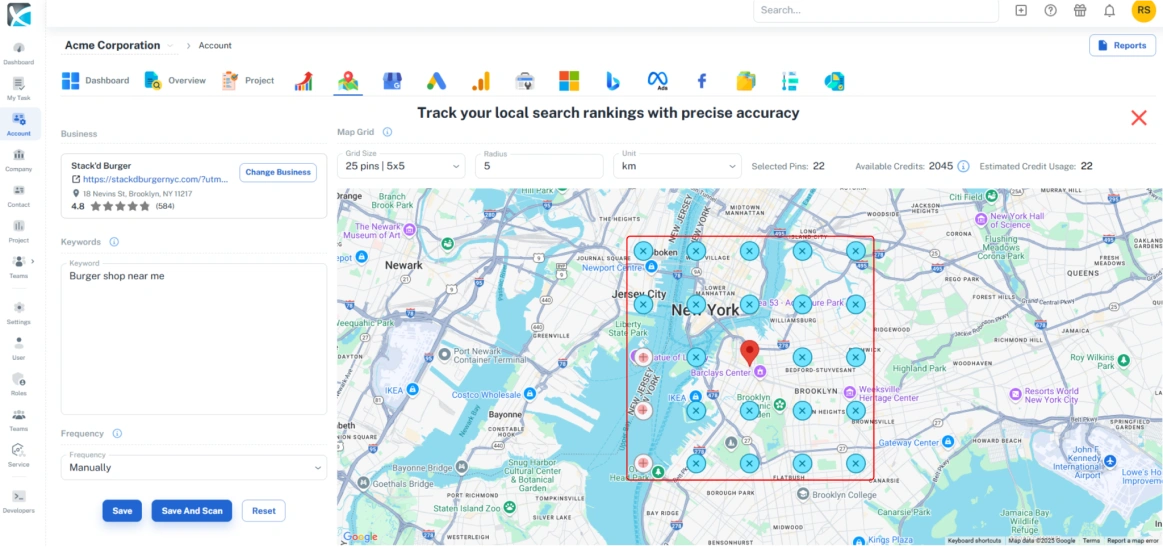
4. Customize Your Search Grid
Once you’ve selected the grid size and radius you can customize the grid to remove any pins in areas you don't want to search. To remove a pin, simply click on it.
5. Set Your Search Frequency & Scan
You can also set the frequency with which you want to carry out local searches. The frequency is set to “manual” by default. You can schedule automatic searches by selecting from the drop down. 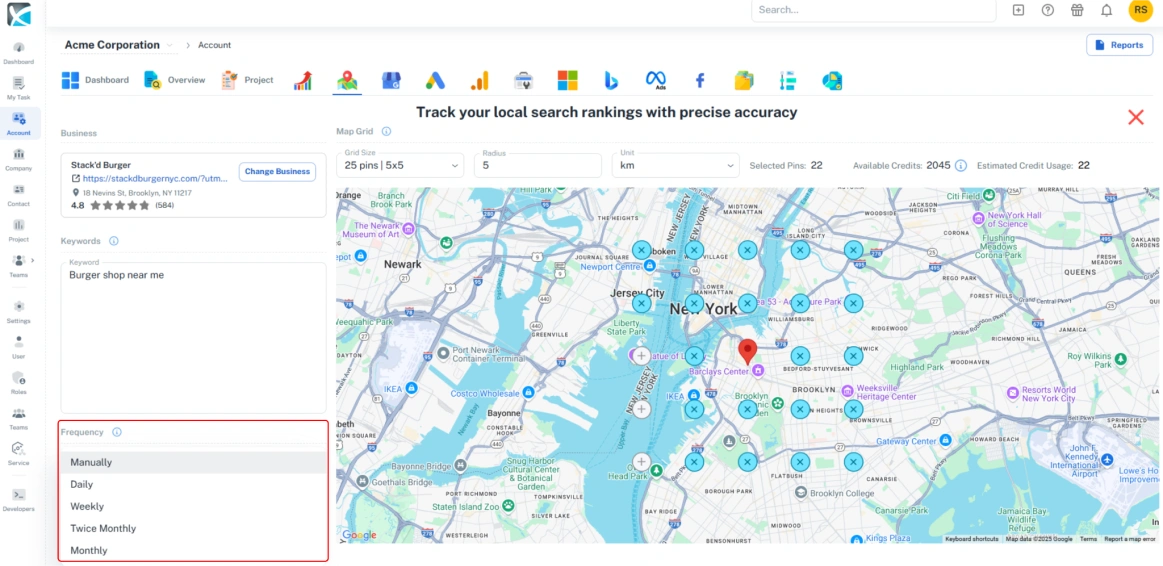
Once you’ve configured your local search parameters, you can save or save and scan to carry out the search.
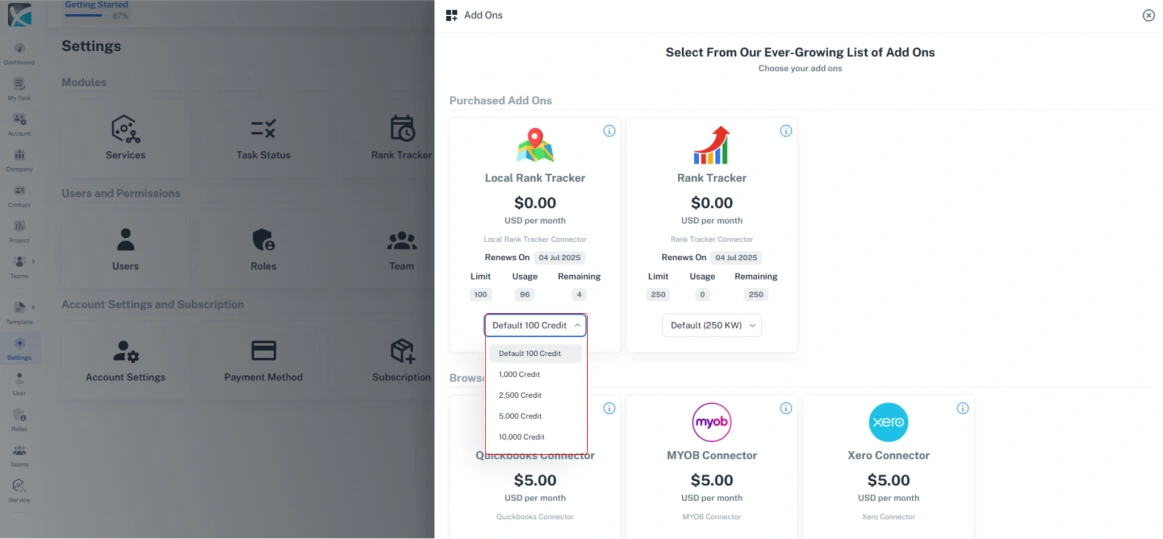
Managing Frequency Settings
The frequency settings will determine exactly when your automated local searches will take place. To manage your search frequency settings go to Settings in the side bar and click on the Local Rank Tracker icon.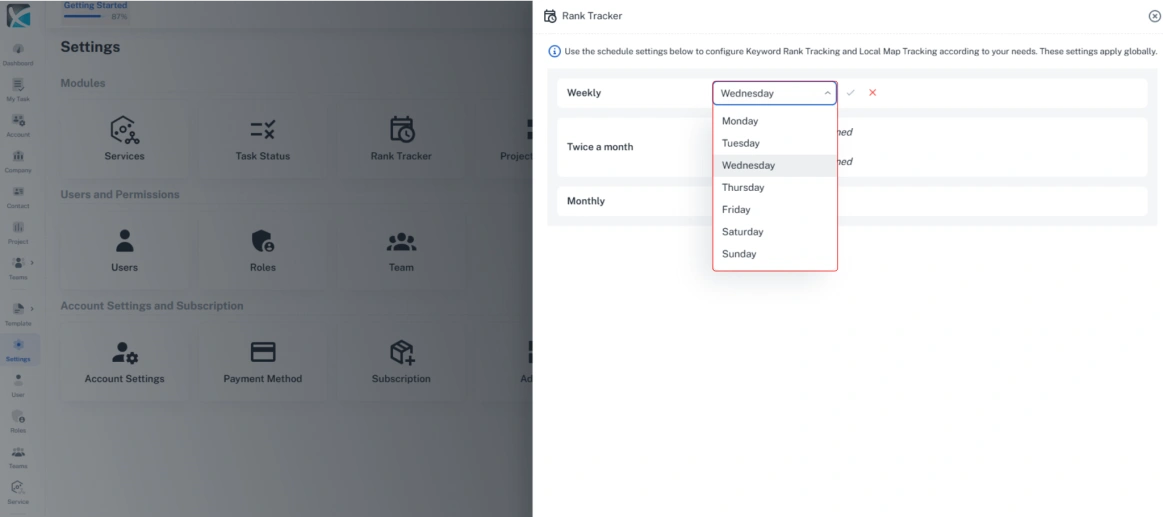
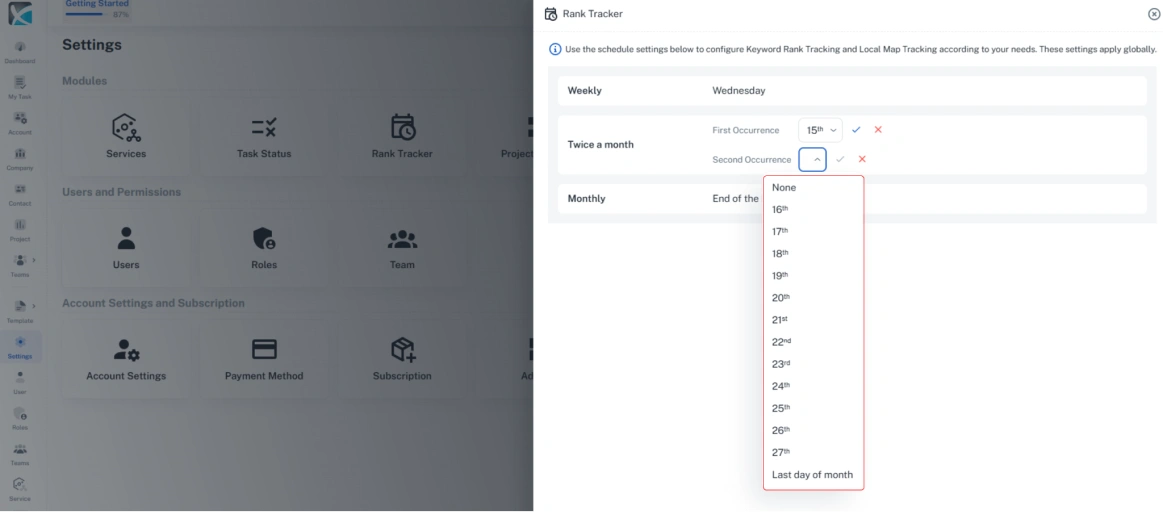 And for monthly searches, select the day of the day of the month from the drop-down.